Gearshift Cable: Installation
- Ensure transaxle shift lever is in Park position. Position cable in vehicle and connect cable end to transaxle shift lever. Ensure washer is in place on cable mounting stud. See Figure
. Install cable to transaxle and tighten nut to 20 ft. lbs. (27 N.m).
- Rotate fill tube to original location. Install and tighten fill tube bracket bolt. Install cable fastener into bracket. See Figure
. Route cable through hole in firewall. Ensure grommet is mounted correctly in firewall. Install cable in throttle/gearshift bracket. See Figure
.
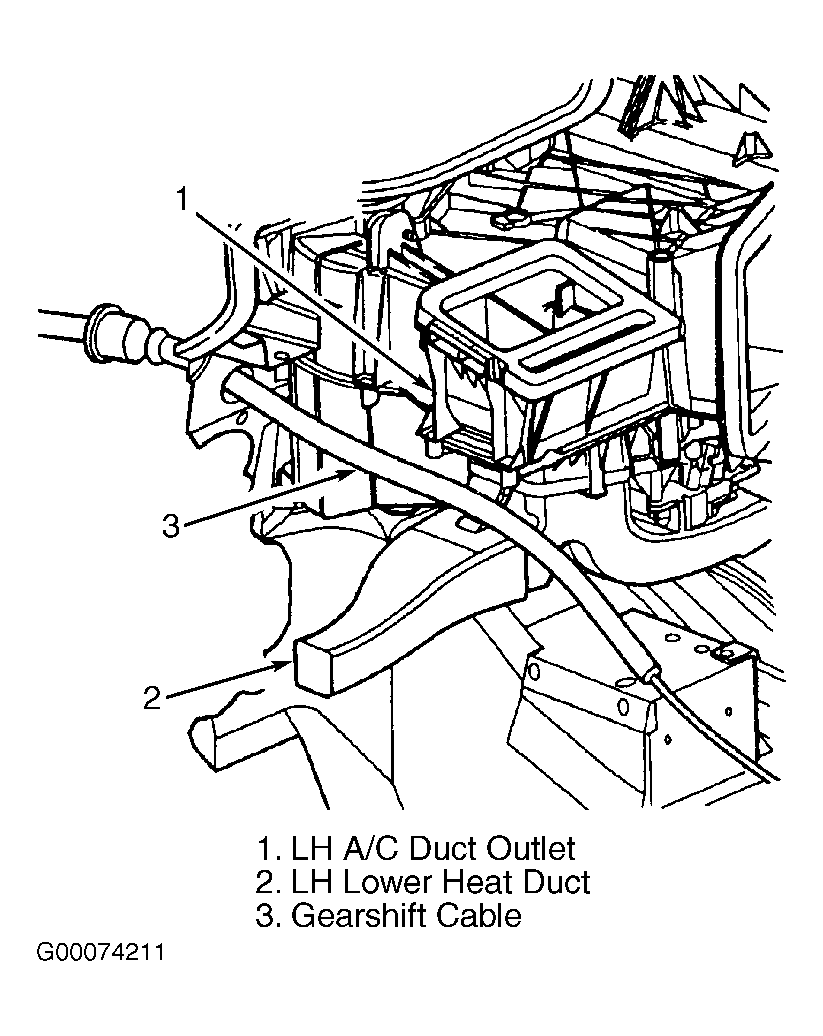
- Route gearshift cable between left A/C duct and lower left heat duct and up to steering column. See Fig 1
. Connect gearshift cable housing (conduit) to bracket and secure with clip. See Figure
. Connect cable end to attaching stud.
- Adjust cable as needed. See GEARSHIFT CABLE
under ADJUSTMENTS. Install upper and lower steering column shrouds. Install steering column tilt lever. Install diagnostic connector to reinforcement panel. Install reinforcement panel to instrument panel.
- Install park brake release cable to brake release handle in lower instrument panel cover. Connect wire harness connector to trunk release switch in lower instrument panel cover. Install lower instrument panel cover. Install screws behind fuse panel cover attaching lower instrument panel cover to panel mounting bracket. Install left end cap (fuse panel cover) to instrument panel. Ensure gearshift lever moves freely and does not bind. Check that vehicle only starts in "P" or "N" position.
 Courtesy of DAIMLERCHRYSLER CORPORATION
- Ensure transaxle shift lever is in Park position. Position cable in vehicle and connect cable end to transaxle shift lever. Ensure washer is in place on cable mounting stud. See Figure
. Install cable to transaxle and tighten nut to 20 ft. lbs. (27 N.m).
- Rotate fill tube to original location. Install and tighten fill tube bracket bolt. Install cable fastener into bracket. See Figure
. Route cable through hole in firewall. Ensure grommet is mounted correctly in firewall. Install cable in throttle/gearshift bracket. See Figure
.
- Route gearshift cable between left A/C duct and lower left heat duct and toward gearshift lever assembly. See Figure
. Connect gearshift cable housing (conduit) to bracket and secure with clip. Route cable through hole in gearshift lever bracket and attach cable end to stud. Install clip on cable housing (conduit) at floor shifter bracket. See Figure
. Tighten adjuster nut. See Figure
. Connect cable end to attaching stud.
- Install bezel and gearshift handle. Hold shifter button while tightening handle screw to properly locate handle. Ensure gearshift lever moves freely and does not bind. Ensure vehicle only starts in "P" or "N" position.
- Route cable from underneath vehicle. Connect gearshift cable to shift lever assembly at transaxle. Place gearshift lever at transaxle in Park position. Tighten cable clamp bolt at transaxle. Route cable through interior of vehicle. Install cable grommet. Route cable under carpeting to gearshift lever assembly.
- Fasten gearshift cable retaining clips to driver's compartment with appropriate rivets. Place gearshift lever in "P" position. Route cable through hole in gearshift lever bracket and attach cable end to stud. Install clip on cable housing (conduit) at floor shifter bracket. See Figure
. Tighten adjuster nut. See Figure
.
- Install console, bezel and gearshift handle. See Figure
. Hold shifter button while tightening handle screw to properly locate handle. Install driver's seat. Ensure gearshift lever moves freely and does not bind. Ensure vehicle only starts in "P" or "N" position.