Modulator Assembly: Installation
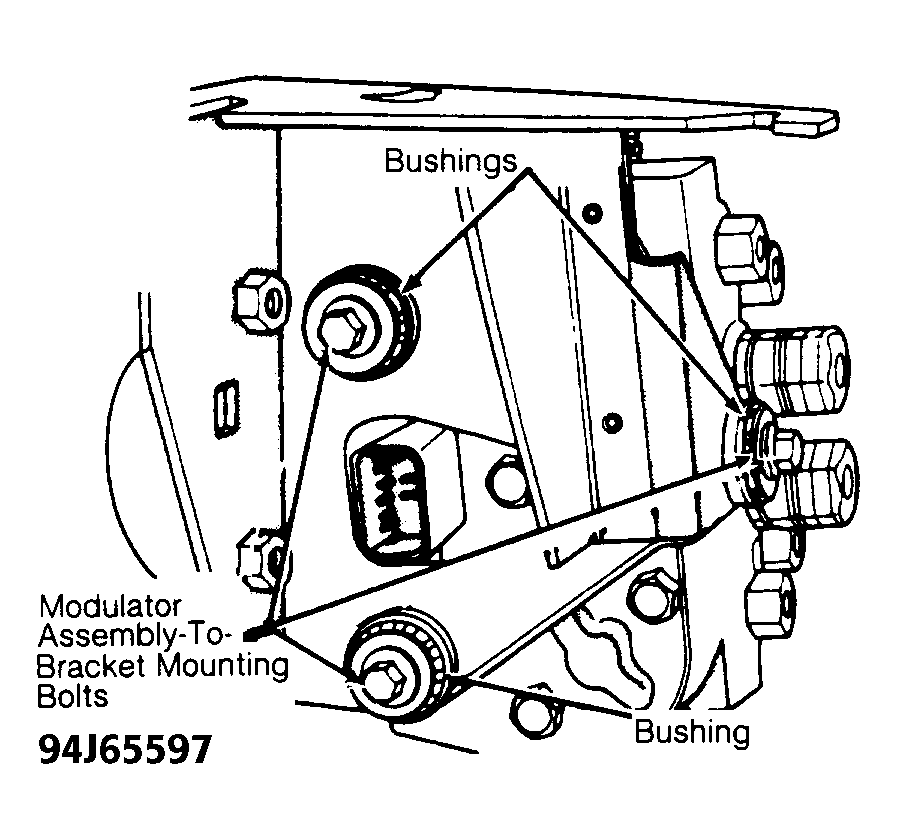
- Inspect 3 modulator assembly bushings and replace if necessary. See Fig 1
. Install modulator assembly on modulator bracket. Ensure bushings are properly positioned on modulator bracket and modulator assembly. Install and tighten 3 modulator assembly-to-modulator bracket bolts to 21 ft. lbs. (28 N.m).
- Mount modulator and bracket assembly on 3 mounting bolts on side of frame rail. Tighten rear mounting bolt to 125 INCH lbs. (14 N.m). Raise vehicle. Tighten 2 front mounting bolts to 125 INCH lbs. (14 N.m). Install speed control servo and bracket (if equipped) on modulator bracket. Tighten speed control servo mounting bolt to 21 ft. lbs. (28 N.m).
- Reconnect 10-pin modulator assembly connector. Ensure lock on wiring harness side of connector fully engages tab on modulator side of connector. Lower vehicle. Align 6 hydraulic brakelines with their appropriate fittings on modulator assembly. Hand thread 6 brakeline tube nuts into proportioning valves and thread savers on modulator assembly.
- Using crowfoot and torque wrench, tighten brakeline tube nuts to 13 ft. lbs. (18 N.m). DO NOT allow thread savers or proportioning valves to turn when tightening brakelines. Connect battery to vehicle using jumper cables. Bleed brake system. See BLEEDING BRAKE SYSTEM
. Install acid shield to modulator assembly. To complete installation, reverse removal procedure. Road test vehicle to ensure proper ABS operation.
 Courtesy of CHRYSLER CORP.