Removal Procedure
- Remove Rear Compartment Floor Stowage Trim Compartment Replacement
- Disconnect Battery Negative Cable Disconnection and Connection
 Courtesy of GENERAL MOTORS COMPANY
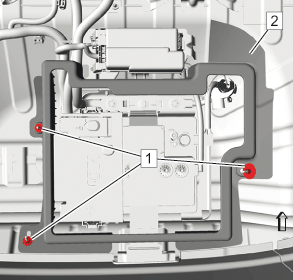
- Remove the 3 panel trim nuts (1).
- Remove the panel trim (2).
 Courtesy of GENERAL MOTORS COMPANY
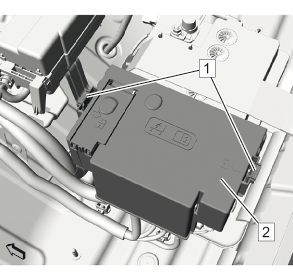
- Remove Release the retaining tabs.(1)
- Remove Battery Fuse Block Cover (2)
 Courtesy of GENERAL MOTORS COMPANY
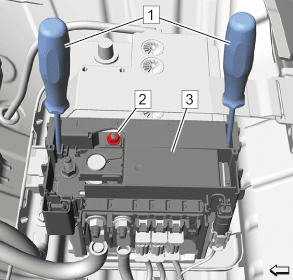
- Loosen the battery positive pole clamp nut (2).
- Use a screwdriver (1) to unclip the 2 battery fuse block retainer tabs from the battery and remove the battery fuse block (3) along with the battery positive cables.
 Courtesy of GENERAL MOTORS COMPANY
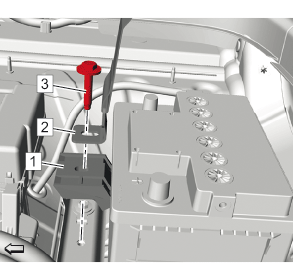
- Remove the battery hold down retainer bolt (3).
- Remove the battery retainer strap (2).
- Remove Battery Hold Down Retainer(1)
 Courtesy of GENERAL MOTORS COMPANY
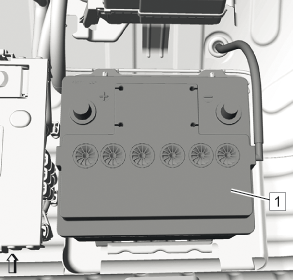
- Remove the battery (1) from the rear compartment area along with their vent hose.