Removal Procedure
- Drain the cooling system. Refer to Cooling System Draining and Filling
- Remove Three-Way Catalytic Converter. Refer to Three-Way Catalytic Converter Replacement
 Courtesy of GENERAL MOTORS COMPANY
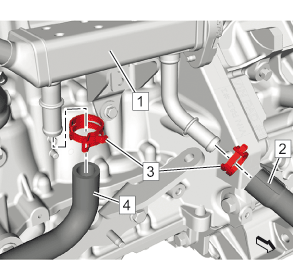
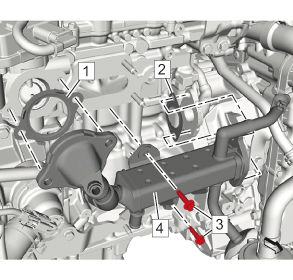
- Loosen Clamp (3) (Qty: 2)
- Disconnect Heater Inlet Hose (2) @ Exhaust Gas Recirculation Cooler (1)
- Disconnect Exhaust Gas Recirculation Cooler Water Bypass Outlet Hose (4) @ Exhaust Gas Recirculation Cooler (1)
 Courtesy of GENERAL MOTORS COMPANY
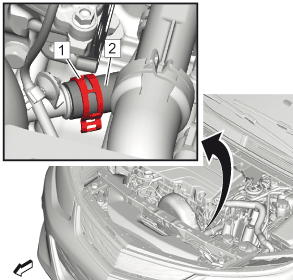
- Loosen Thermostat Bypass Hose Clamp (1)
- Disconnect Thermostat Bypass Hose (2)
 Courtesy of GENERAL MOTORS COMPANY
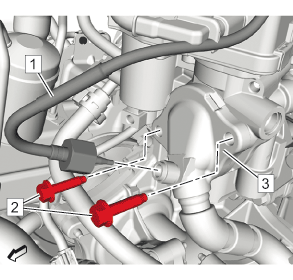
- Remove the exhaust gas recirculation temperature sensor - position 1 (1) from exhaust gas recirculation cooler (3).
- Remove Exhaust Gas Recirculation Cooler Bolt (2) (Qty: 2)
 Courtesy of GENERAL MOTORS COMPANY
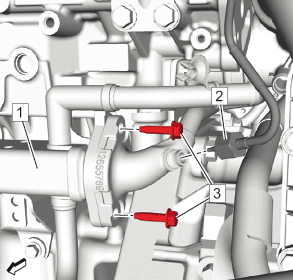
- Remove the exhaust gas recirculation temperature sensor - position 2 (2).
- Remove Exhaust Gas Recirculation Cooler Bolt (3) (Qty: 2) @ Exhaust Gas Recirculation Cooler (1)
 Courtesy of GENERAL MOTORS COMPANY
- Remove Exhaust Gas Recirculation Cooler Bolt (3) (Qty: 2)
- Remove Exhaust Gas Recirculation Cooler (4)
- Remove and DISCARD Gaskets (1, 2) (Qty: 2)