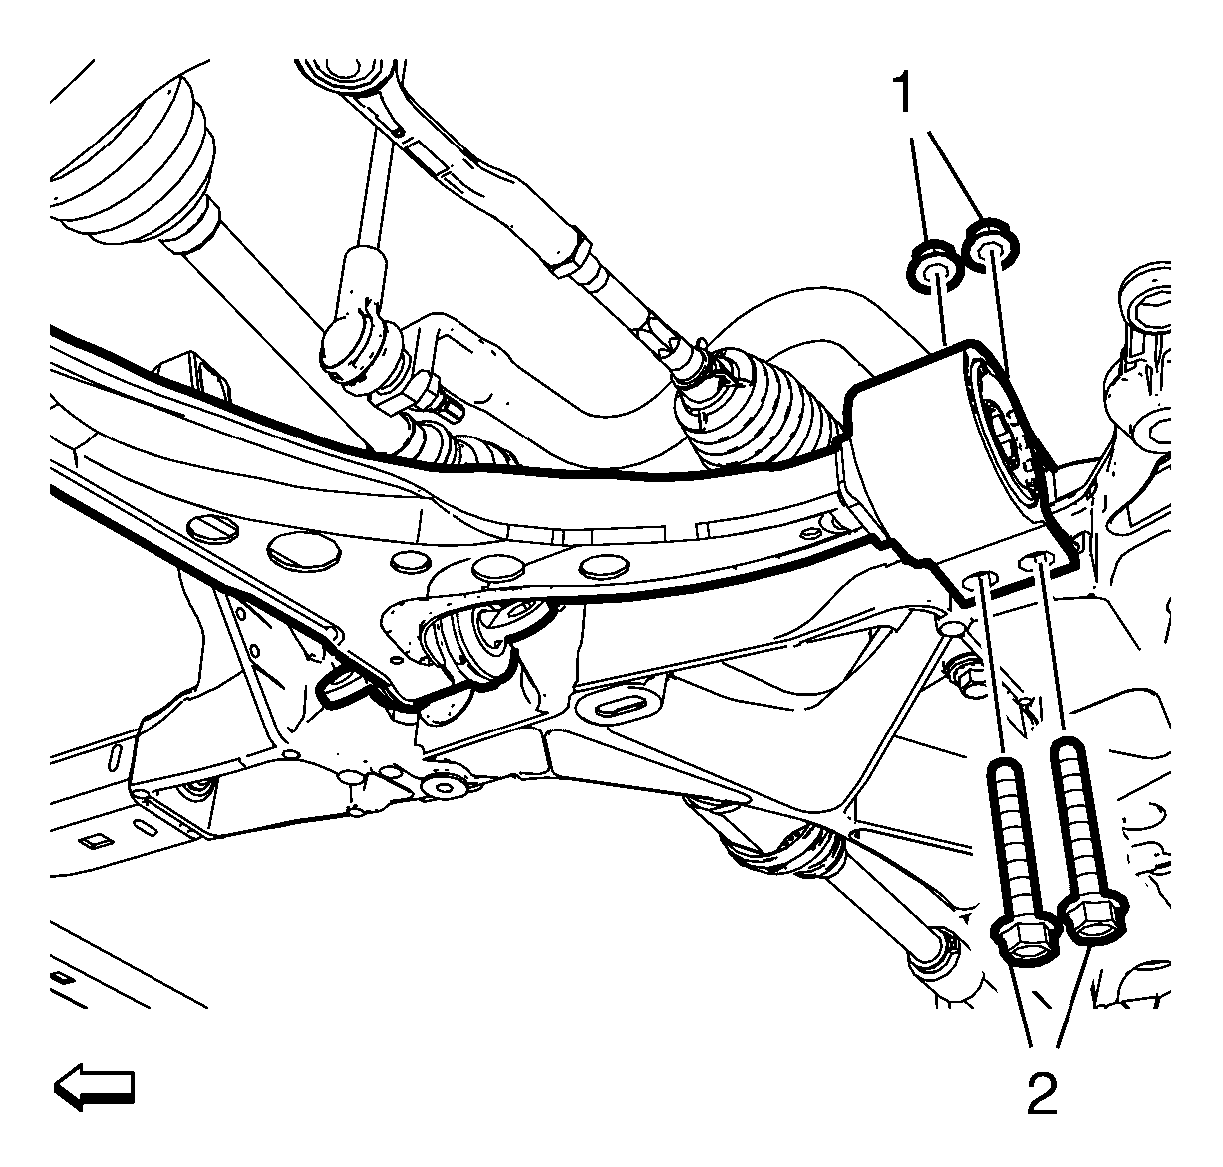
- Bolt (2)» Loosely install [2x]
 Courtesy of GENERAL MOTORS COMPANY
NOTE:
Use NEW bolts.
- Nut (1)» Loosely install [2x]
NOTE:
Use NEW nuts.
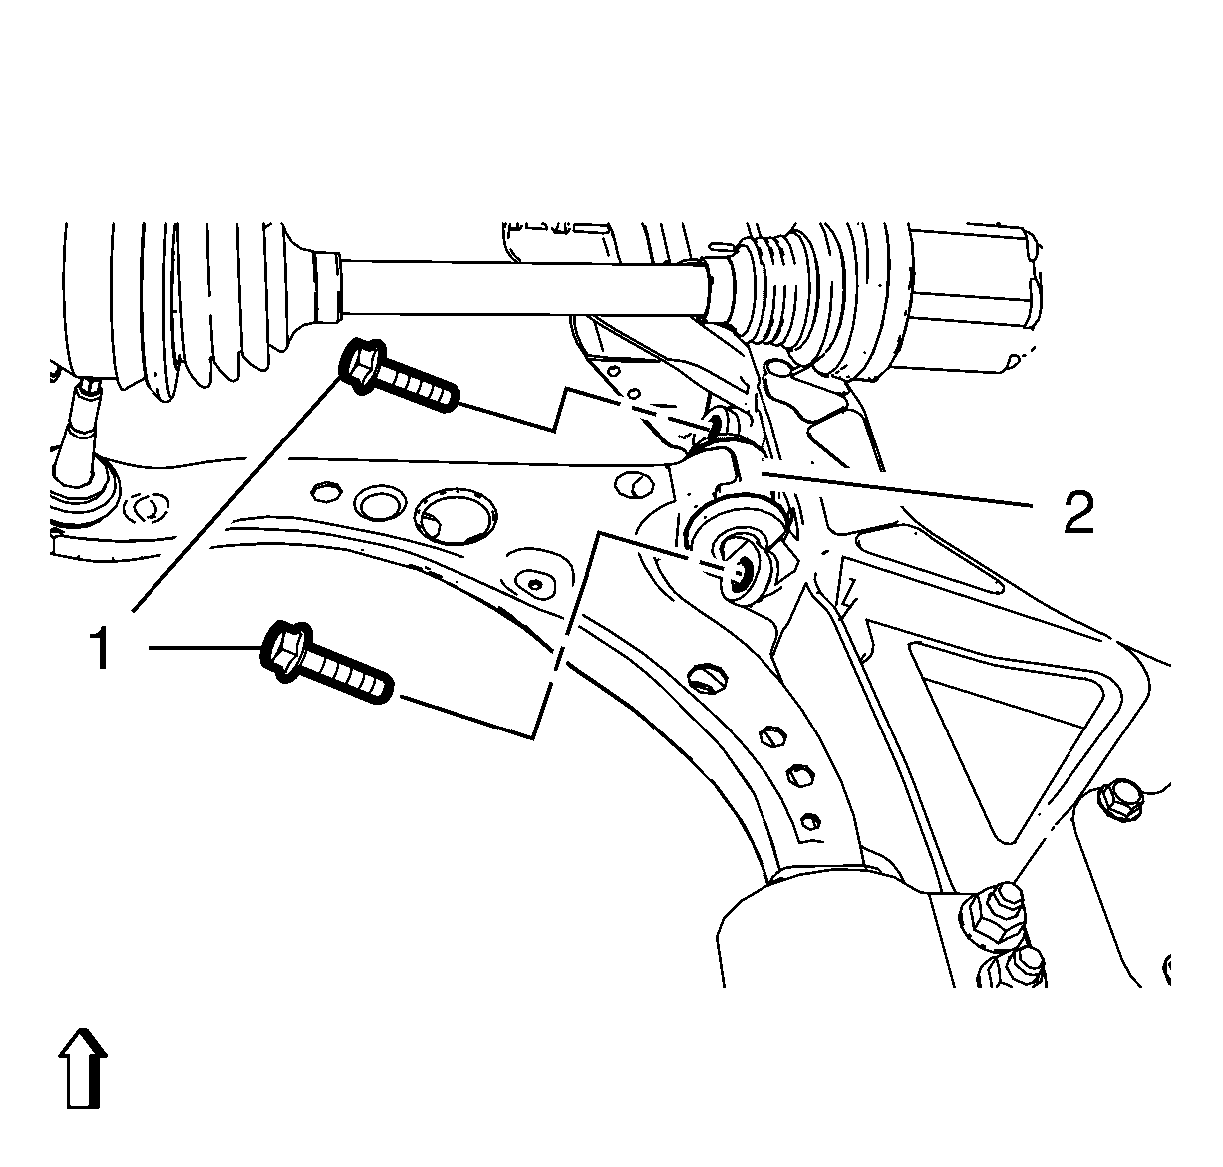
- Bolt (1) @ Front Lower Control Arm Bushing (2)» Loosely install [2x]
 Courtesy of GENERAL MOTORS COMPANY
NOTE:
Use NEW bolts.
NOTE:
Tighten the front bolt till the lower control arm front bushing (2) lie flat on the drivetrain and front suspension cradle to install the rear bolt easier. If necessary turn the steering knuckle in position.
- Bolt (2) & Nut (1)» Tighten [2x]
Courtesy of GENERAL MOTORS COMPANY
NOTE:
Hold against the nuts (2) to tighten the bolts (1). Use a suitable tool.
- First Pass: 100 N.m (74 lb ft)
- Final Pass: 90 to 105 degrees - EN-45059
meter
- Bolt (1) @ Front Lower Control Arm Bushing (2)» Tighten [2x]
Courtesy of GENERAL MOTORS COMPANY
- First Pass: 100 N.m (74 lb ft)
- Final Pass: 30 to 45 degrees - EN-45059
meter
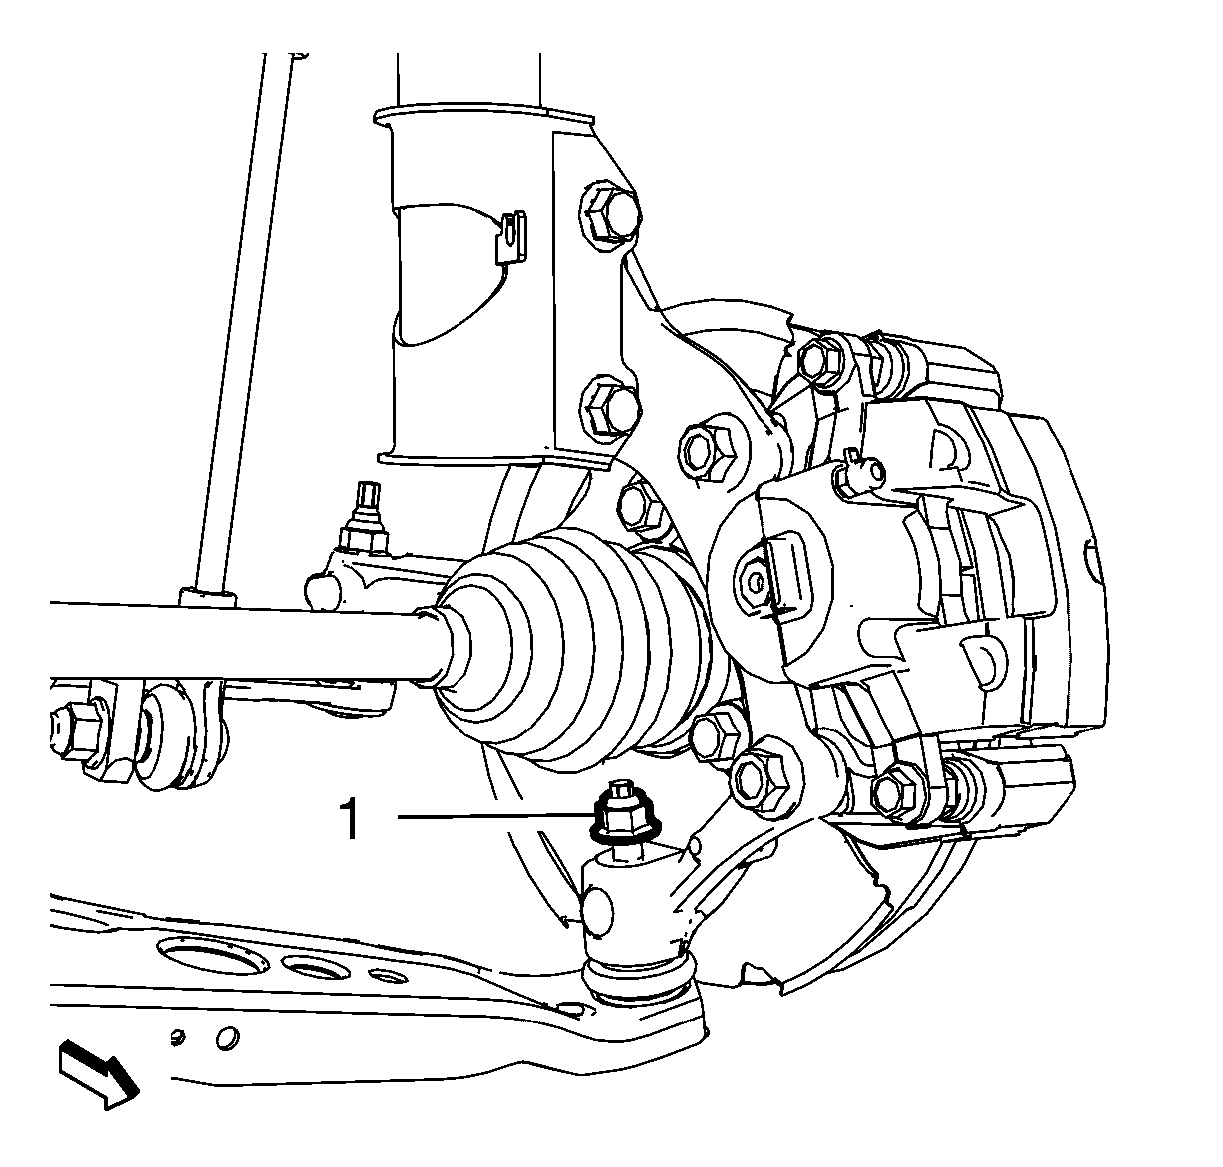
- Install the lower ball joint in the steering knuckle.
 Courtesy of GENERAL MOTORS COMPANY
NOTE:
Support the lower control arm ball joint with a hydraulic jack.
NOTE:
Hold against the hex of the threaded stud to tighten the nut (1). Use a suitable tool.
- Install a NEW nut. (1)
- Nut» Tighten [2x]
- First Pass: 35 N.m (26 lb ft)
- Final Pass: 30 to 45 degrees - EN-45059
meter
- If equipped with the front leveling position sensor, connect the electrical connector.
- Install the front tire and wheel assembly. Refer to Tire and Wheel Removal and Installation