Removal Procedure
- Raise and support the vehicle. Refer to Lifting and Jacking the Vehicle
.
- Remove the tires and wheels. Refer to Tire and Wheel Removal and Installation
.
- Drain the rear differential assembly. Refer to Axle Lubricant Change .
- Remove the rear wheel drive shafts. Refer to Rear Wheel Drive Shaft and Rear Axle Shaft Seal Replacement
.
- Remove the propeller shaft assembly. Refer to Propeller Shaft Replacement
.
 Courtesy of GENERAL MOTORS CORP.
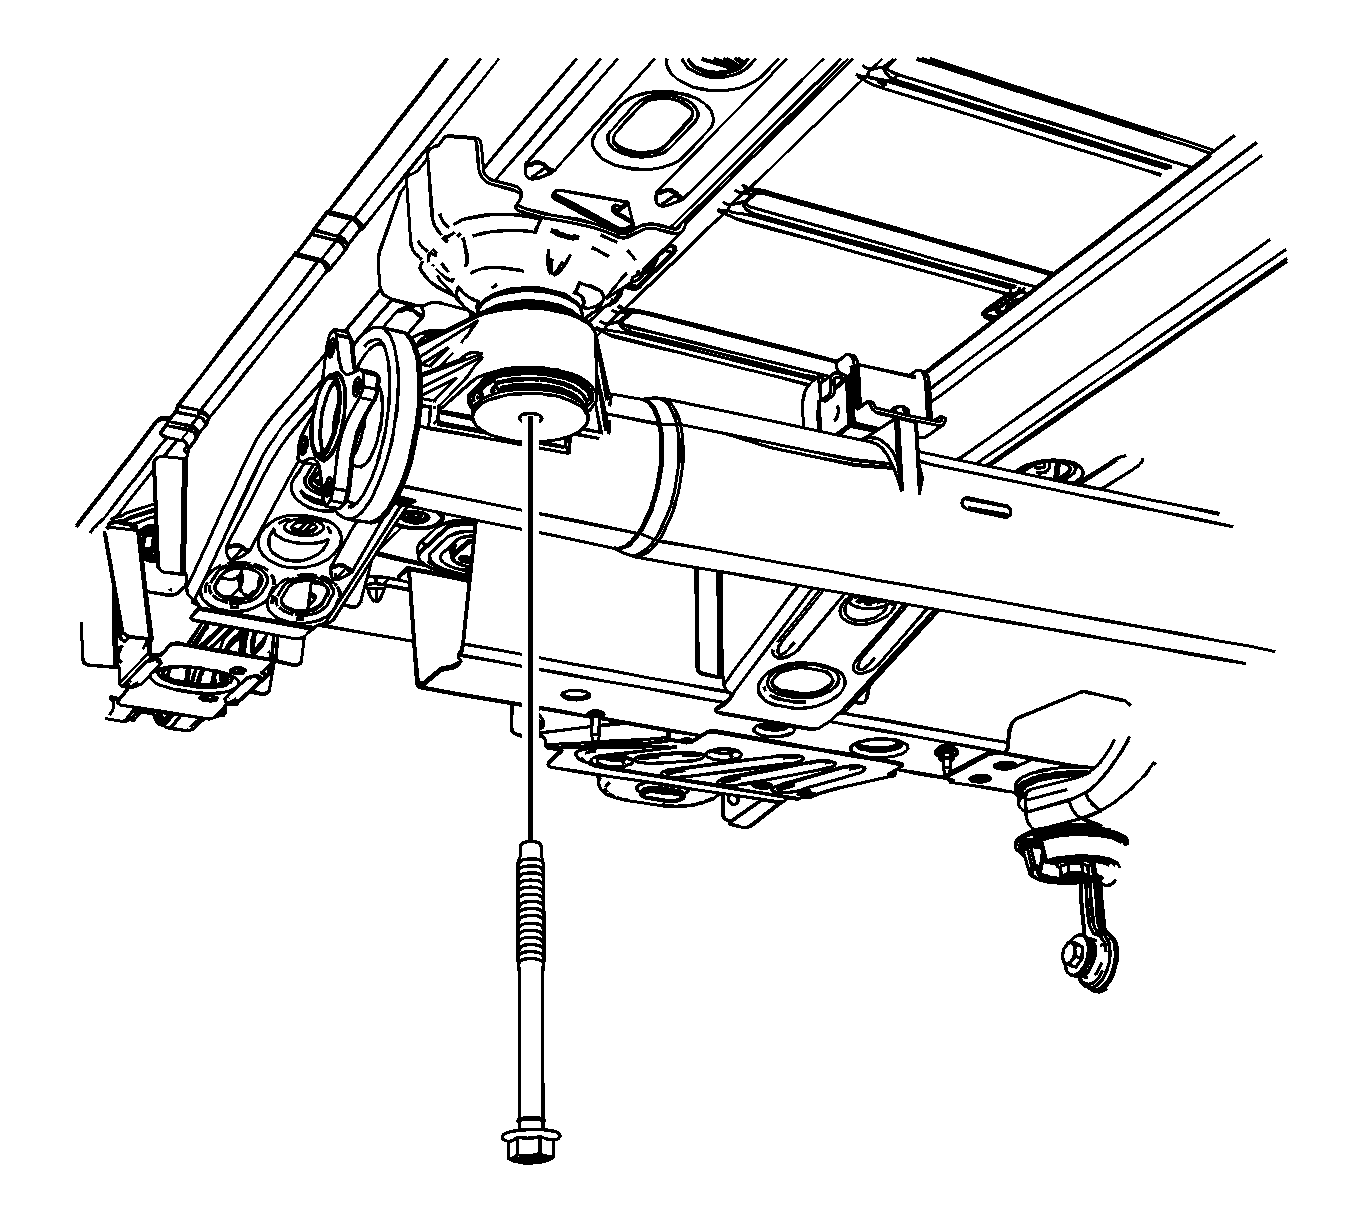
- Remove the front torque tube mounting bracket bolt.
 Courtesy of GENERAL MOTORS CORP.
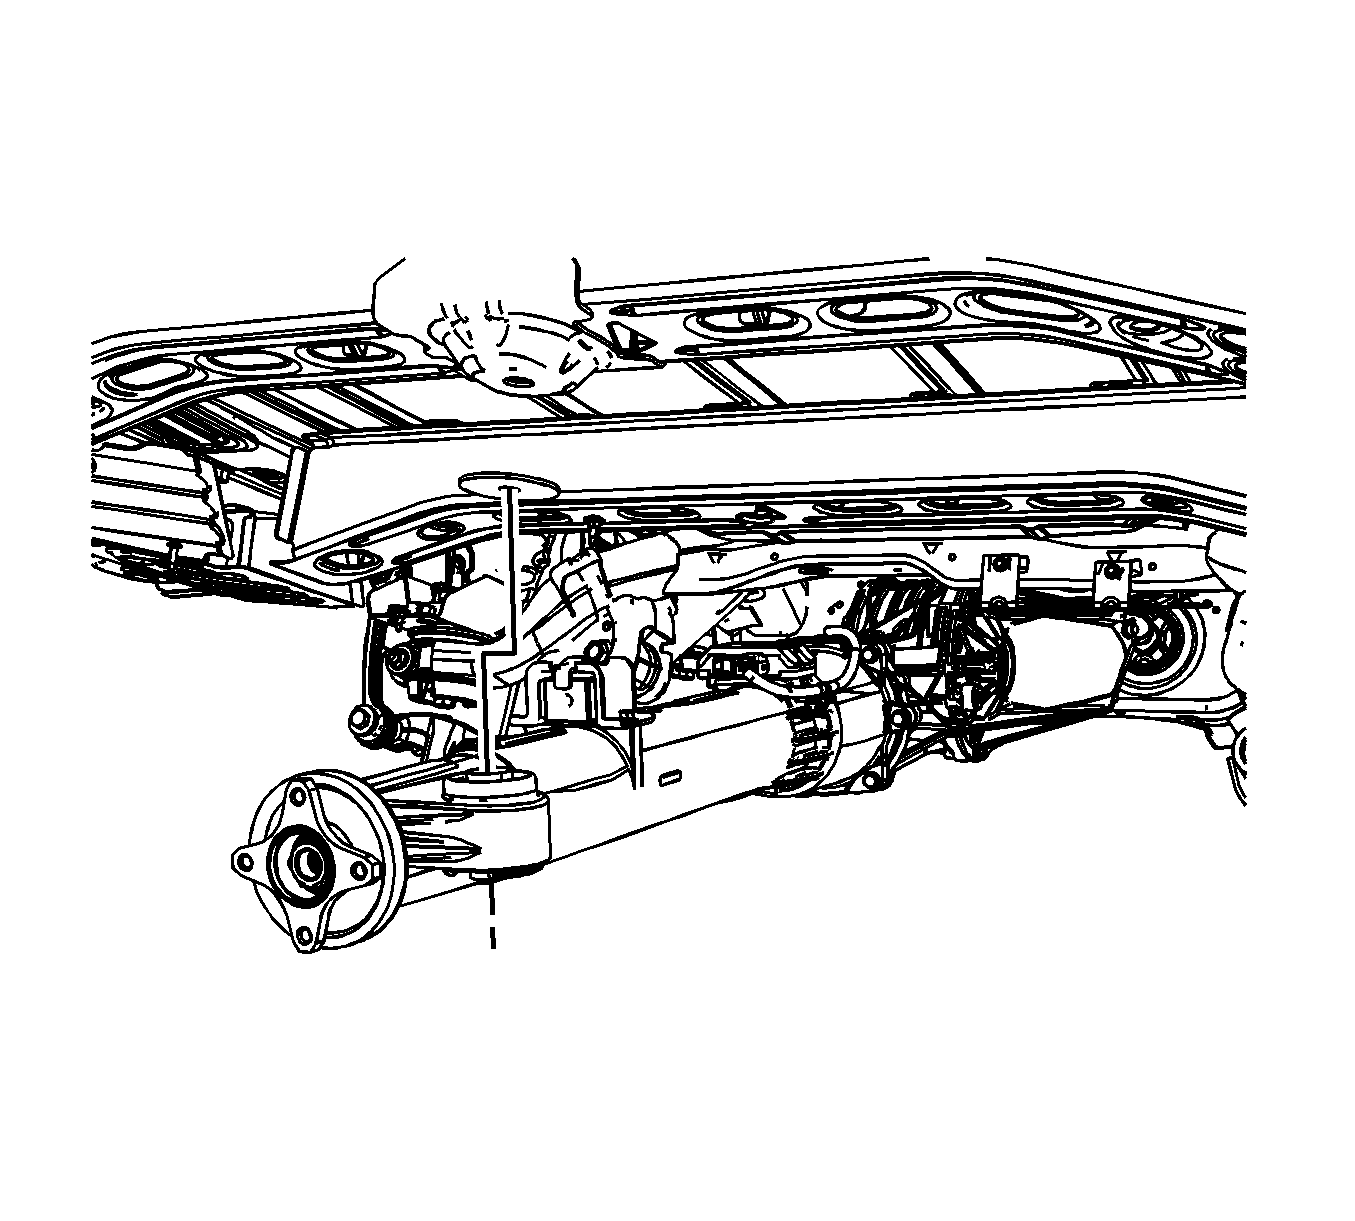
- Lower the front of the torque tube to gain access to the electronic clutch control module.
 Courtesy of GENERAL MOTORS CORP.
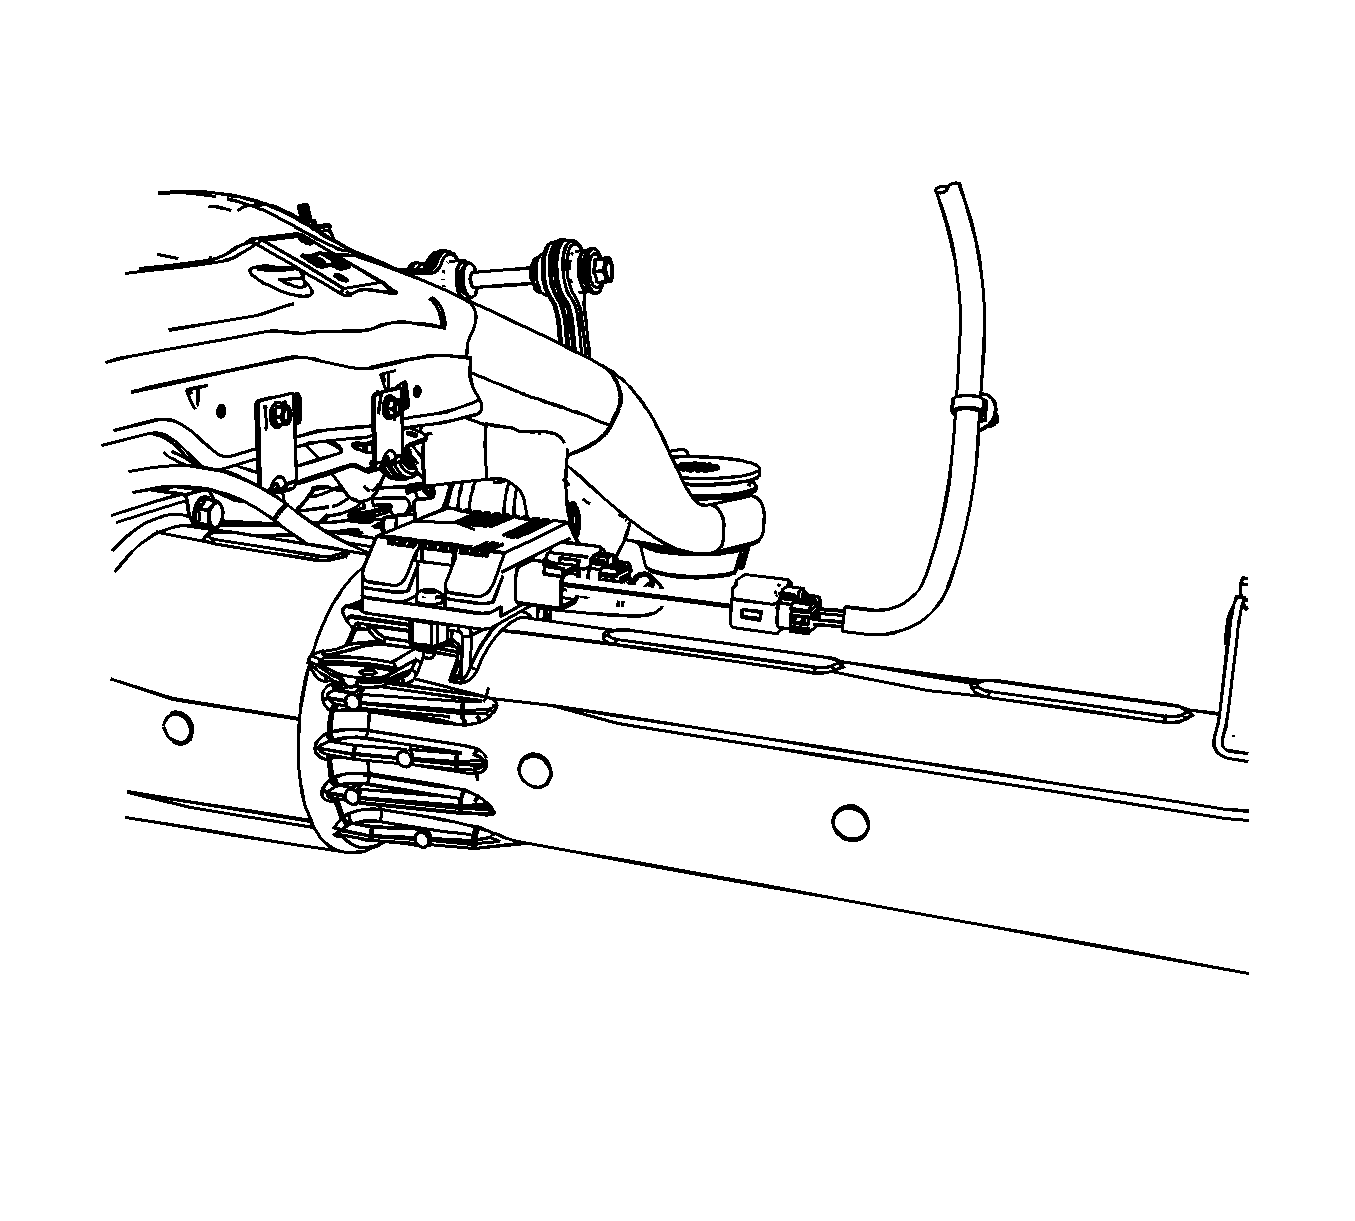
- Disconnect the electrical connector from the electronic clutch control module.
- Support the torque tube with a jack stand.
- Support the rear differential assembly with a transmission jack.
 Courtesy of GENERAL MOTORS CORP.
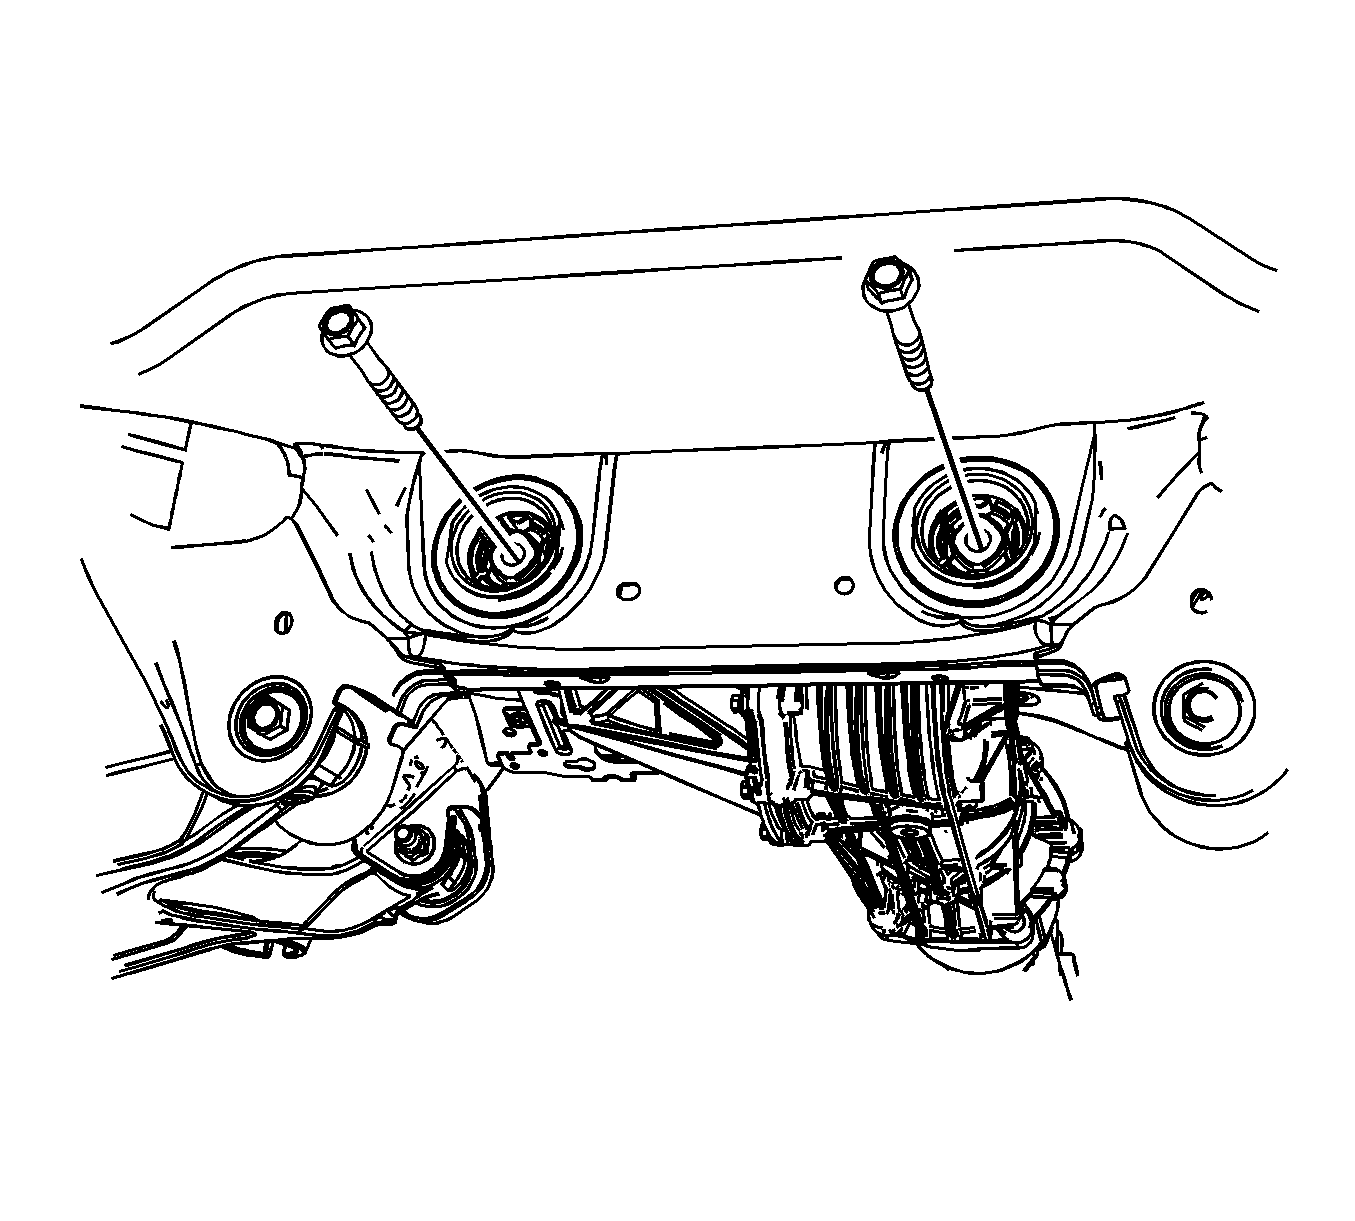
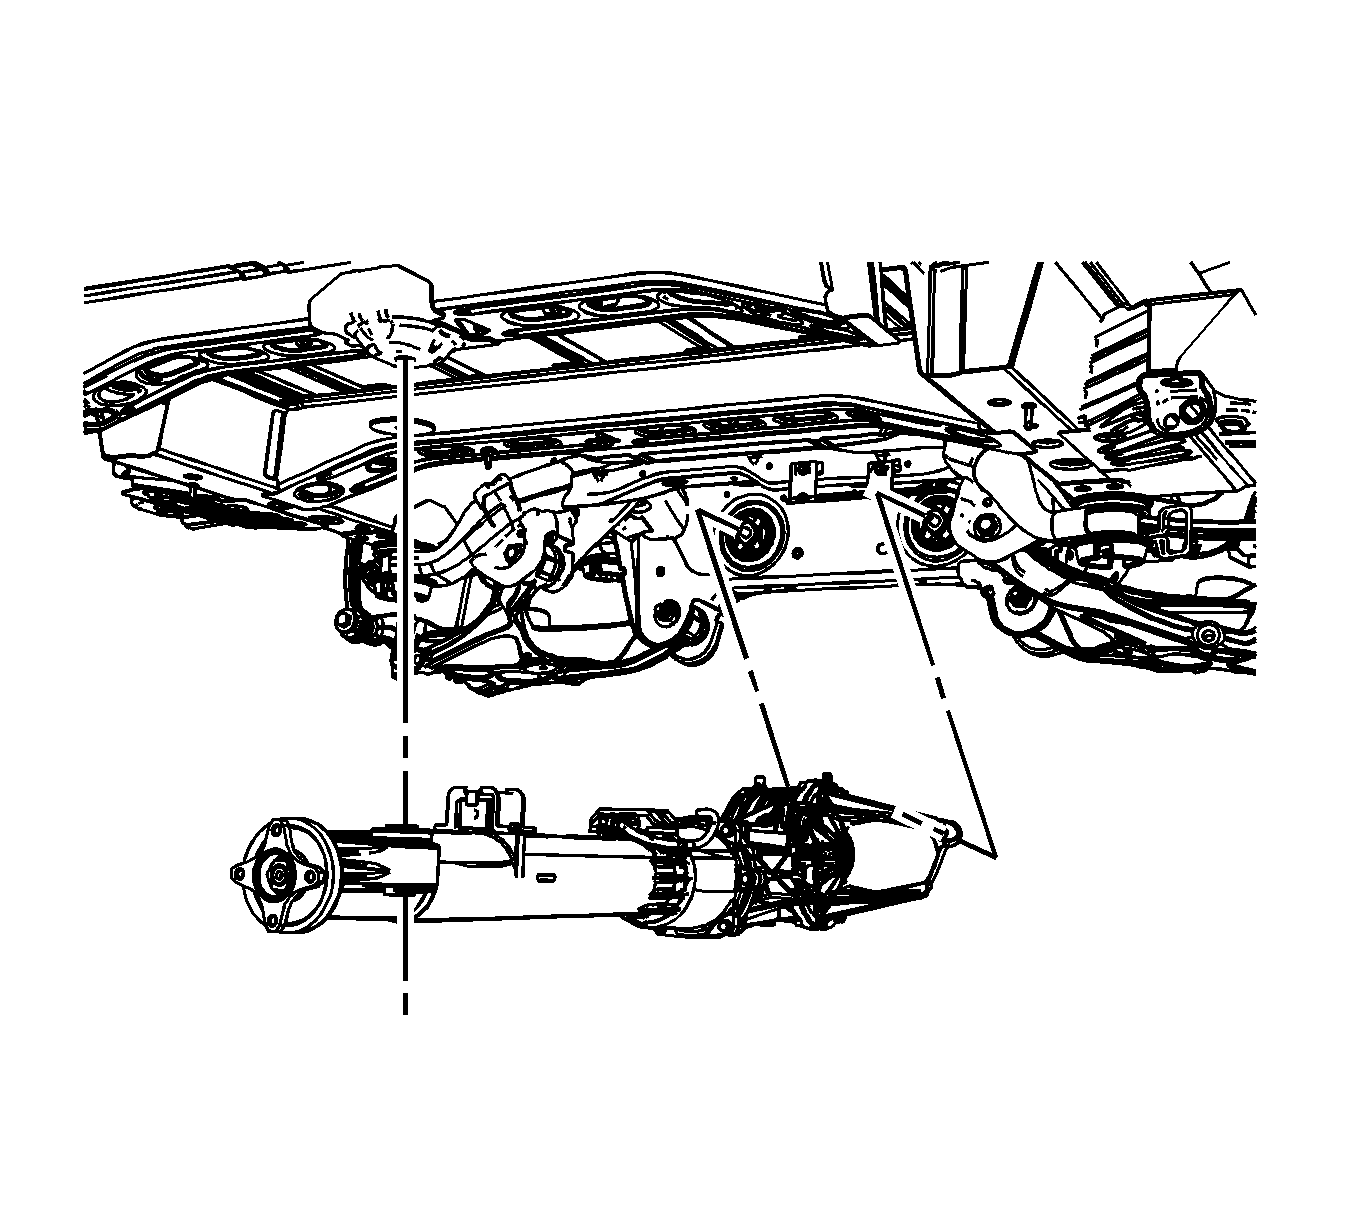
- Remove the rear differential drive mounting bolts.
 Courtesy of GENERAL MOTORS CORP.
- With the aide of an assistant, remove the rear differential assembly from the vehicle.
- Remove the torque tube assembly mounting bolts from the rear differential assembly. Refer to Driveline Torque Tube Replacement .