Removal Procedure
- Disconnect the primary negative battery cable. Refer to Battery Negative Cable Disconnection and Connection (Primary) , Battery Negative Cable Disconnection and Connection (Auxiliary) .
- Remove the rear compartment side trim panel. Refer to Rear Compartment Side Trim Panel Replacement
.
 Courtesy of GENERAL MOTORS CORP.
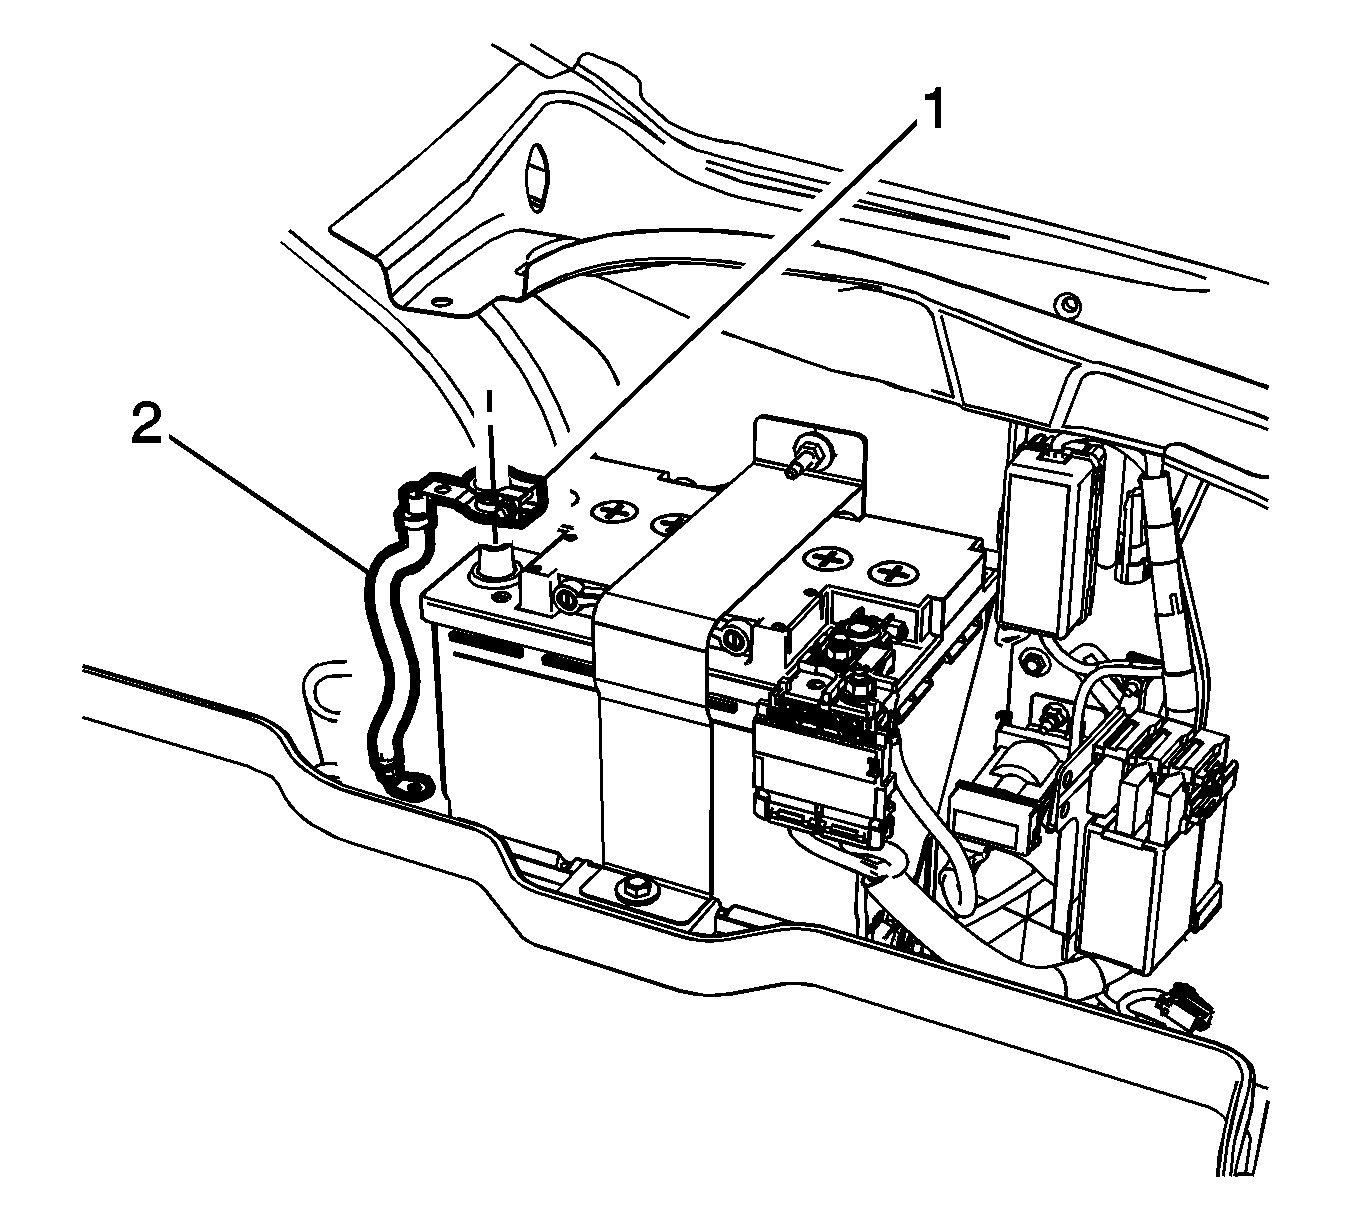
- Loosen the auxiliary battery negative post clamp nut (1).
- Disconnect the auxiliary battery negative cable (2) from the auxiliary battery.
 Courtesy of GENERAL MOTORS CORP.
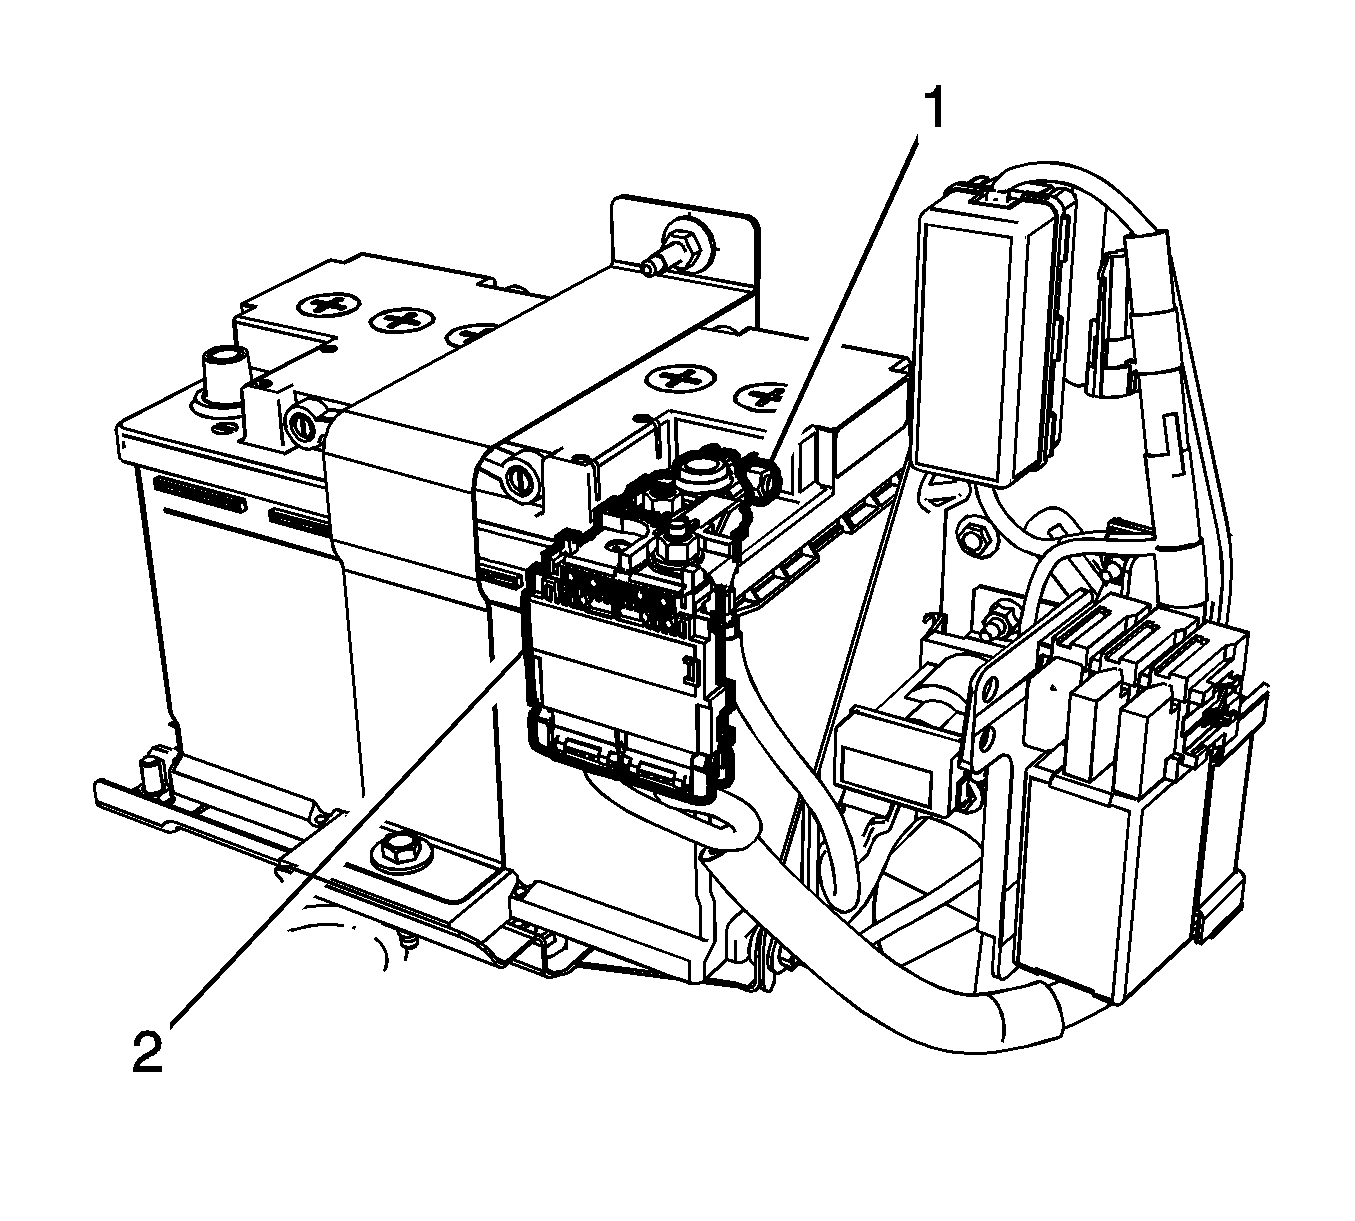
- Loosen the auxiliary battery positive cable clamp nut (1) and remove the auxiliary battery positive cable (2).
 Courtesy of GENERAL MOTORS CORP.
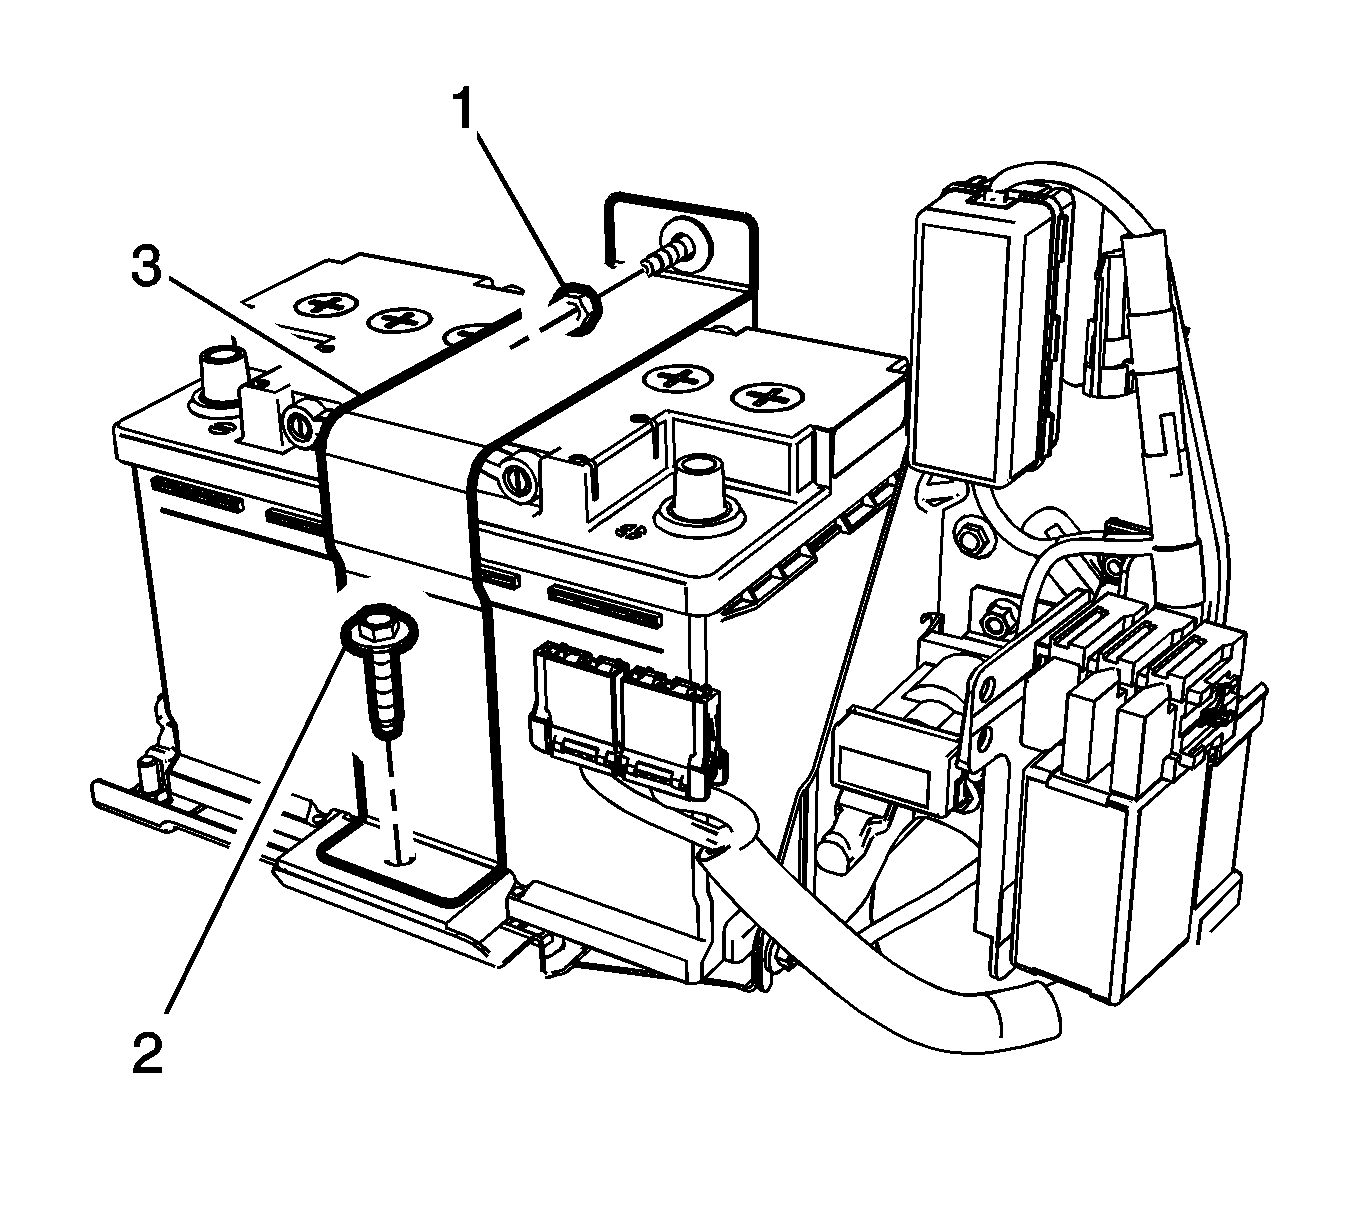
- Remove the auxiliary battery tray bracket nut (1) and the battery hold down retainer bolt (2).
 Courtesy of GENERAL MOTORS CORP.
- Remove the auxiliary battery brace (1) with the hold down retainer (2).
- Remove the battery vent hose from the auxiliary battery.
- Remove the auxiliary battery (3) from the rear compartment.