Front Lower Control Rear Arm Replacement
WARNING: This page is about a different car, the 2012 Chevrolet Camaro. However, it is still accessible from the selected car via links, so may be relevant.
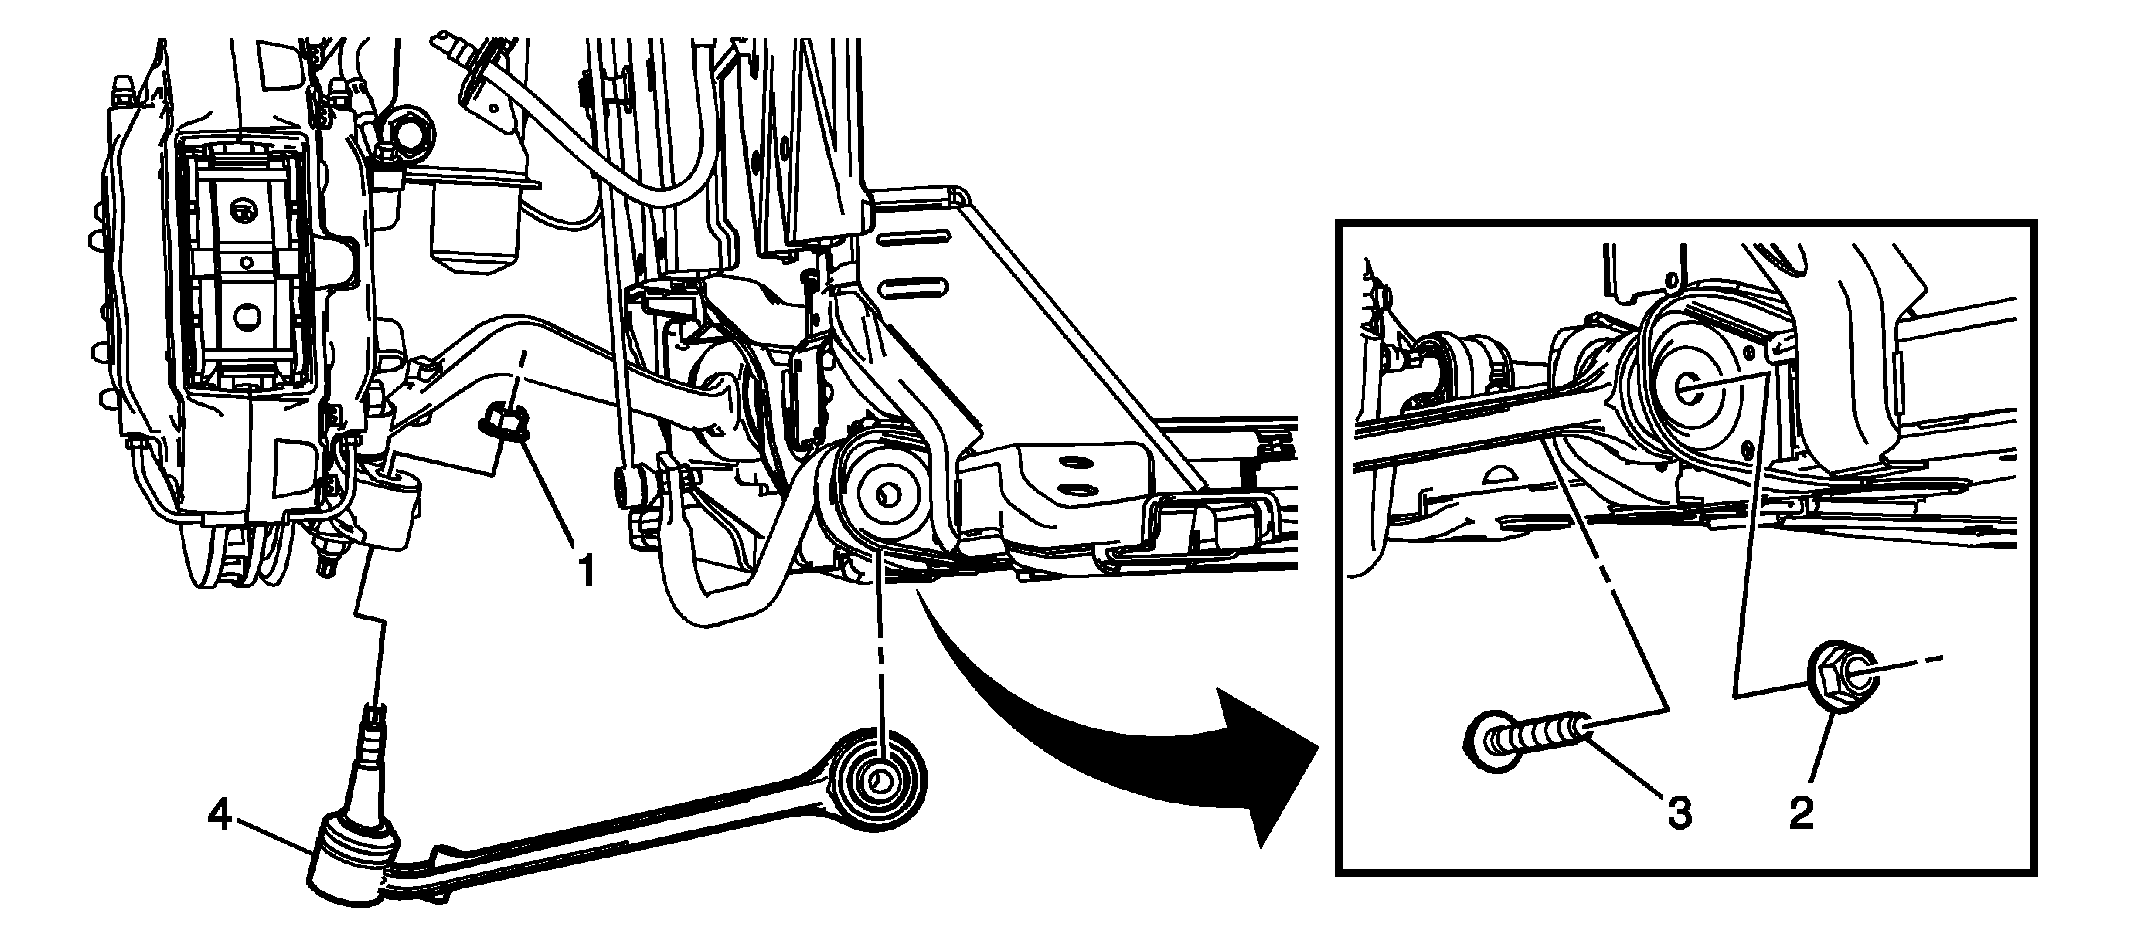 Courtesy of GENERAL MOTORS COMPANY
 Front Lower Control Rear Arm Replacement
| Callout |
Component Name |
|
Preliminary Procedures
- Raise and support the vehicle. Refer to Lifting and Jacking the Vehicle
.
- Remove the tire and wheel assembly. Refer to Tire and Wheel Removal and Installation (w RT2)
, Tire and Wheel Removal and Installation (w/o RT2)
.
- Remove the front position sensor link from the lower control arm, if equipped.
|
| 1 |
Front Rear Lower Control Arm Nut
Procedure
- Using the J-42188
separator , remove the front rear lower control arm from the knuckle.
- Using a torque angle meter, tighten the nut.
Tighten
- First Pass: 40 N.m (30 lb ft)
- Final Pass: plus 90 degrees
Special Tools
J-42188
Ball Joint Separator
For equivalent regional tools, refer to Special Tools . |
| 2 |
Front Lower Control Arm Rear Nut |
| 3 |
Front Lower Control Arm Bolt
Tighten
- First Pass: 50 N.m (37 lb ft)
- Final Pass: plus 120 degrees
|
| 4 |
Front Lower Control Arm Procedure
- Transfer the electronic position sensor link ball stud from the old control arm to the new control arm, if equipped.
- Check and adjust the front wheel alignment, if needed. Refer to Front Camber Adjustment
.
|