Removal Procedure
- Open the folding top.
- Turn the ignition switch to the OFF position.
- Remove the rear upper garnish molding. Refer to Garnish Molding Replacement - Rear Upper
in Interior Trim.
- Remove the floor console. Refer to Console Replacement
in Instrument Panel, Gages, and Console.
- Move the passenger seat fully forward.
- Disconnect the negative battery cable. Refer to Battery Negative Cable Disconnect/Connect Procedure
in Engine Electrical.
 Courtesy of GENERAL MOTORS CORP.
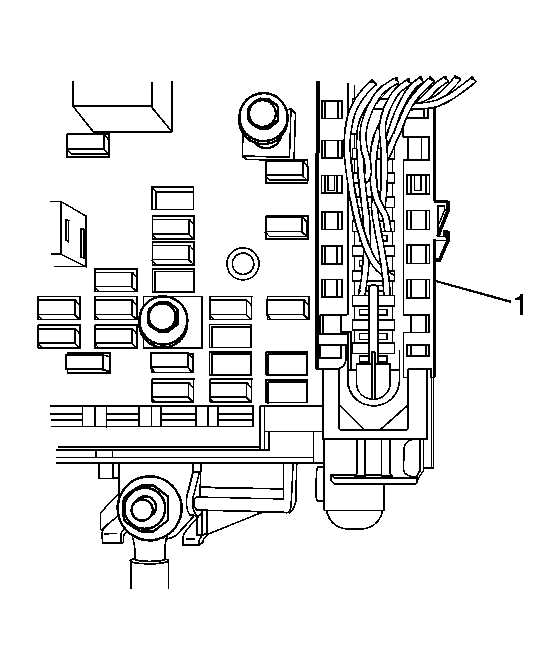
- Push the sliding latch (1) downward until fully extended, approximately 40 mm (1.6 in).
 Courtesy of GENERAL MOTORS CORP.
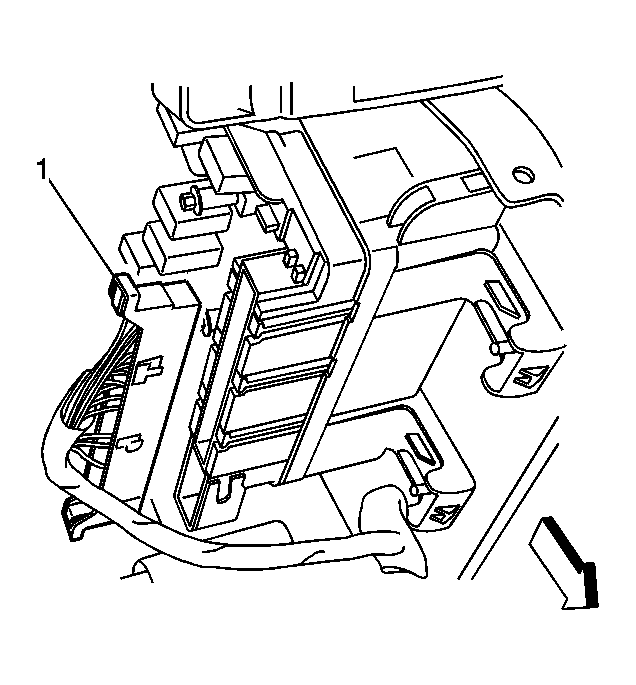
- Remove the connector (1) from the electrical center.
 Courtesy of GENERAL MOTORS CORP.
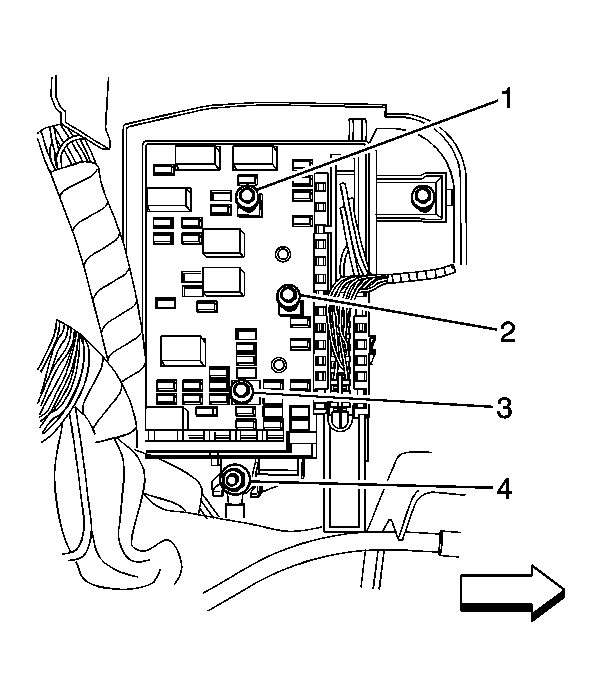
- Remove the nut (4) retaining the positive battery terminal to the electrical center.
- Fully loosen bolts (1, 2, 3).
 Courtesy of GENERAL MOTORS CORP.
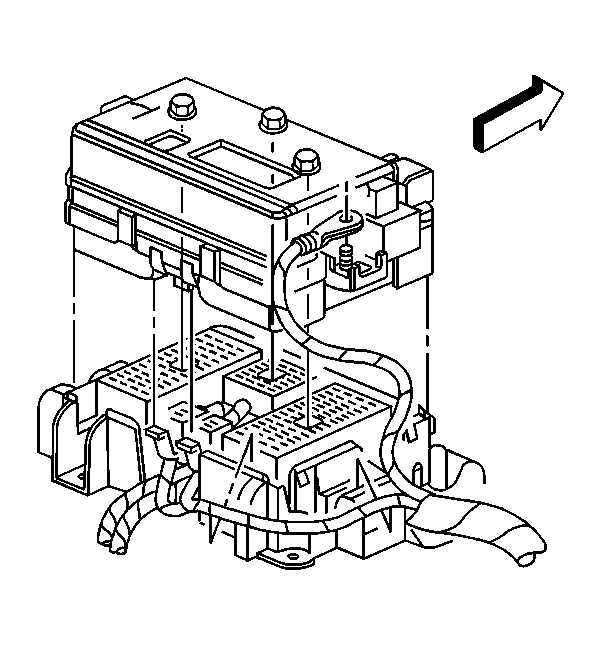
- Release the 4 retaining tabs located at the top and bottom of the electrical center.
- Remove the electrical center from the base.
 Courtesy of GENERAL MOTORS CORP.
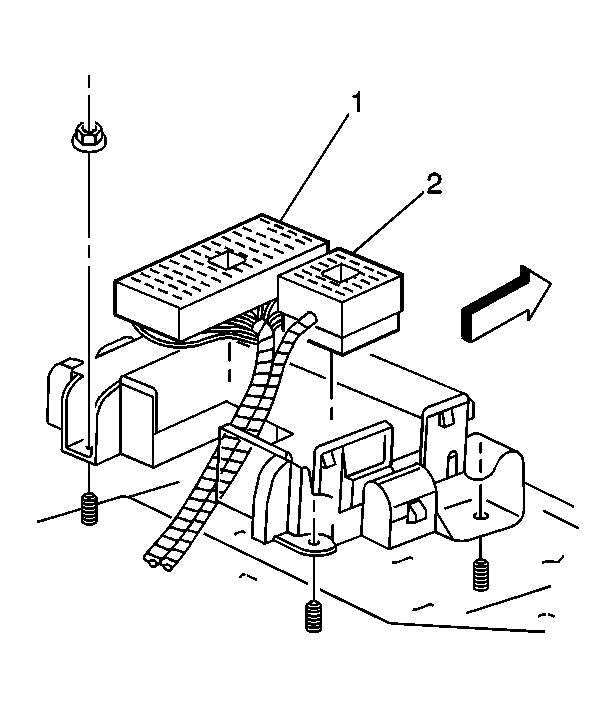
- Removal all the block connectors including (1, 2) from the electrical center base.
- Remove the nuts retaining the electrical center base to the console bracket studs.
- Remove the electrical center base from the vehicle.