Headlamp Replacement
WARNING: This page is about a different car, the 2012 Chevrolet Malibu. However, it is still accessible from the selected car via links, so may be relevant.
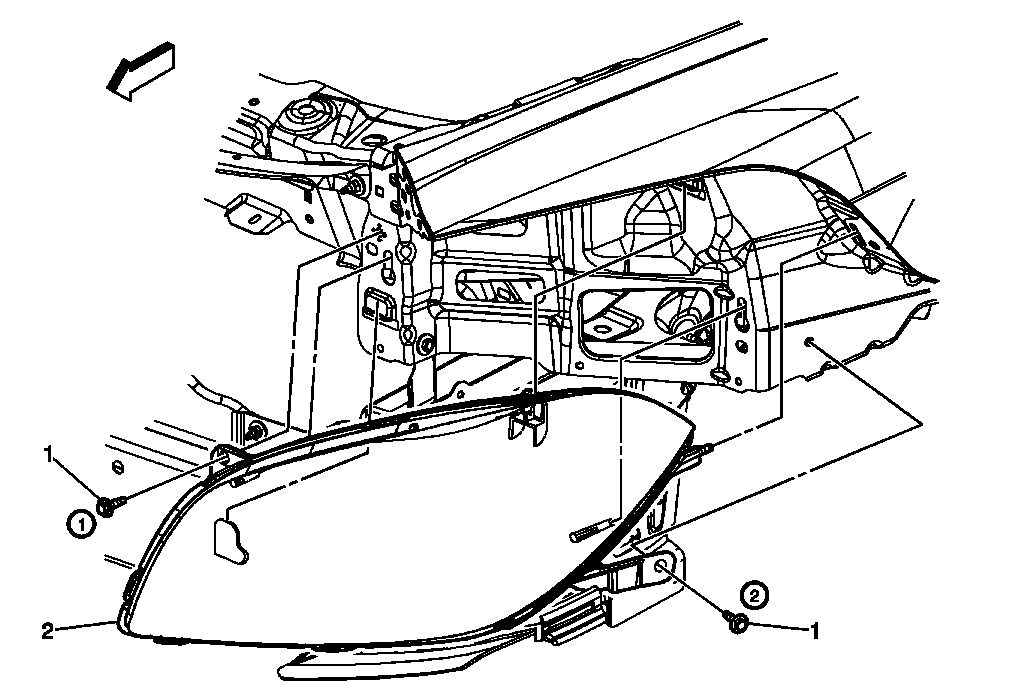 Courtesy of GENERAL MOTORS COMPANY
 Headlamp Replacement
| Callout |
Component Name |
|
Preliminary Procedure
- Remove the front bumper fascia fasteners from the center and side of the headlamp to be removed, full removal of the fascia is not necessary. Refer to Front Bumper Fascia Replacement
.
- Gently pull the fascia forward to allow clearance to remove the headlamp assembly.
|
| 1 |
Headlamp Screw (Qty: 2)
TIP:
Secure the headlamp fasteners in sequence, as indicated.
Tighten
3 N.m (27 lb in) |
| 2 |
Headlamp Assembly Procedure
- Pull forward on the outside edge of the headlamp in order to release the up and down locator tabs on the backside of the headlamp.
- Pull forward on the top inside edge of the headlamp to release the inboard up/down locator.
- Pull the headlamp assembly down.
- Pull the headlamp assembly forward far enough to access the electrical connection.
- Disconnect the headlamp electrical connector from the forward lamp harness connector.
- Remove the headlamp assembly.
- Aim the headlamps after installation. Refer to Headlamp Aiming .
|