Fuel Tank: Removal
- Release fuel system pressure. See FUEL SYSTEM PRESSURE RELEASE
. Drain the fuel tank. See FUEL TANK DRAINING
.
- Remove the rear seat bottom cushion top access fuel tank access panel. Disengage the front retaining clips by raising the rear seat cushion at the front edge. Pull the rear seat cushion forward in order to remove the cushion from the vehicle. Remove the sill plate from the left side door opening.
- Fold back the carpet in order to maintain metal-to-metal contact while servicing the fuel sender assembly. Remove the access panel for the fuel sender assembly from the rear seat floor. The panel is held in place by a butyl caulk seal. Disconnect the electrical connector from the fuel sender assembly.
- Remove the retaining clip from the fuel line fitting. Remove the fuel line from the fuel sender assembly. Raise and support vehicle. Remove the catalytic converter and intermediate pipe assembly from the vehicle. Remove the 4 screws and the nut from the rear exhaust heat shield.
- Remove the rear exhaust heat shield from the underbody. Remove the 4 bolts securing the parking brake cables to the underbody. Remove the fuel filler hose from the fuel tank. See Fig 1
. Disconnect the fuel tank breather hose from the fuel tank.
- Disconnect the On-Board Refueling Vapor Recovery (ORVR) vapor hose from the fuel filler pipe assembly. Disconnect the fuel limiter vent valve hose from the EVAP canister by pinching both sides of the hose connector.
- Support the fuel tank with a transmission jack or other suitable fixture. Remove the 4 bolts and the 2 fuel tank straps from the vehicle. Lower the fuel tank from the vehicle.
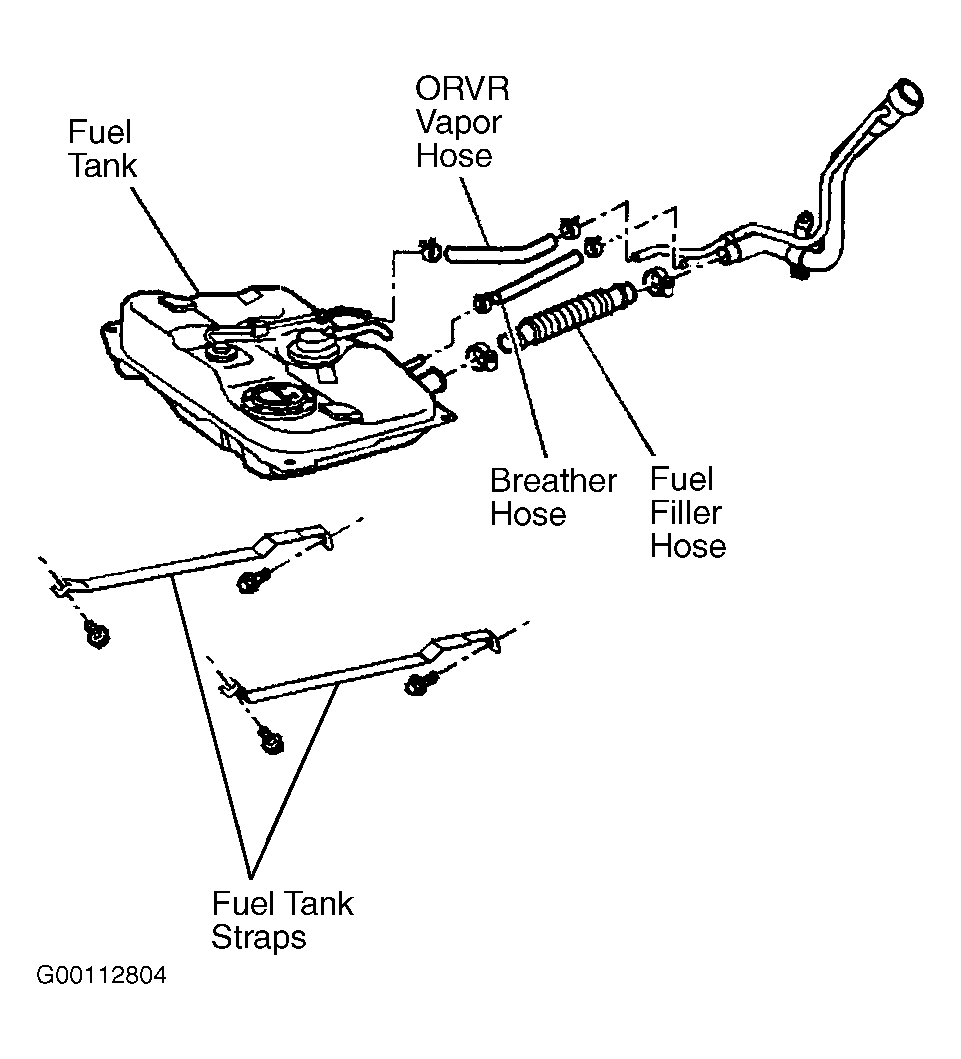 Courtesy of GENERAL MOTORS CORP.