Throttle Valve Cable: Installation
- Attach the T.V. cable to the transmission. Attach the T.V. cable to the T.V. cable cam while installing the valve body. Install the valve body in the transmission. See VALVE BODY & ACCUMULATOR PISTONS
.
- Install the transmission range switch. See TRANSMISSION RANGE SWITCH
. Install the transmission oil pan and gasket to the transmission. See DRAINING & REFILLING
under LUBRICATION.
- Attach the pinion flange yoke (2) to the front differential pinion flange (3) aligning the index (reference marks) (1) on the pinion flange. Secure the pinion flange yoke (2) with 4 bolts and nuts. See Fig 1
. Tighten the propeller shaft bolts and nuts to specification. See TORQUE SPECIFICATIONS
.
- Lower the vehicle. Position the cable (1) in a 3.94" (100 mm) radius (a) as shown. See Fig 2
. Pull the inner cable (3) with the force of 0.45 ft. lbs. (2 N.m) to remove the slack in the cable. Crimp the stopper (2) to the inner cable (3) 0.03-0.06" (0.8-1.5 mm) from the end of the cable casing as shown in dimension (C).
- Install the T.V. cable casing into the T.V. cable bracket at the throttle body. Install the T.V. cable to the throttle body linkage. Connect the negative battery cable. Adjust the T.V. cable. See THROTTLE VALVE CABLE
under ADJUSTMENTS.
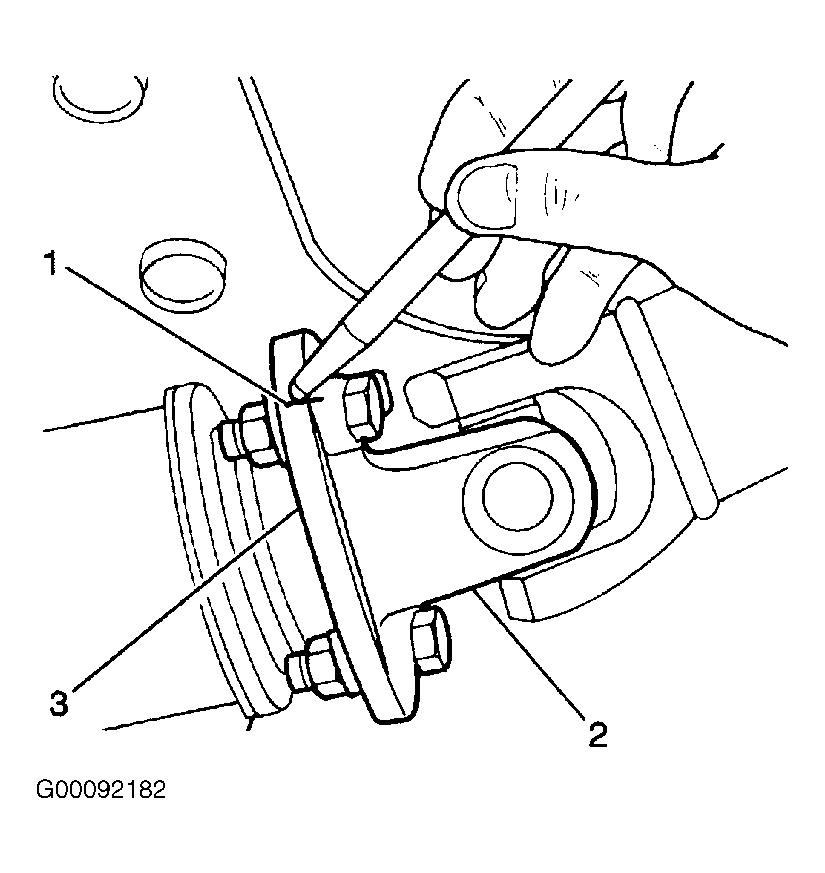 Courtesy of GENERAL MOTORS CORP.
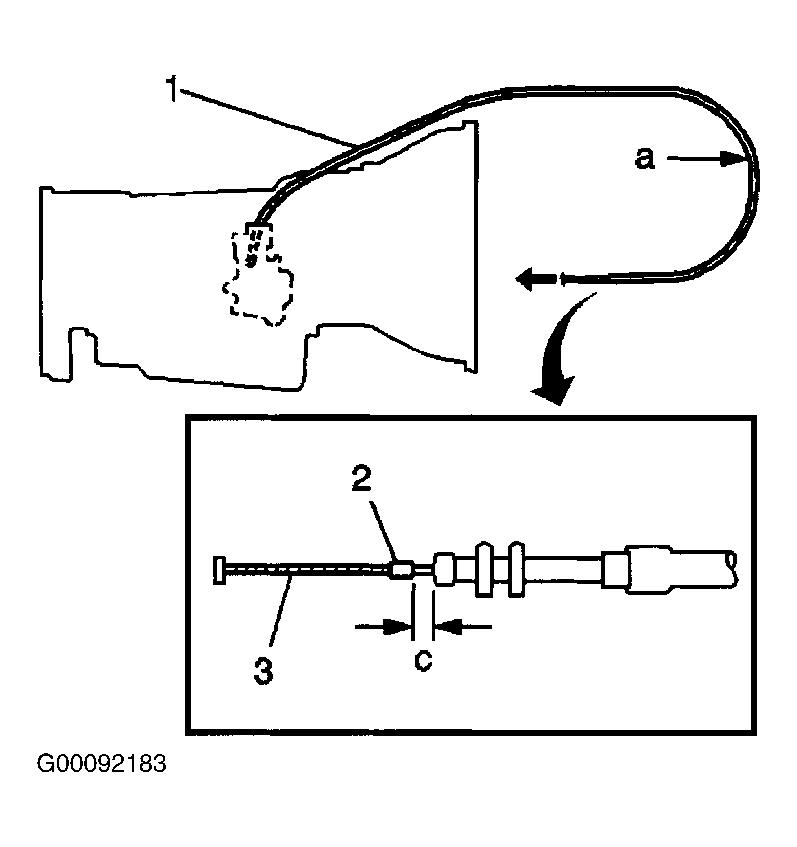 Courtesy of GENERAL MOTORS CORP.