Oil Pump & Control Valve Assembly
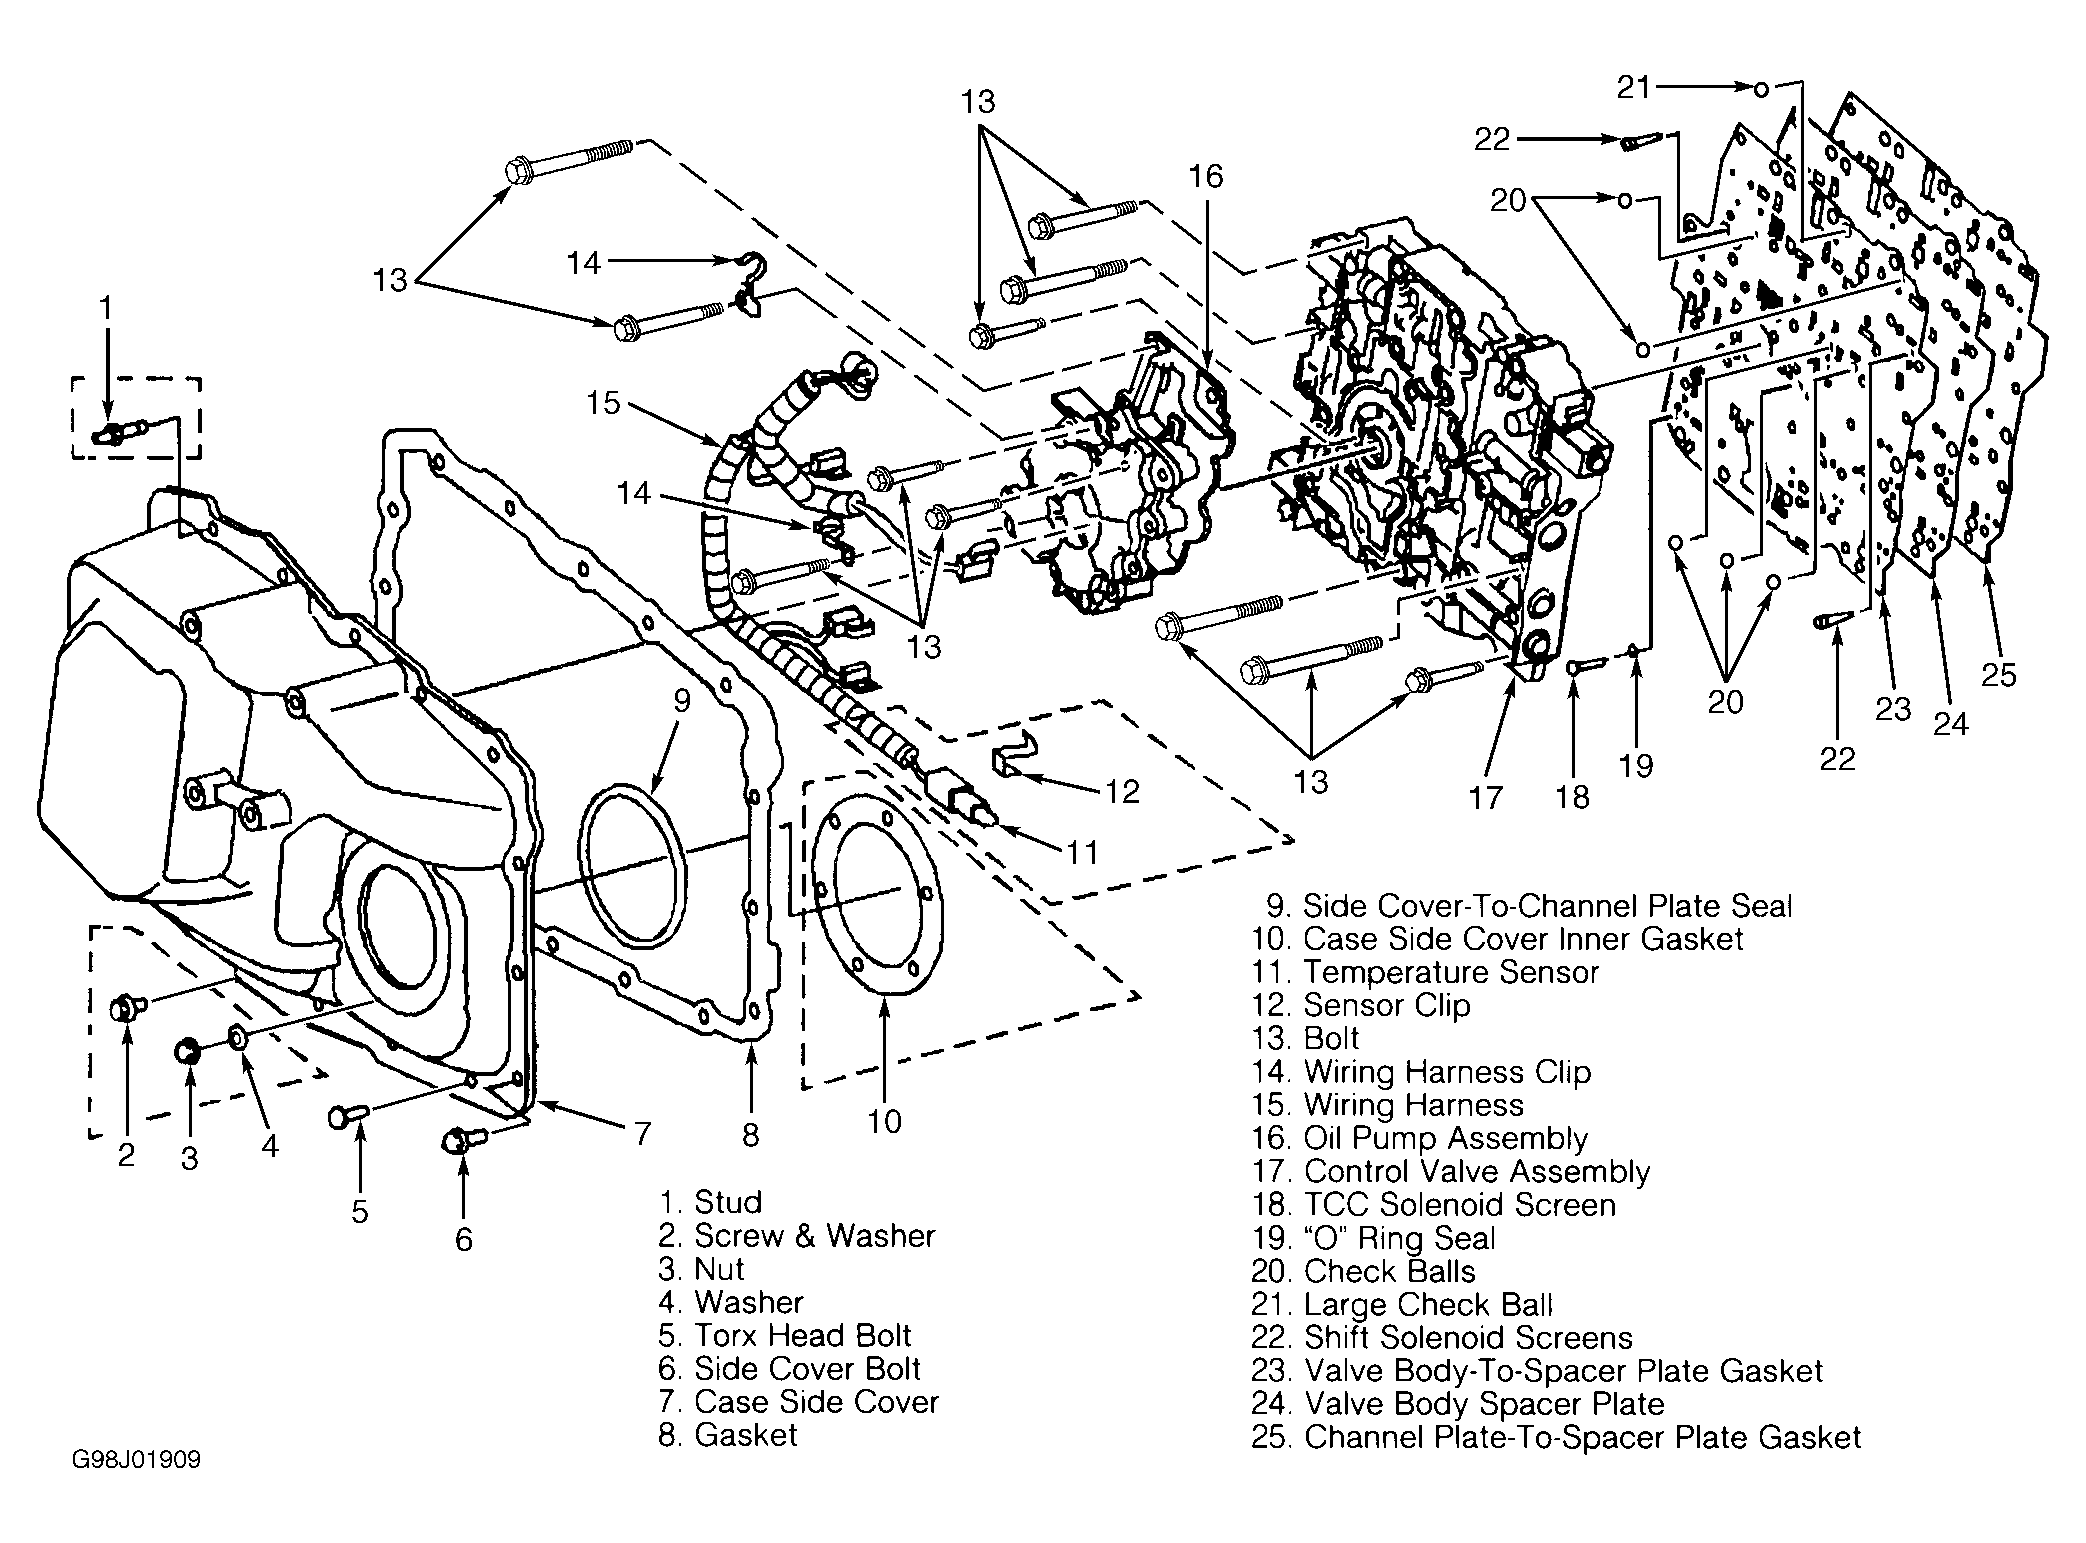
- Remove case side cover attaching bolts, nuts and washers. Remove case side cover, seal and gaskets. Disconnect wiring harness from solenoids, temperature sensor and case connector. Remove wiring harness. See Fig 1
.
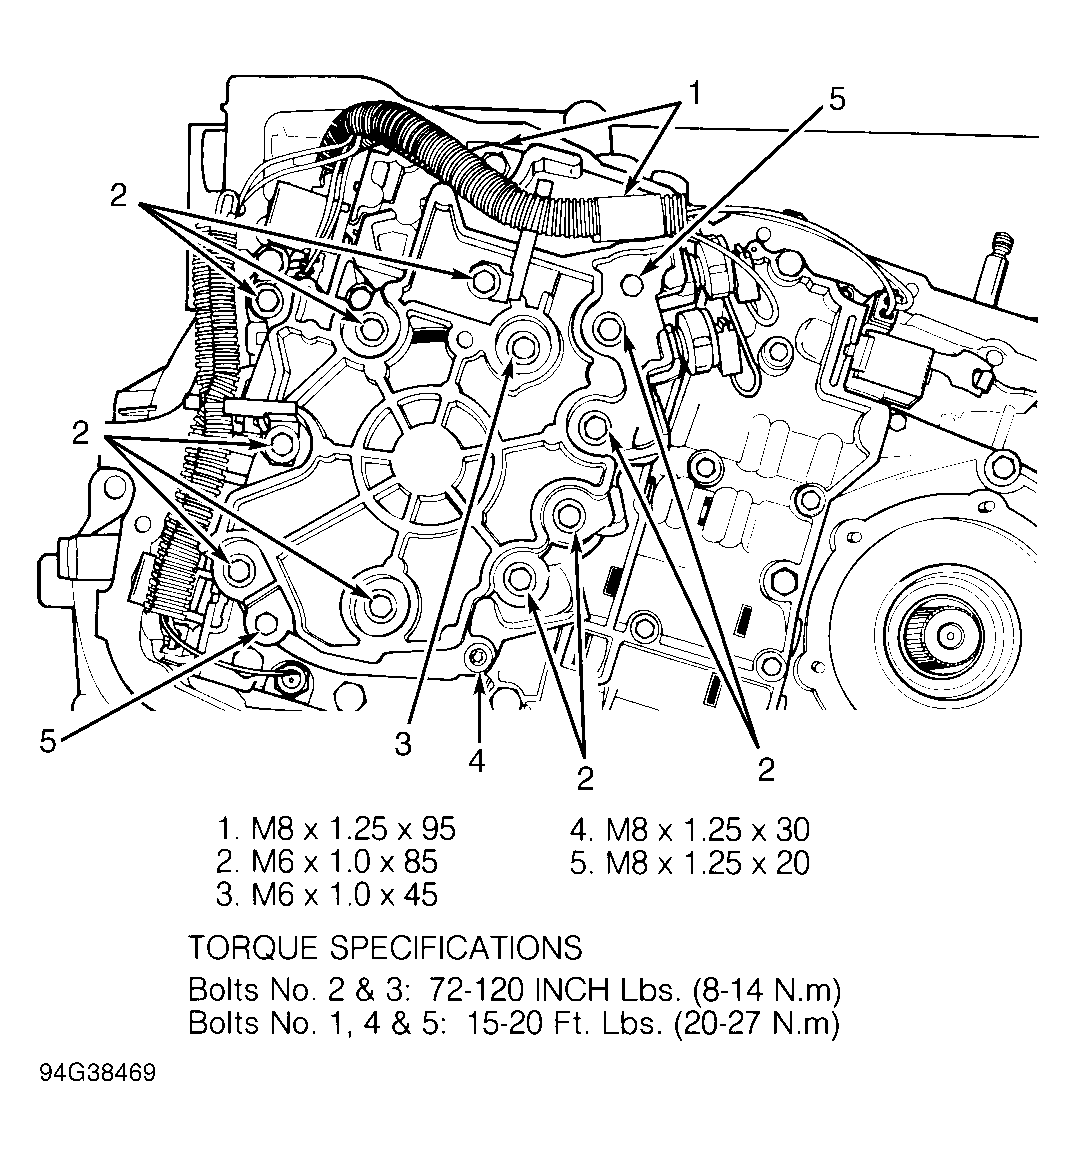
- Remove linkage and bracket from control valve assembly. Remove oil pump assembly bolts to remove oil pump from control valve assembly. See Fig 3
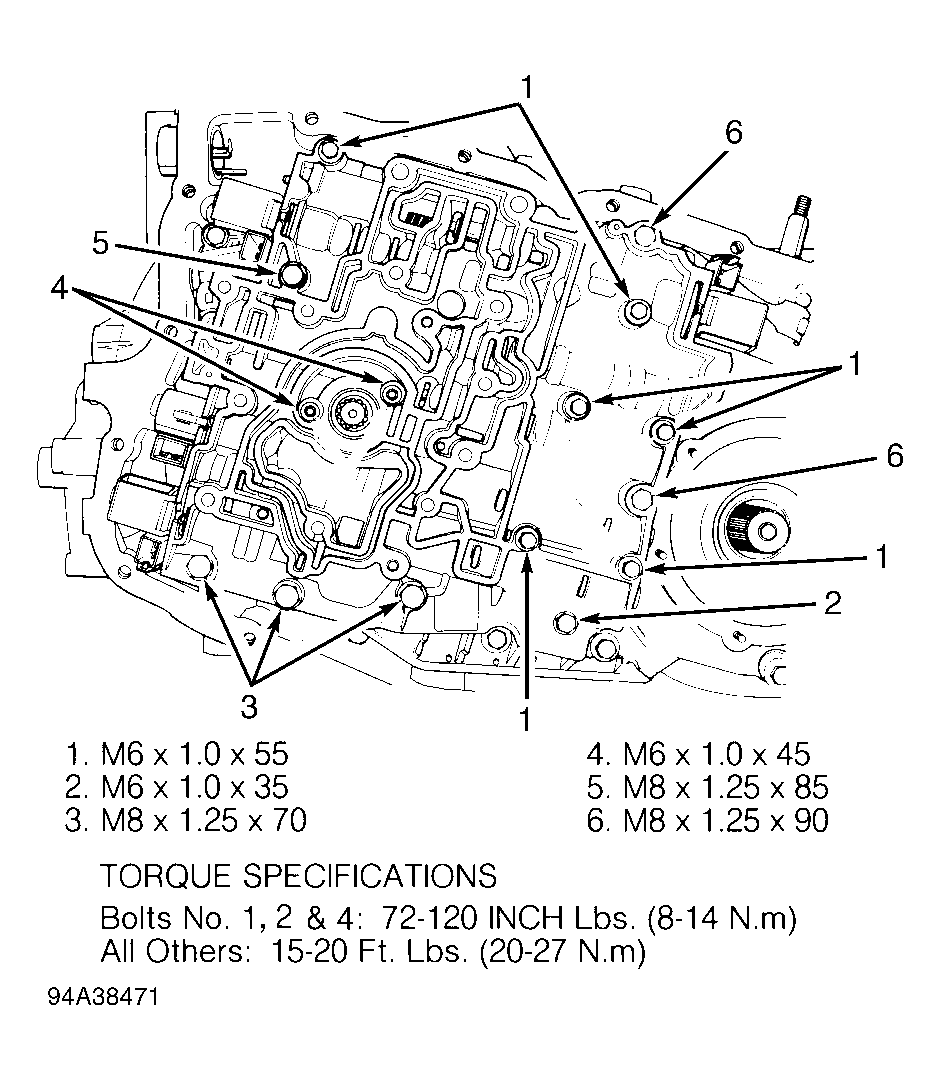
. Remove servo pipe retainer bolt and retainer plate. Remove remaining mounting bolts from control valve assembly. See Fig 2
. Remove control valve assembly from channel plate.
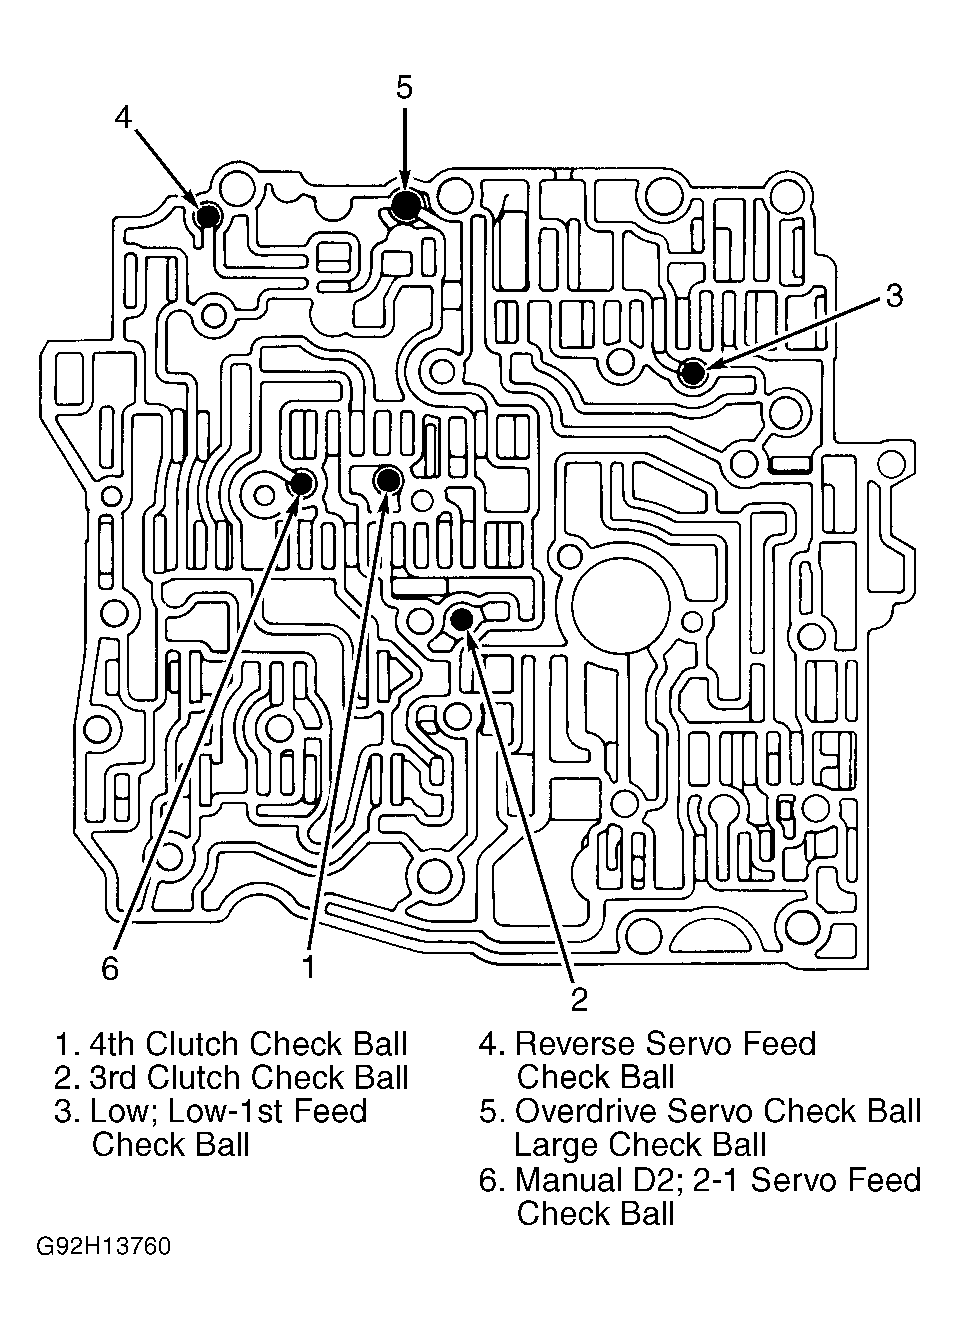
- Remove spacer plate and gaskets. Remove oil pump drive shaft. Remove 6 check balls between channel plate and spacer plate. See Fig 4
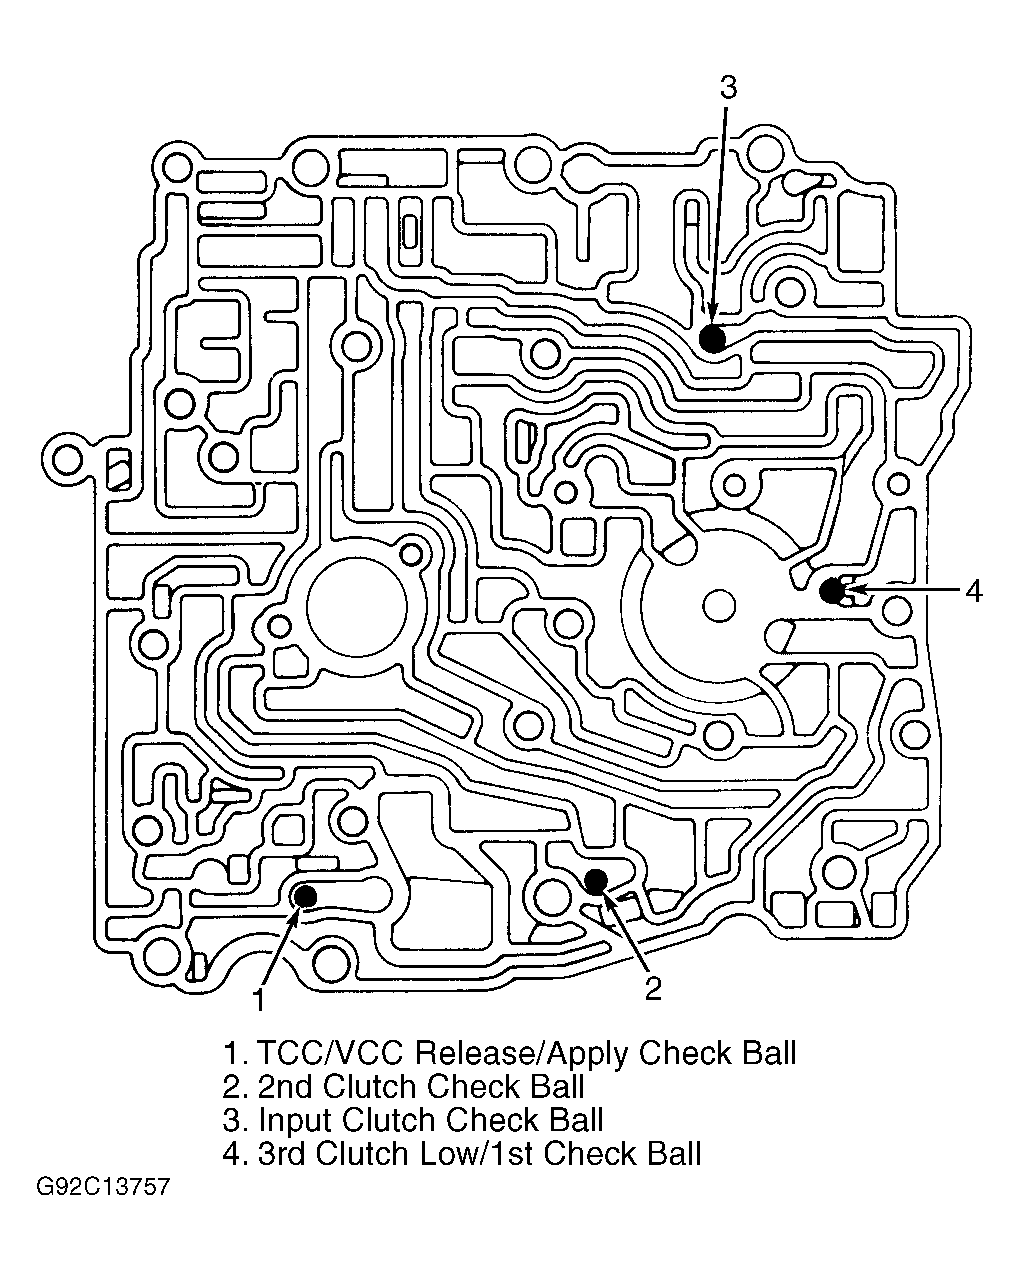
. Remove 4 check balls between spacer plate and control valve assembly. See Fig 5
. Remove solenoid screens. See Fig 1
.
 Courtesy of GENERAL MOTORS CORP.
 Courtesy of GENERAL MOTORS CORP.
 Courtesy of GENERAL MOTORS CORP.
 Courtesy of GENERAL MOTORS CORP.
 Courtesy of GENERAL MOTORS CORP.