Installation Procedure
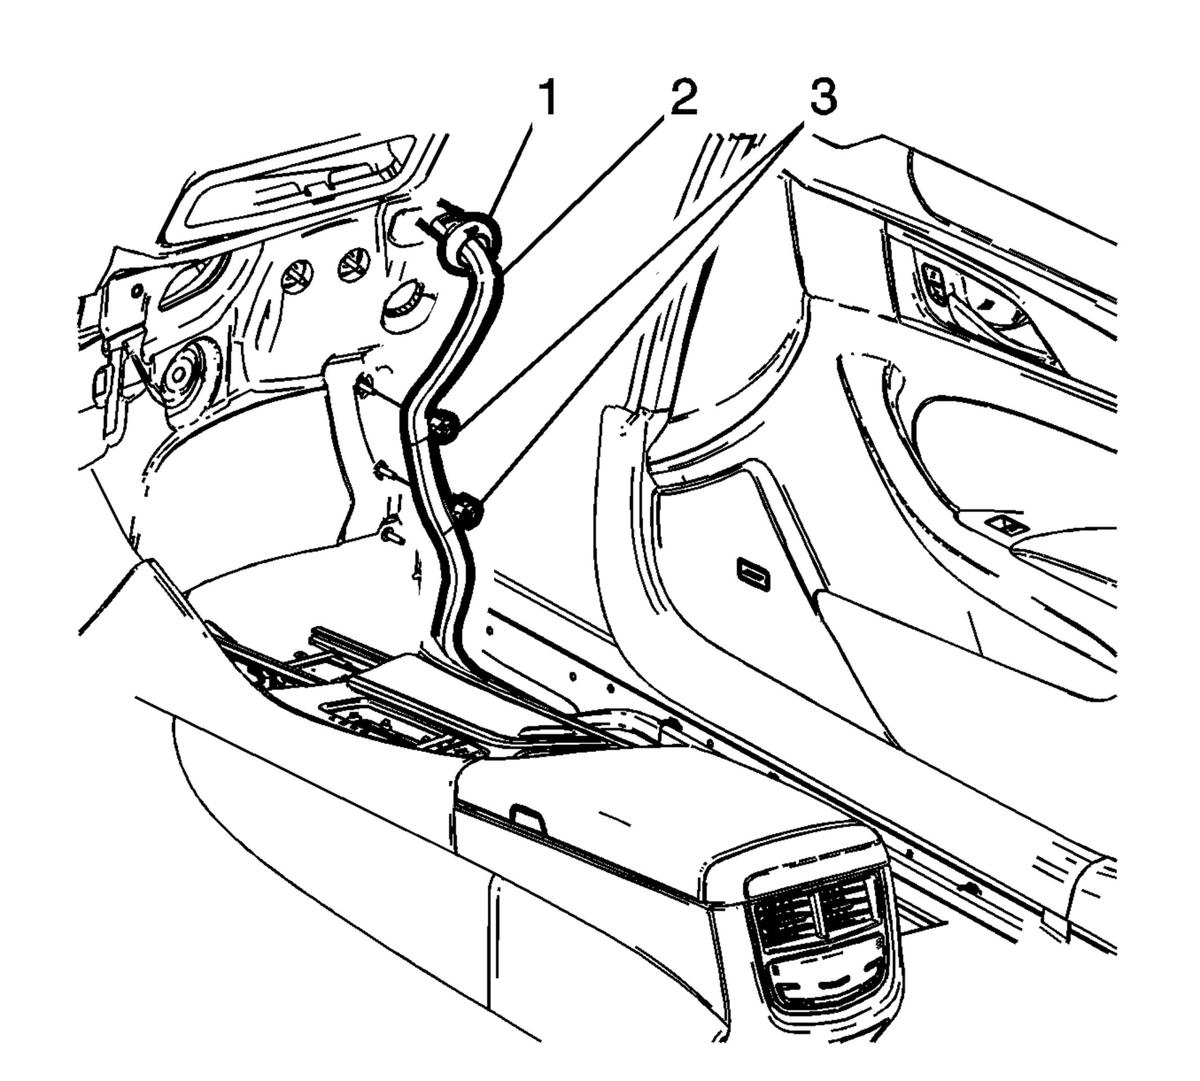
- Install the engine compartment battery positive cable (2) through the pass through opening and install the battery positive cable grommet (1).
 Courtesy of GENERAL MOTORS COMPANY
- Attach the battery positive cable retainers (3) to the plenum studs.
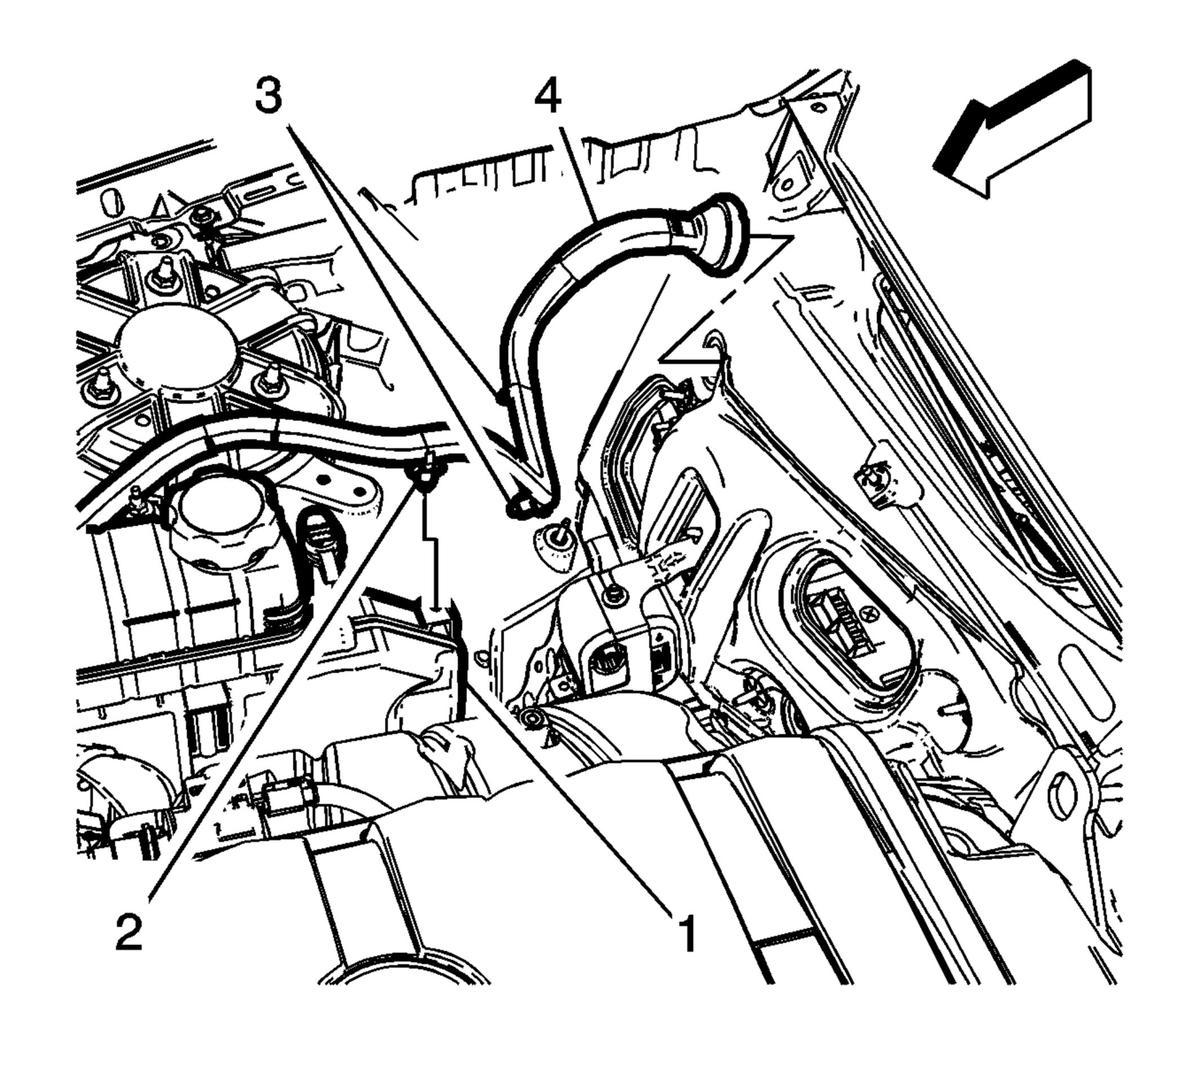
- Install the battery positive cable (4) to the body harness and wheel house with the retainers (3).
 Courtesy of GENERAL MOTORS COMPANY
- Install the battery positive cable retainer (2), to the radiator surge tank (1).
- Attach the following to the pre-fuse block:
 Courtesy of GENERAL MOTORS COMPANY
- Starter Solenoid Cable (4).
- Battery Positive Barrel Fastener (3). Tighten to 15 N.m (11 lb ft).
- Pre-Fuse Block Cover (2).
- Battery Jumper Post Cover (1).
- Reposition the brake pressure modulator valve. Refer to Brake Pressure Modulator Valve Replacement
.
- Install the front plenum panel. Refer to Plenum Front Panel Replacement
.
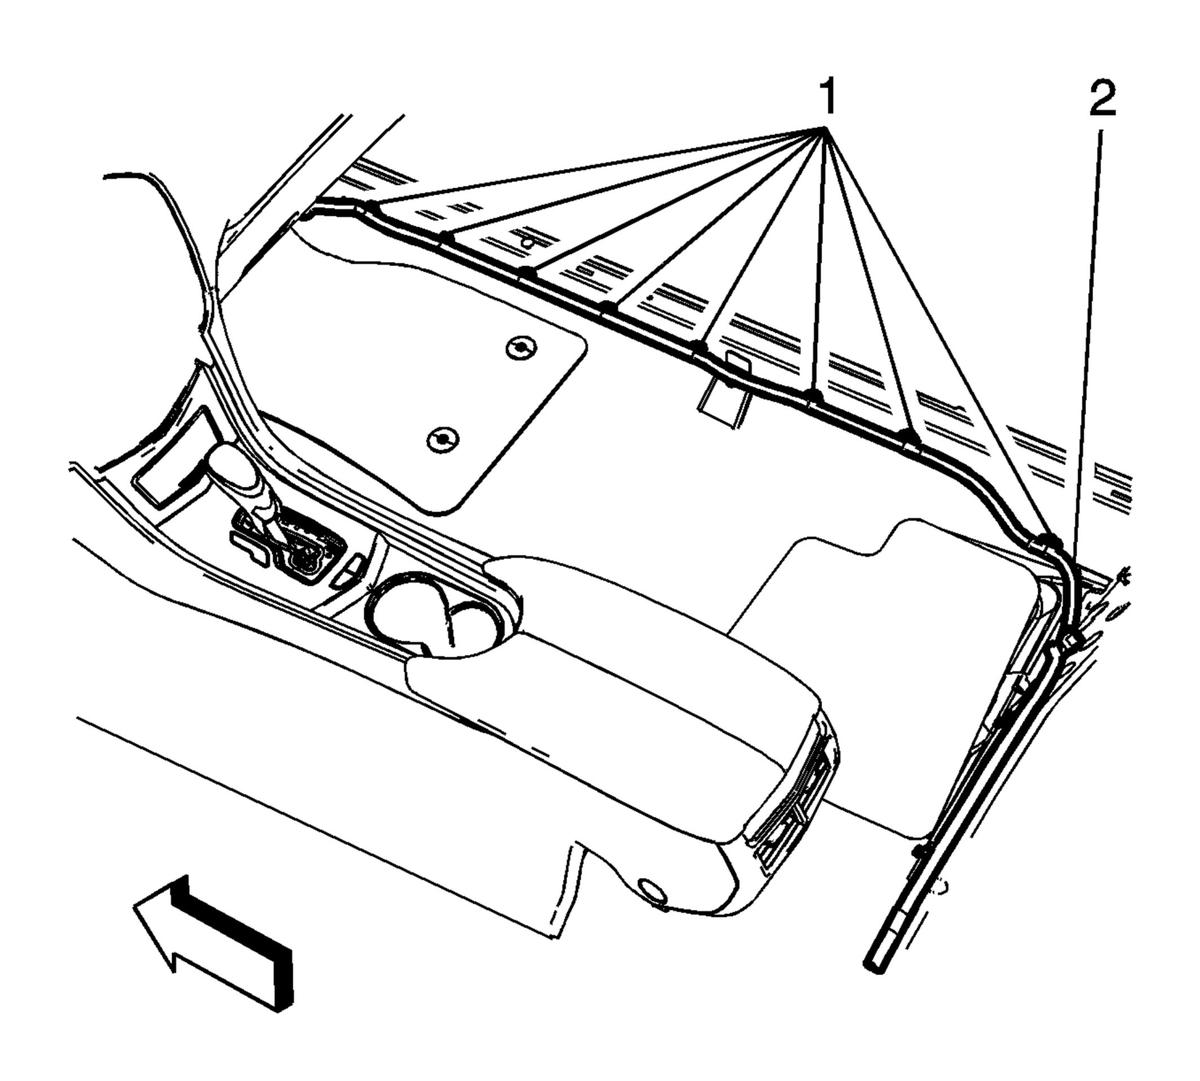
- Attach the battery positive cable (2) to the right side passenger compartment with the retainers (1).
 Courtesy of GENERAL MOTORS COMPANY
- Position the battery positive cable (2) along the rear seat area with the retainers (1).
 Courtesy of GENERAL MOTORS COMPANY
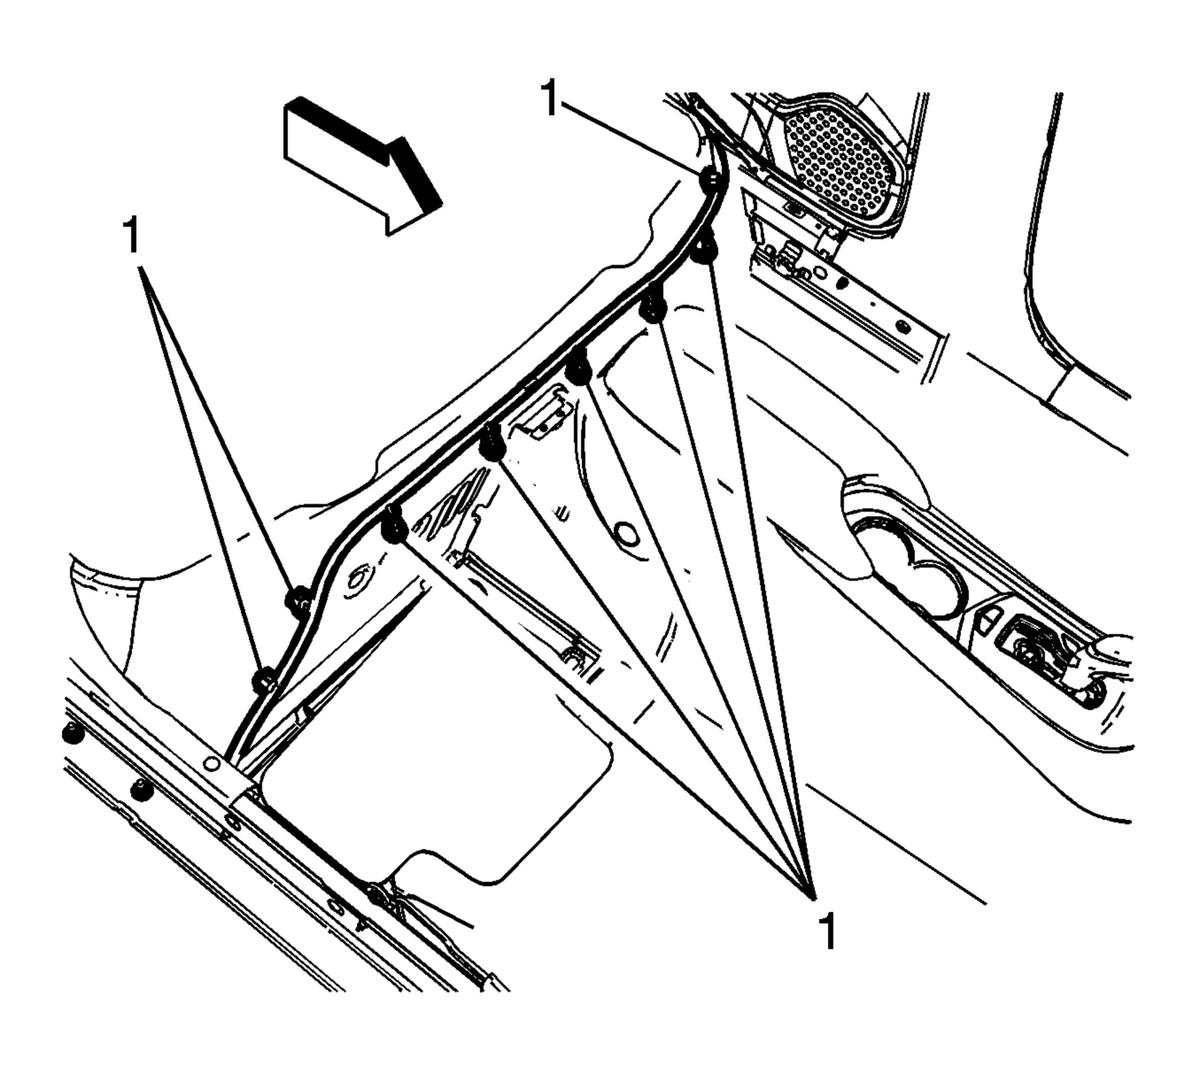
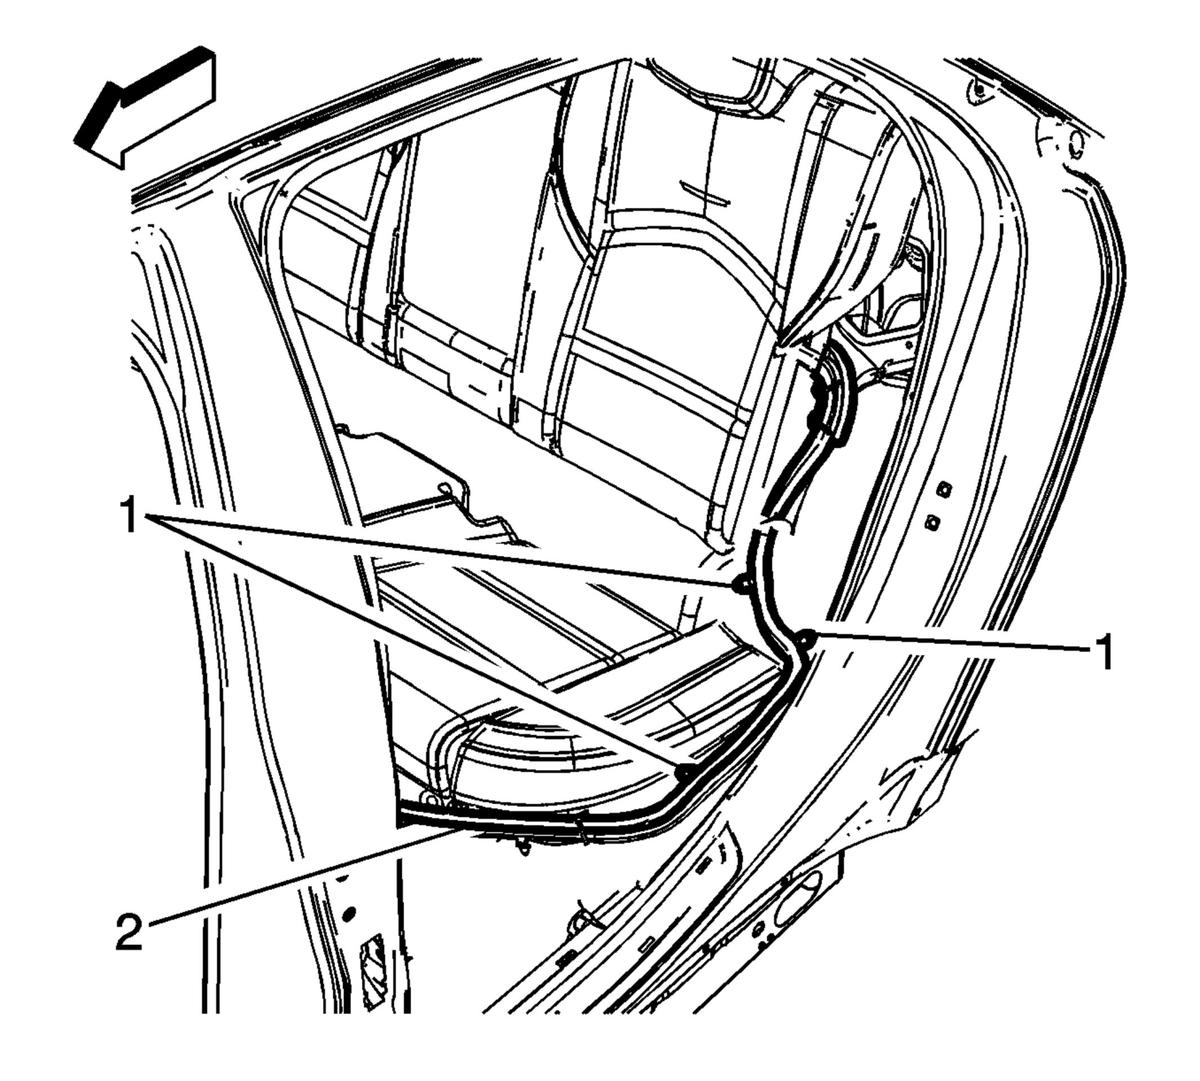
- Install the battery positive cable (2) along the left rear seat with the retainers (1).
 Courtesy of GENERAL MOTORS COMPANY
- Position the front and rear carpet back into position.
- Install the front side door sill garnish molding. Refer to Front Side Door Sill Garnish Molding Replacement
.
- Install the rear side door sill garnish molding left and right. Refer to Rear Side Door Sill Garnish Molding Replacement
.
- Install the center pillar lower trim panel. Refer to Center Pillar Lower Trim Panel Replacement
.
- Install the rear seat cushion. Refer to Rear Seat Cushion Removal and Installation
.
- Install the rear seat back bolster. Refer to Rear Seat Back Bolster Replacement
.
- Install the passenger seat. Refer to Driver or Passenger Seat Removal and Installation
.
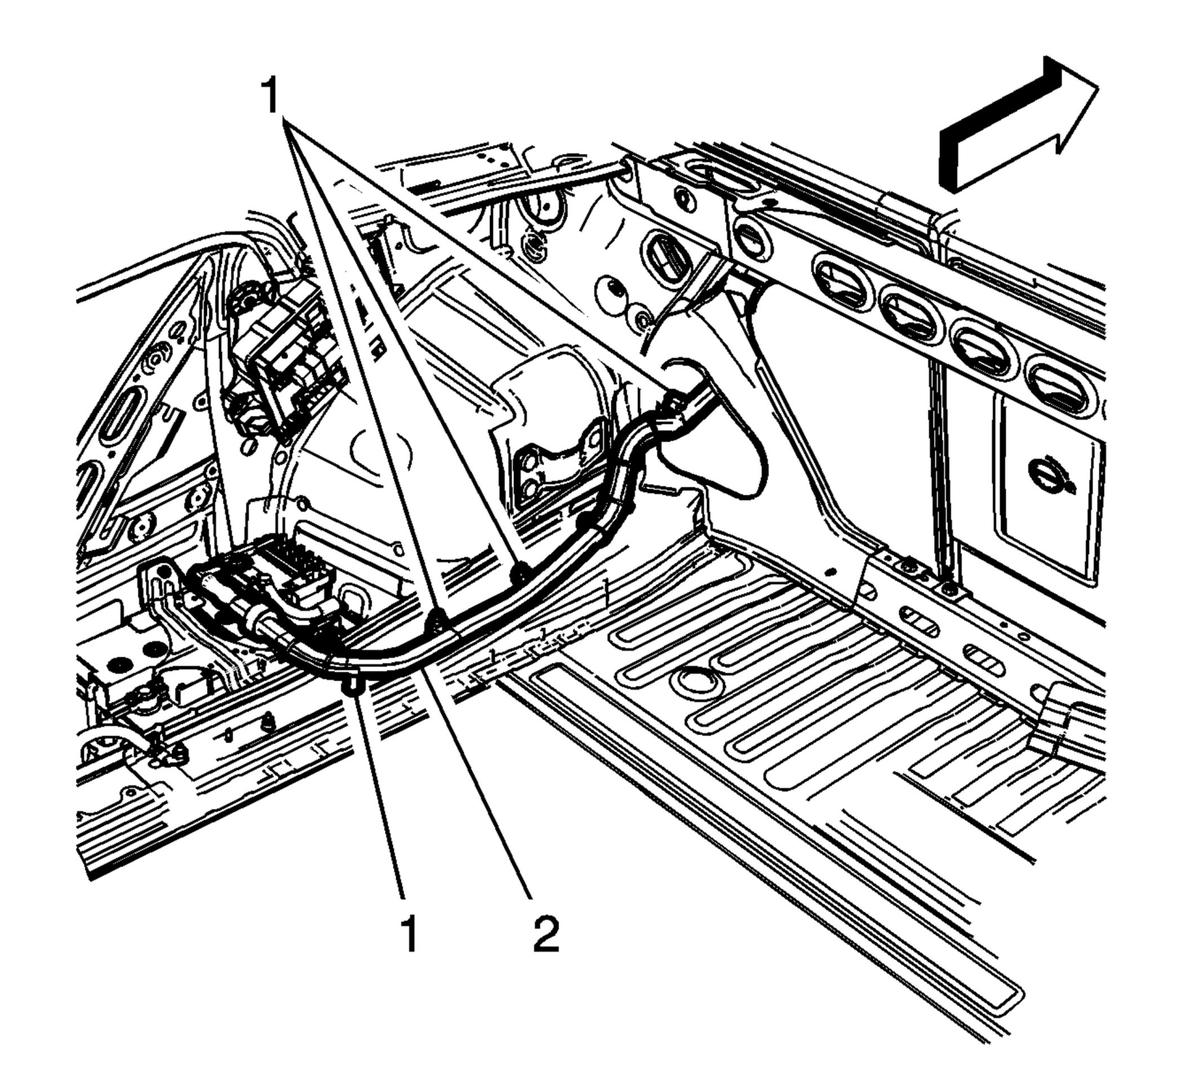
- Install the battery positive cable (2) along the left rear compartment area with the retainers (1).
 Courtesy of GENERAL MOTORS COMPANY
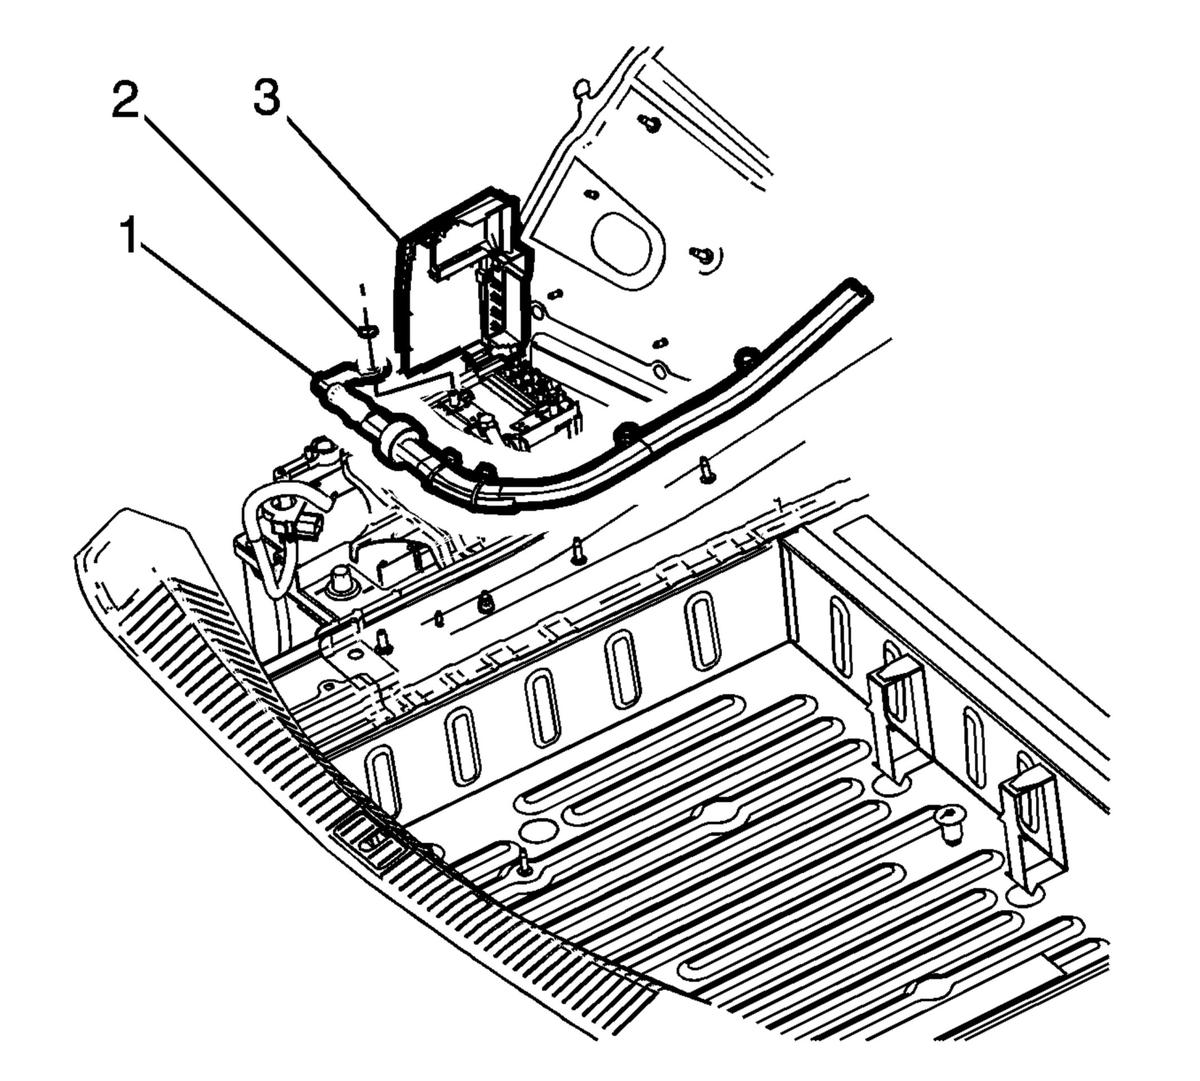
- Install the battery positive cable terminal (1) to the battery fuse block stud and tighten the fastener (2) to 12 N.m (106 lb in).
 Courtesy of GENERAL MOTORS COMPANY
- Install the battery fuse block cover (3).
- Connect the negative battery cable. Refer to Battery Negative Cable Disconnection and Connection .
- Install the left side rear compartment trim panel. Refer to Rear Compartment Side Trim Replacement - Left Side
.