- Open the hood.
- Remove the windshield wiper arms. Refer to Windshield Wiper Arm Replacement
.
- Remove the windshield side reveal molding. Refer to Windshield Side Reveal Molding Replacement .
- Remove the air inlet grille. Refer to Air Inlet Grille Panel Replacement
.
- Remove the windshield garnish moldings. Refer to Windshield Garnish Molding Replacement
.
- Lower the front section of the headliner only to access the urethane adhesive bead. Refer to Headlining Trim Panel Replacement (With Sunroof)
.
- Remove the inside rearview mirror. Refer to Inside Rearview Mirror Replacement
.
NOTE:
If the windshield is equipped with a blackout area around the mirror base bracket, Care Must be used not to cut or scrape the blackout. If the mount bracket comes off the windshield, it can Not be reinstalled and the windshield must be replaced. If the bracket is bonded to the windshield, it is Not reusable. Remove all sensors, cover, electrical devices and bracket from the pins. If the bracket is bonded to the windshield, it is Not reusable.
- Remove the camera. Refer to Front View Camera Replacement (With UFL)
, Front View Camera Replacement (With UGN)
and/or Front View Camera Replacement (With UQT)
.
- Remove the outside moisture sensor. Refer to Windshield Outside Moisture/Ambient Light and Humidity Sensor Replacement
.
- Cover to protect the following parts from broken glass:
WARNING:
If broken glass falls into the defroster outlets, it can be blown into the passenger compartment and cause personal injury.
- Upper dash pad
- Defroster outlets and A/C outlets
- Seats and carpeting
- Using the appropriate tool, carefully cut the windshield lace molding from around the window in order to access the urethane adhesive bead.
NOTE:
Before cutting out a stationary window, apply a double layer of masking tape around the perimeter of the painted surfaces and the interior trim.
- Do the following steps when separating the window from the urethane adhesive:
NOTE:
Keep the cutting edge of the tool against the window. There are window locating pins, one in each corner of the window. Use care Not to remove or cut them off when removing the window. If the window locator pins are cut, it will be necessary to tape the window in place.
- Leave a base of urethane adhesive on the pinchweld flange.
- The only suitable lubrication is clean water, no oils, lubes or soaps.
- BO-39032
Stationary Glass Removal Tool or equivalent in order to remove the window.
- Using the appropriate tool, cut along the bottom of the window separating the window from urethane adhesive. Keep the cutting edge of the tool against the window. Do this from inside the vehicle. While cutting from inside the vehicle, reposition the tool to cut the urethane adhesive along the top and both sides to release the window completely.
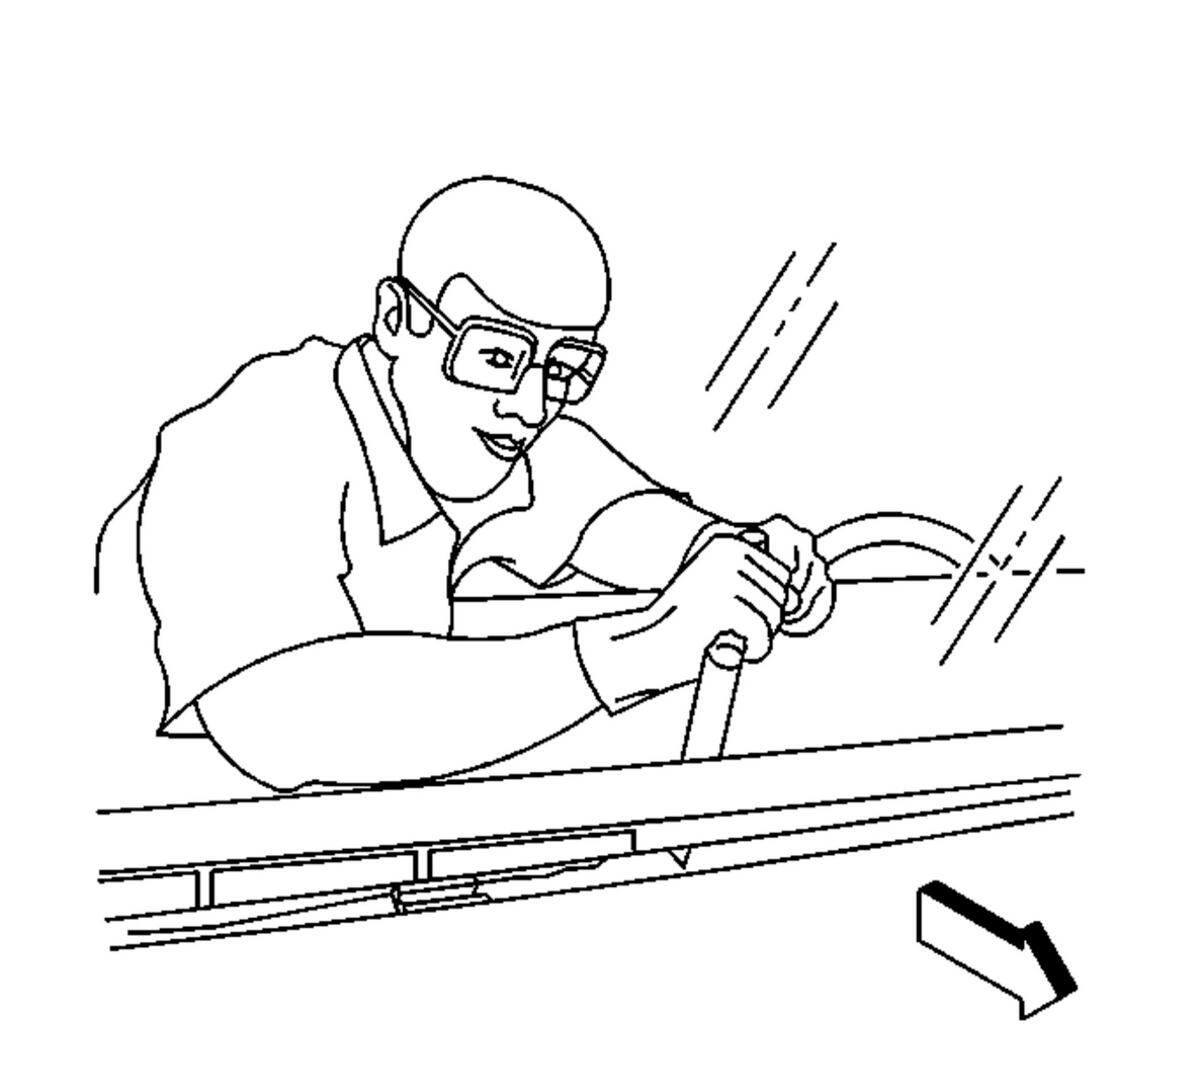 Courtesy of GENERAL MOTORS COMPANY
- With an assistant, remove the windshield (1) and locator pins (2) from the vehicle.
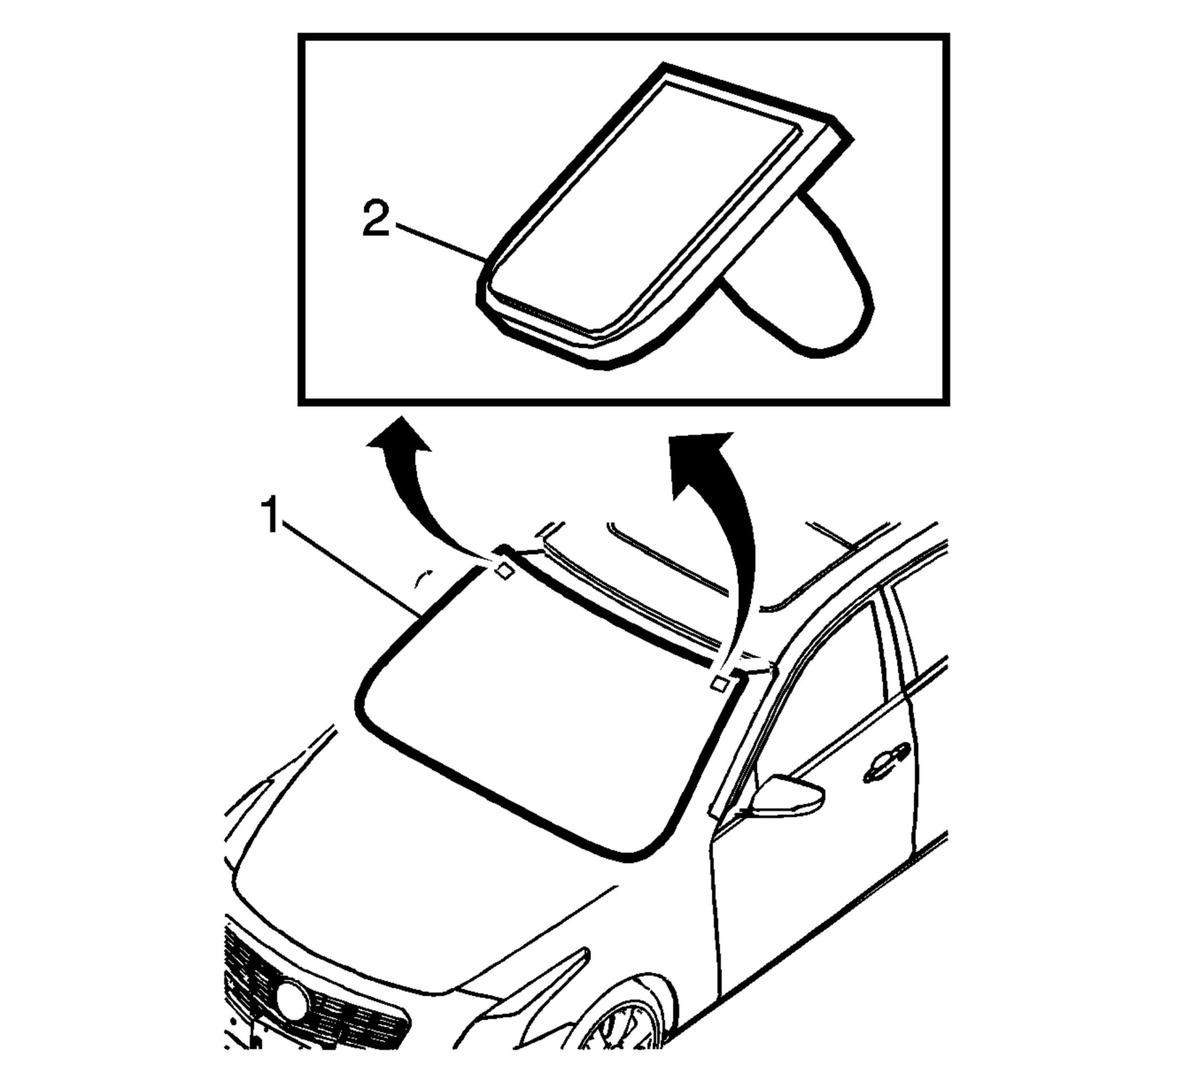 Courtesy of GENERAL MOTORS COMPANY