Removal Procedure
 Courtesy of GENERAL MOTORS CORP.
- Disconnect the battery negative cable. Refer to Battery Negative Cable Disconnect/Connect Procedure .
- Remove the generator drive belt. Refer to Drive Belt Replacement - Generator
in Engine Mechanical - 4.6L (LH2).
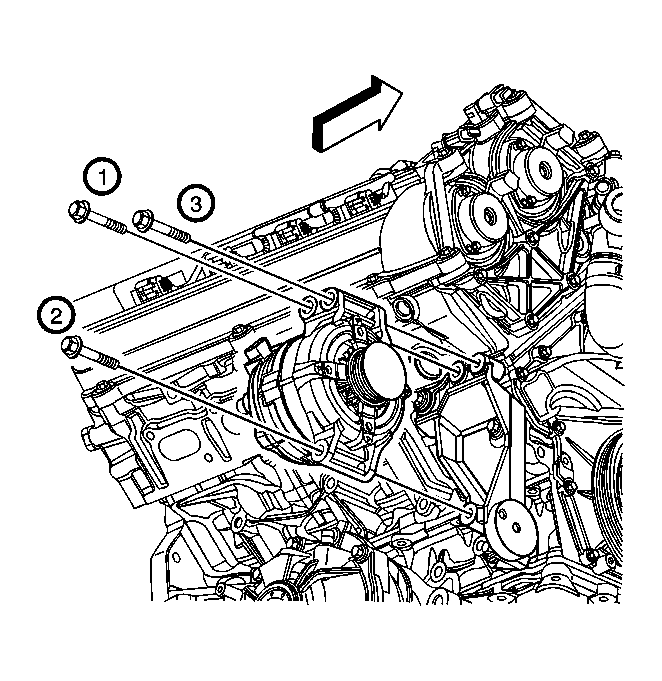
- Remove the upper generator mounting bolts (1, 3).
- Raise and support the vehicle. Refer to Lifting and Jacking the Vehicle
in General Information.
- Remove the front air deflector. Refer to Air Deflector Replacement - Front
in Body Front End.
 Courtesy of GENERAL MOTORS CORP.
- Remove the front wheels. Refer to Tire and Wheel Removal and Installation
in Tires and Wheels.
- Remove the right side wheelhouse liner. Refer to Wheelhouse Liner Replacement - Front
in Body Front End.
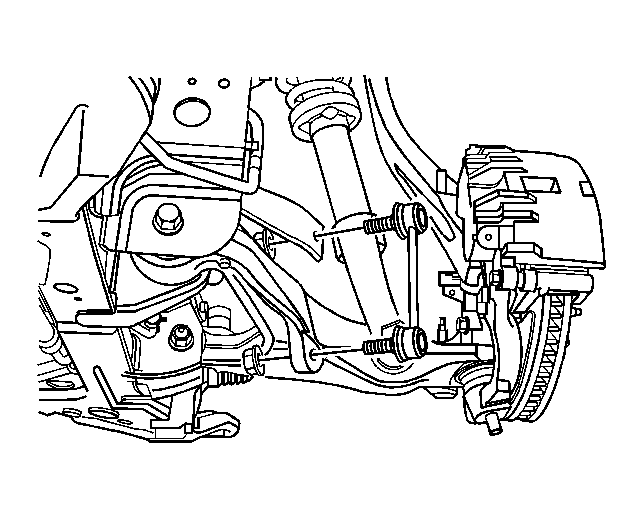
- Remove the right and left side stabilizer shaft links at the lower control arm. Refer to Stabilizer Shaft Link Replacement
in Front Suspension.
- Rotate the stabilizer shaft downward to gain access to the generator and to create a removal envelop for generator removal.
- Perform the remainder of the removal process through the wheelhouse opening.
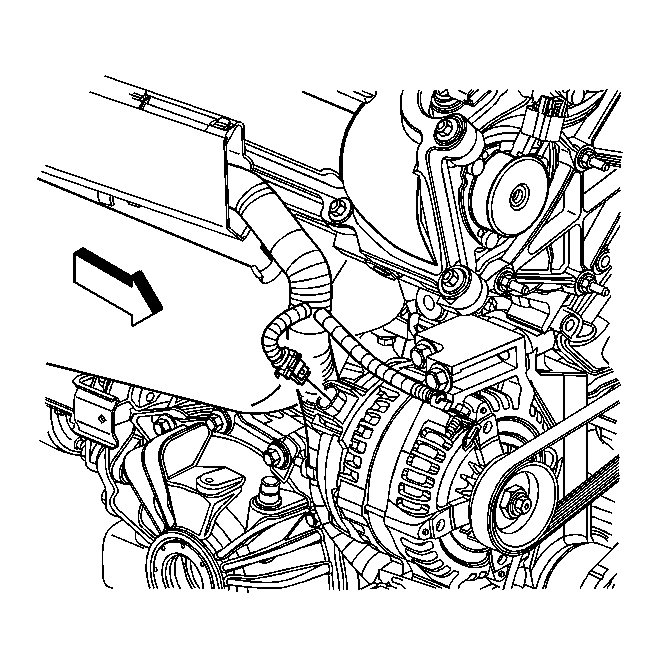
- Cut the tie strap securing the wiring harness to the generator.
 Courtesy of GENERAL MOTORS CORP.
- Remove the lower generator mounting bolt.
- Lift the generator off of the mounting bracket in order to gain access to the connector and the generator output BAT terminal nut.
- Disconnect the wire harness electrical connector from the generator.
- Reposition the protective boot from the generator output battery terminal for access.
- Remove the generator output battery terminal nut and disconnect the battery positive lead from the generator.
- Remove the generator from the vehicle.