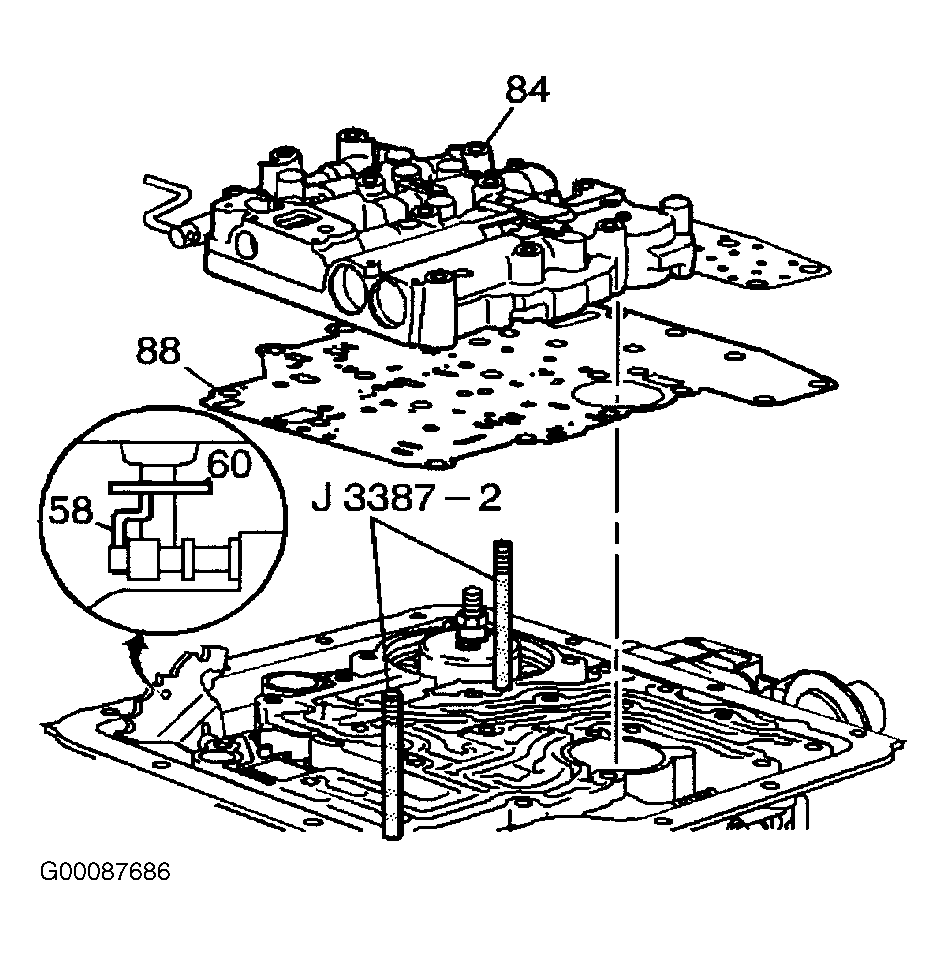
Main Case Control Valve Body: Installation
- Install the 2 check balls (85) into the case fluid passages. See Figure
. Install Alignment Pins (J 3387-2) into the transmission case. See Fig 1
. Install the spacer plate to case gasket (88). Note the position of the manual valve link (the long end into the manual valve, the short end into the detent lever). Install the control valve assembly (84) onto the transmission case. Connect the manual valve link (58) to the detent lever (60). Remove alignment pints.
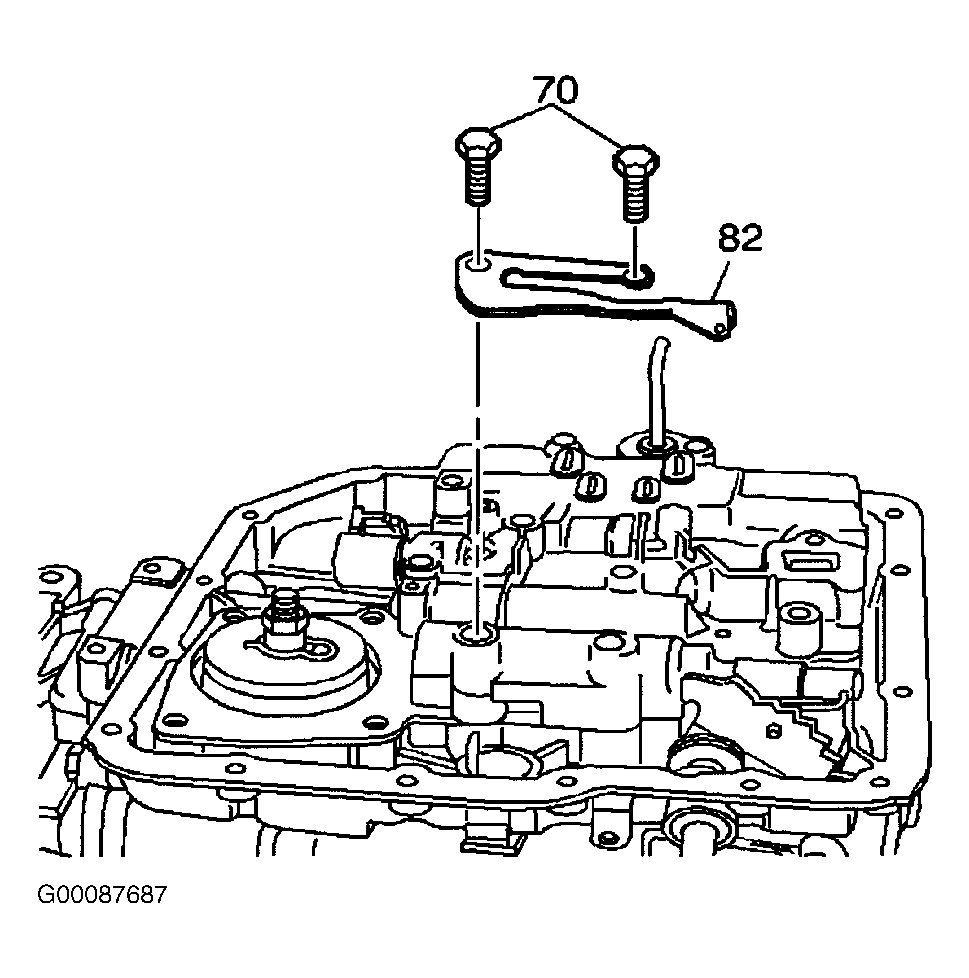
- Install the detent roller assembly (82). See Fig 2
. Install the detent roller assembly bolts (70). Tighten the bolts finger tight only. Torque valve body bolts in a spiral pattern starting from the center. If the bolts are torqued at random, valve bores may be distorted and inhibit valve operation.
- Install the control valve assembly bolts (70). Tighten the bolts to specification. See TORQUE SPECIFICATIONS
. Install the forward band servo cover gasket (92). Install the forward band servo cover (91). Install the forward band servo cover bolts (90). Tighten the cover bolts to specification.
 Courtesy of GENERAL MOTORS CORP.
 Courtesy of GENERAL MOTORS CORP.