Removal Procedure
 Courtesy of GENERAL MOTORS COMPANY
- Relieve the fuel system pressure. Refer to Fuel Pressure Relief (CH 48027) , Fuel Pressure Relief (Without CH 48027) .
- Drain the fuel tank. Refer to Fuel Tank Draining .
- Remove the left rear wheel house liner. Refer to Rear Wheelhouse Panel Liner Replacement
.
- Using compressed air, blow any dirt and/or debris from around the fuel fill pipe and evaporative emission (EVAP) line connections.
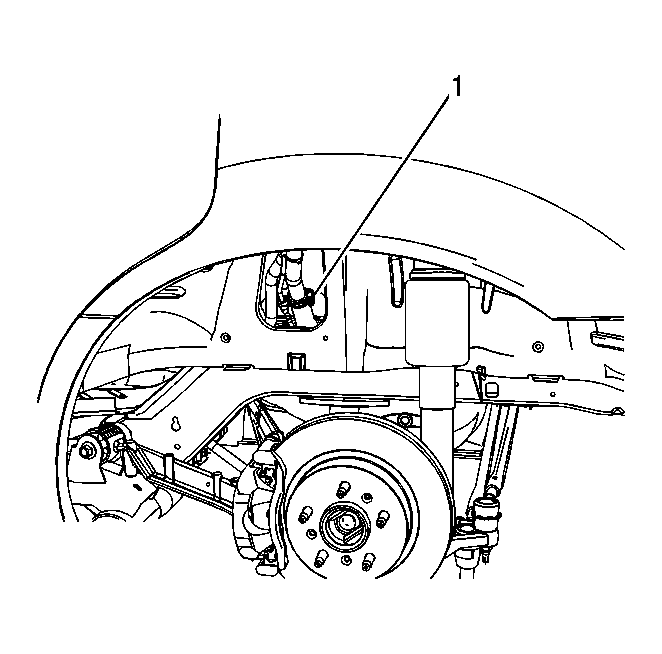
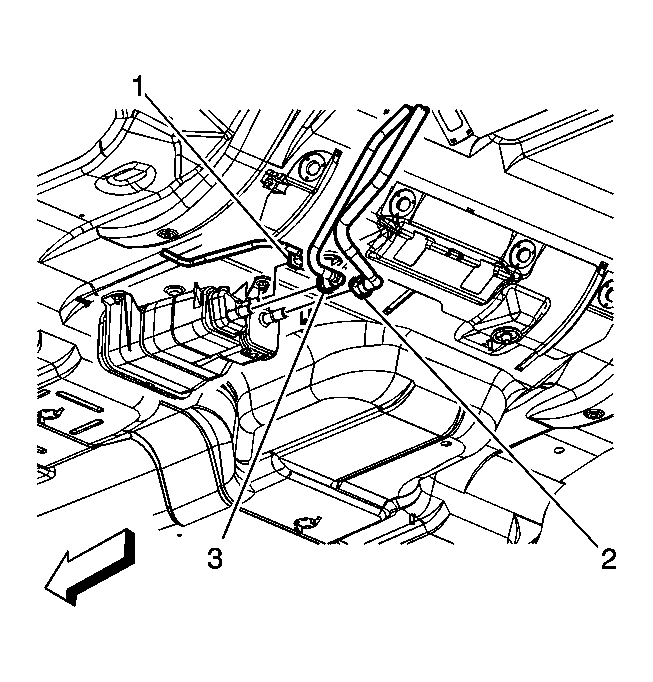
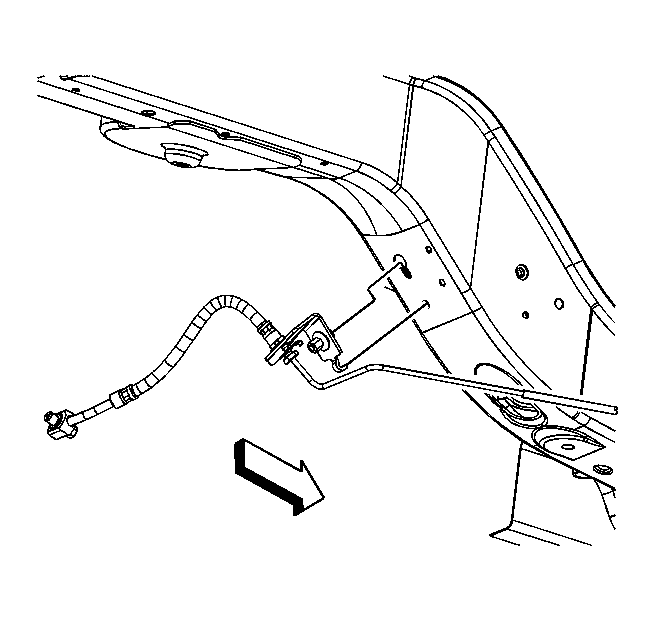
- Loosen the fuel fill hose clamp (1) at the fill pipe.
 Courtesy of GENERAL MOTORS COMPANY
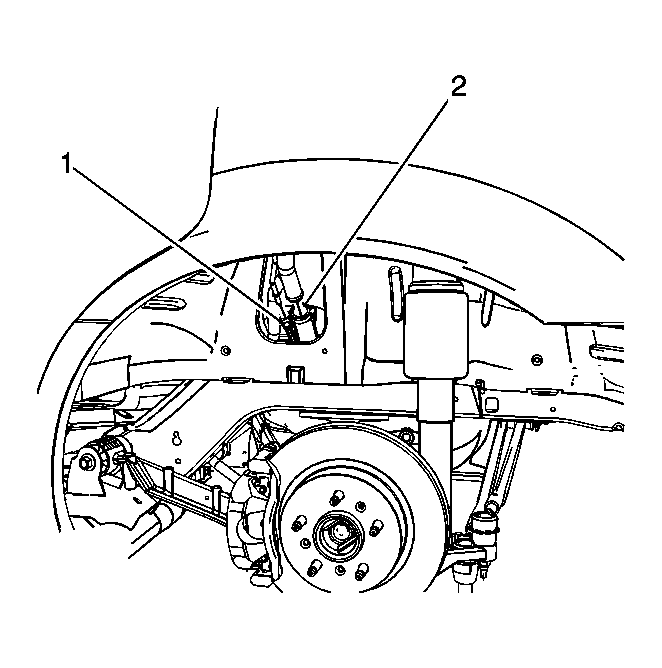
- Disconnect the fuel fill hose (2) from the fuel fill pipe.
- Disconnect the fuel tank EVAP recirculation line quick connect fitting (1) from the fill pipe line. Refer to Plastic Collar Quick Connect Fitting Service .
 Courtesy of GENERAL MOTORS COMPANY
- Disconnect the automatic level control sensor link from the left rear suspension control arm, if equipped.
 Courtesy of GENERAL MOTORS COMPANY
- Disconnect the left and right electronic position sensor links from the ball studs. (left side shown, right side similar).
 Courtesy of GENERAL MOTORS COMPANY
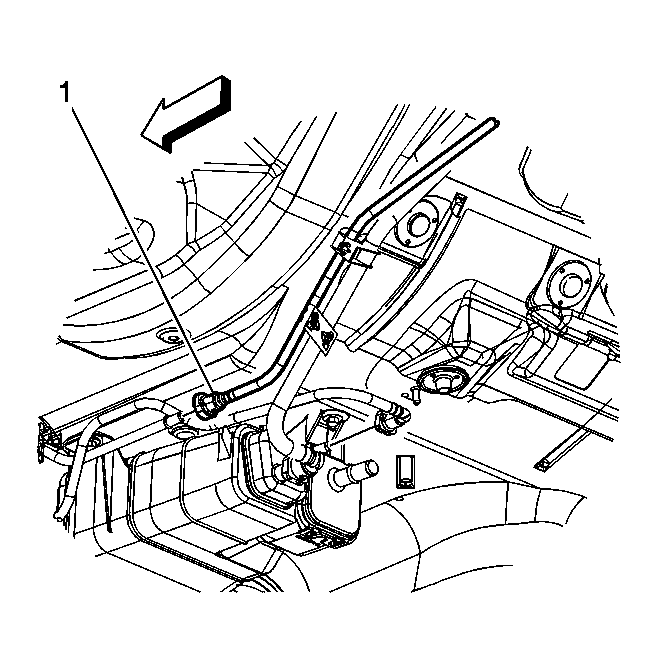
- Disconnect the fill pipe vent line (2) and the fuel tank vapor line (3) quick connect fittings from the EVAP canister. Refer to Plastic Collar Quick Connect Fitting Service .
 Courtesy of GENERAL MOTORS COMPANY
- Disconnect the fuel feed line quick connect fitting (1) from the chassis line. Refer to Plastic Collar Quick Connect Fitting Service .
 Courtesy of GENERAL MOTORS COMPANY
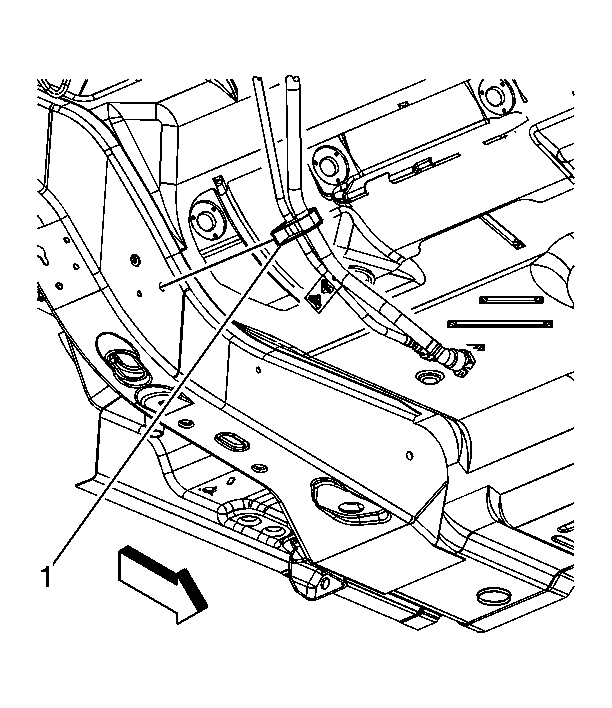
- Remove the fuel and EVAP line retainer (1) from the side rail.
 Courtesy of GENERAL MOTORS COMPANY
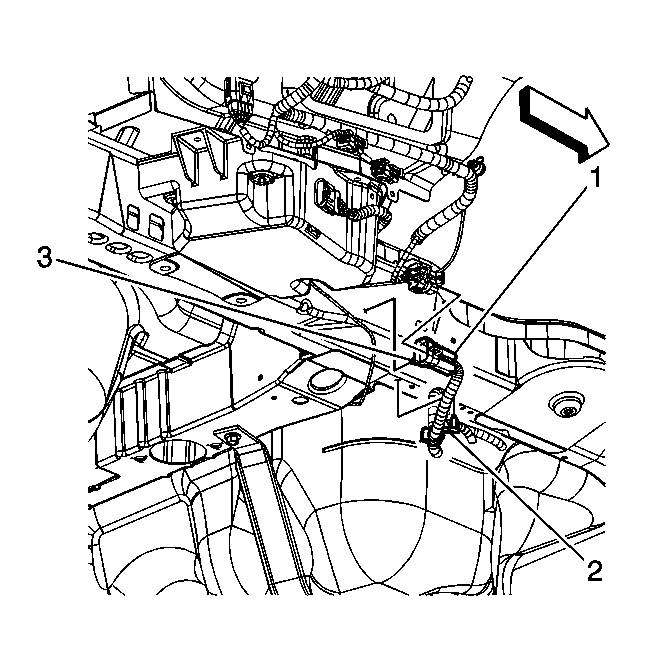
- Disconnect the body harness electrical connector from the fuel tank harness electrical connector (1).
- Remove the fuel tank harness clips (2, 3) from the rear compartment side rail.
- Remove the exhaust system. Refer to Exhaust System Replacement
.
 Courtesy of GENERAL MOTORS COMPANY
- Loosen the left and right rear brake hose bracket nut and slide the stud out of the keyhole slot in the side rail. (left side shown, right side similar).
 Courtesy of GENERAL MOTORS COMPANY
- Remove the rear shock bolts.
- Support the front of the vehicle with a jack stand at the engine cradle.
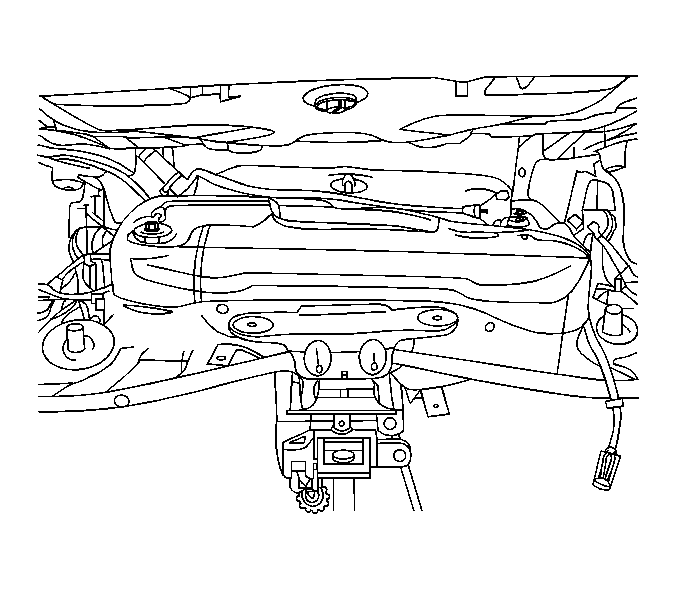
- Support the rear suspension crossmember with a suitable adjustable jack.
 Courtesy of GENERAL MOTORS COMPANY
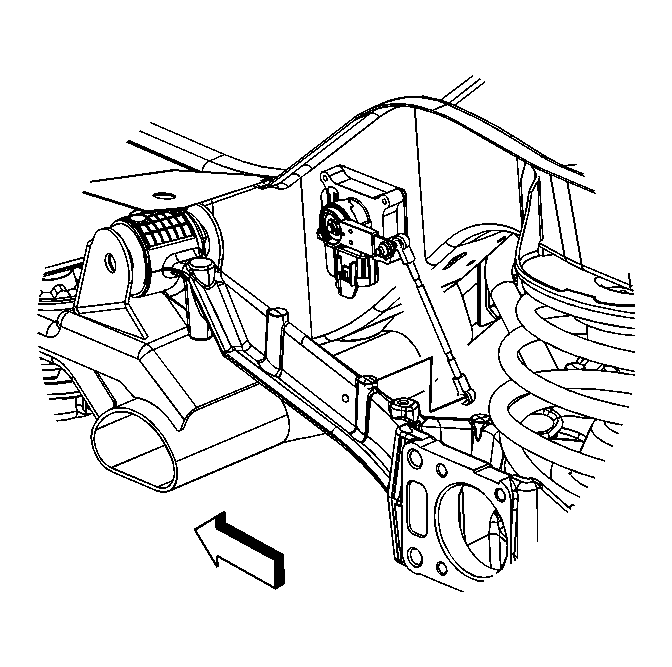
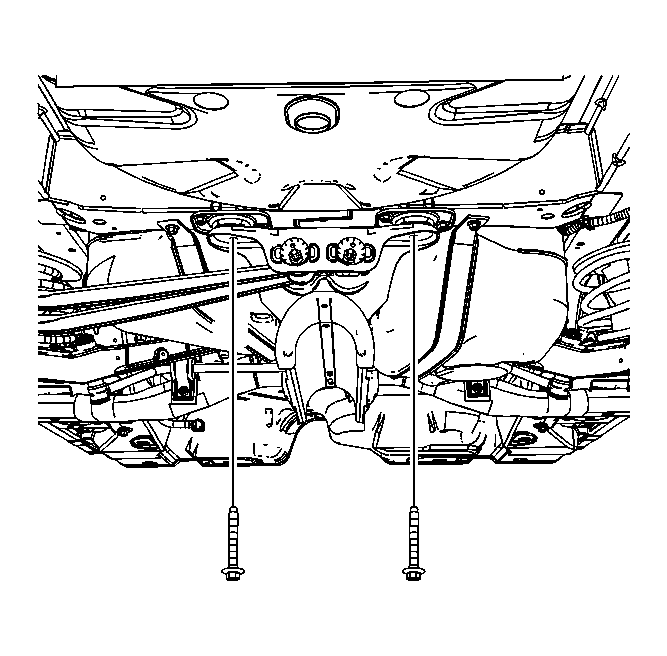
- Remove the rear suspension crossmember bolts.
 Courtesy of GENERAL MOTORS COMPANY
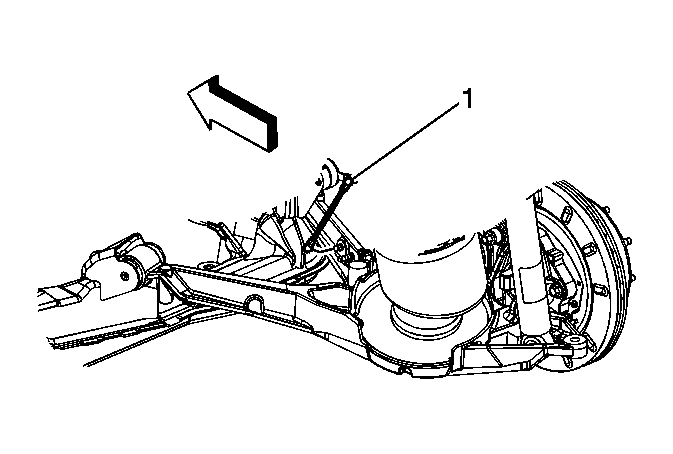
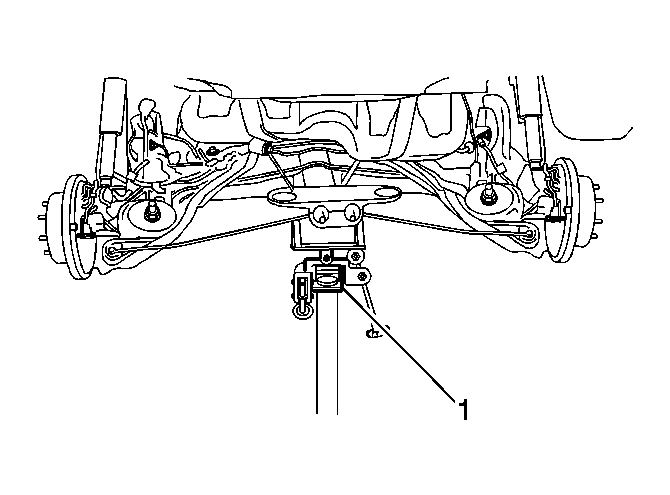
- Using the adjustable jack (1), slowly lower the rear suspension crossmember allowing the crossmember to pivot at the front bolts, until the rear springs can be removed.
- Remove the rear coil springs.
 Courtesy of GENERAL MOTORS COMPANY
- Remove the fuel tank strap bolts.
- Remove the fuel tank straps.
- Remove the fuel tank.