Removal Procedure
 Courtesy of GENERAL MOTORS COMPANY
- Relieve the fuel system pressure. Refer to Fuel Pressure Relief (CH 48027) , Fuel Pressure Relief (Without CH 48027) .
- Drain the fuel tank. Refer to Fuel Tank Replacement (NT7) , Fuel Tank Replacement (NU6) .
- Remove the left rear wheelhouse liner. Refer to Rear Wheelhouse Panel Liner Replacement
.
- Using compressed air, blow any dirt and/or debris from around the fuel fill pipe and evaporative emission (EVAP) line connections.
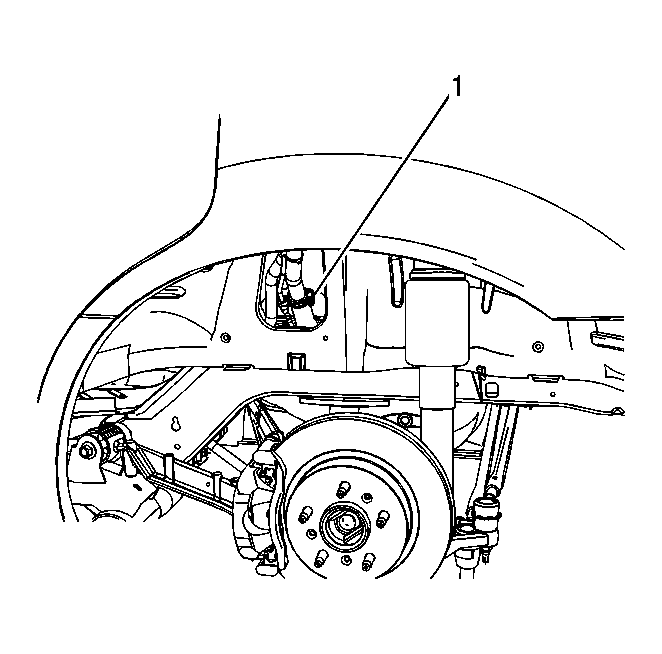
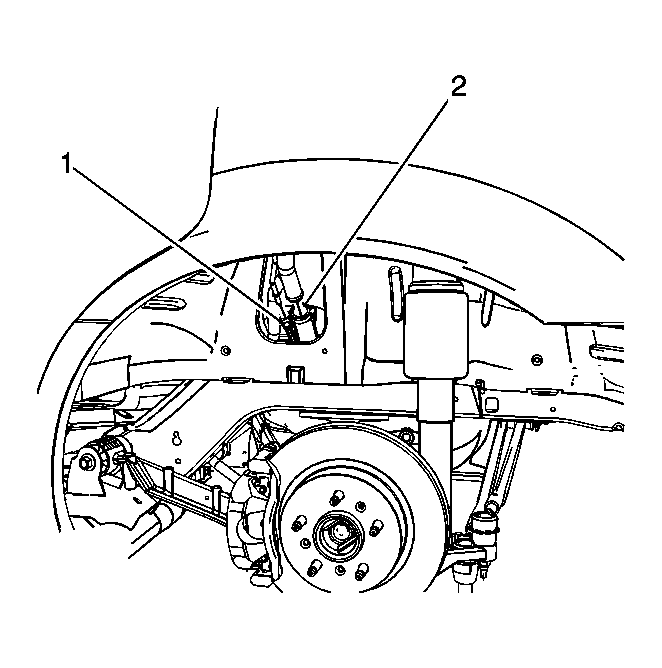
- Loosen the fuel fill hose clamp (1) at the fill pipe.
 Courtesy of GENERAL MOTORS COMPANY
- Disconnect the fuel fill hose (2) from the fuel fill pipe.
- Disconnect the fuel tank EVAP recirculation line quick connect fitting (1) from the fill pipe line. Refer to Plastic Collar Quick Connect Fitting Service .
 Courtesy of GENERAL MOTORS COMPANY
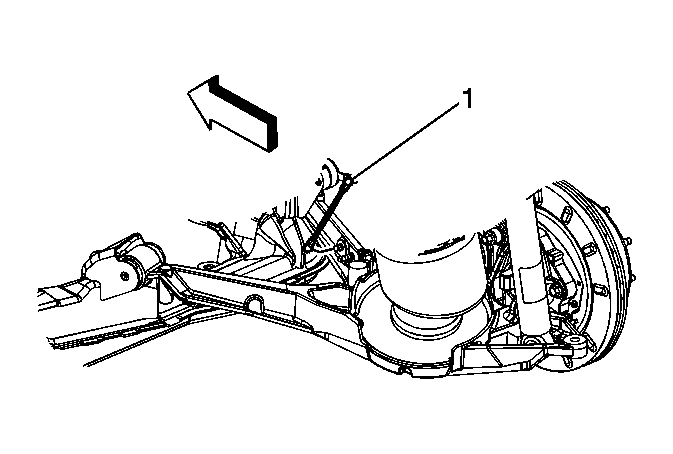
- Disconnect the left and right electronic position sensor links (1) from the ball studs.
 Courtesy of GENERAL MOTORS COMPANY
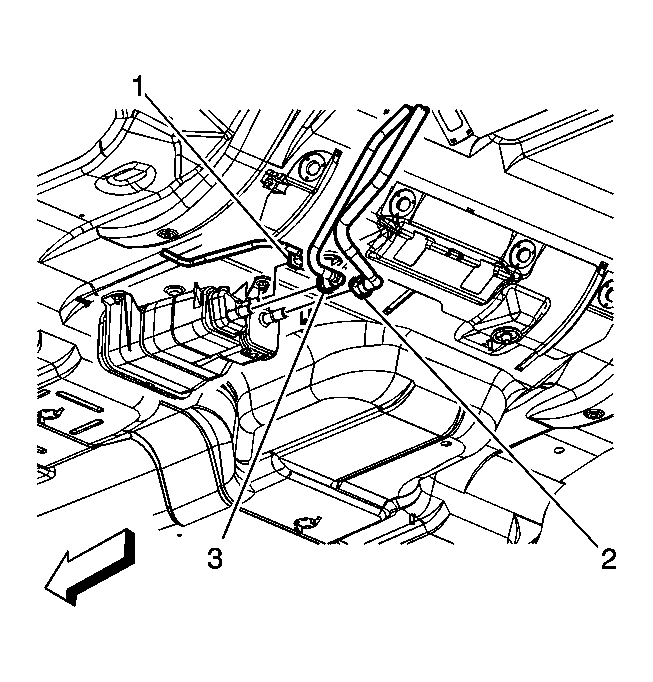
- Disconnect the fill pipe vent line (2) and the fuel tank vapor line (3) quick connect fittings from the EVAP canister. Refer to Plastic Collar Quick Connect Fitting Service .
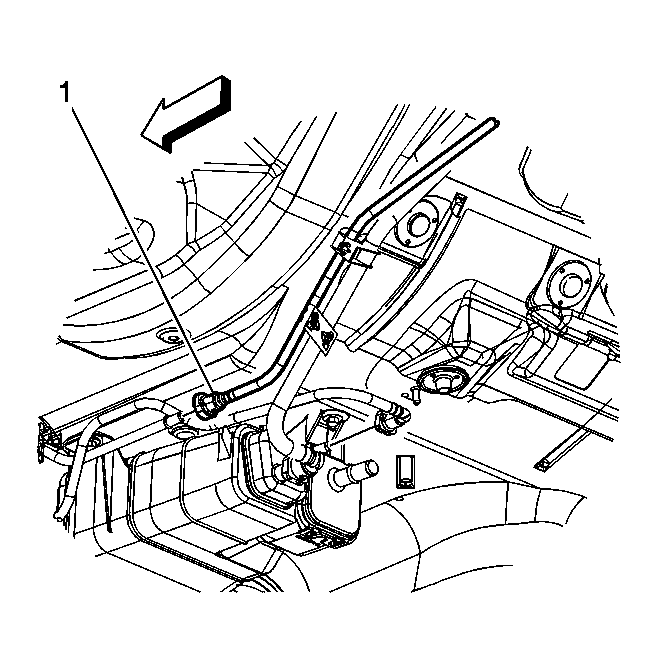 Courtesy of GENERAL MOTORS COMPANY
- Disconnect the fuel feed line quick connect fitting (1) from the chassis line. Refer to Plastic Collar Quick Connect Fitting Service .
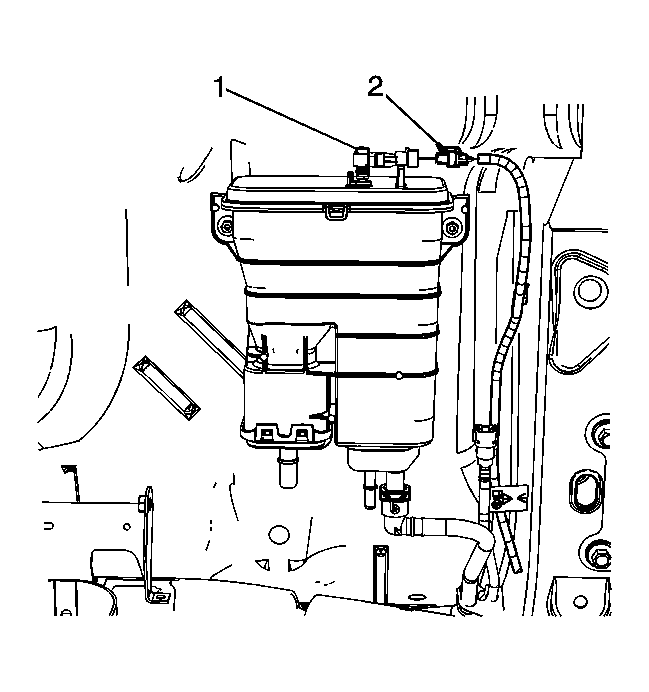 Courtesy of GENERAL MOTORS COMPANY
- Disconnect the fuel tank wiring harness electrical connector (2) from the fuel tank pressure sensor.
 Courtesy of GENERAL MOTORS COMPANY
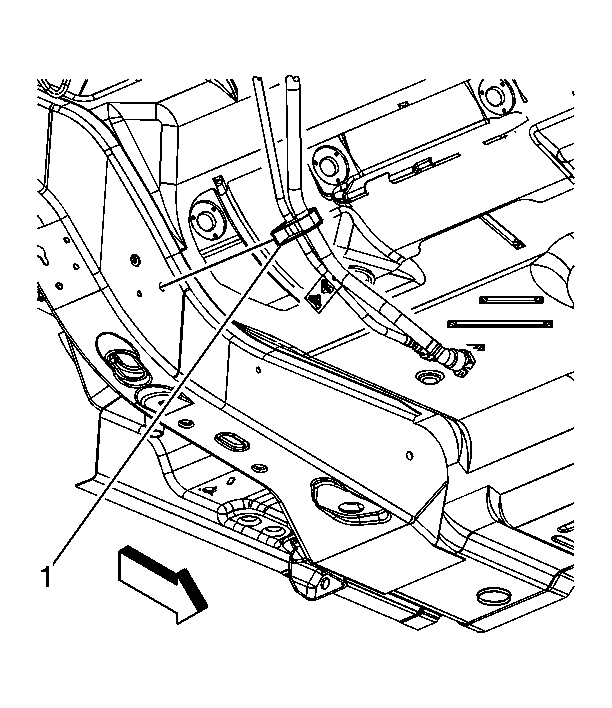
- Remove the fuel and EVAP line retainer (1) from the side rail.
 Courtesy of GENERAL MOTORS COMPANY
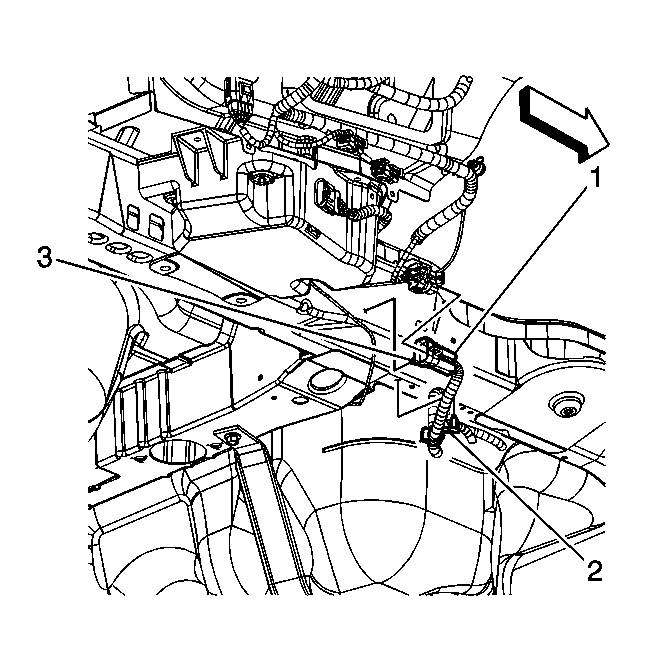
- Disconnect the body harness electrical connector from the fuel tank harness electrical connector (1).
- Remove the fuel tank harness clips (2, 3) from the rear compartment side rail.
- Remove the exhaust system. Refer to Exhaust System Replacement
.
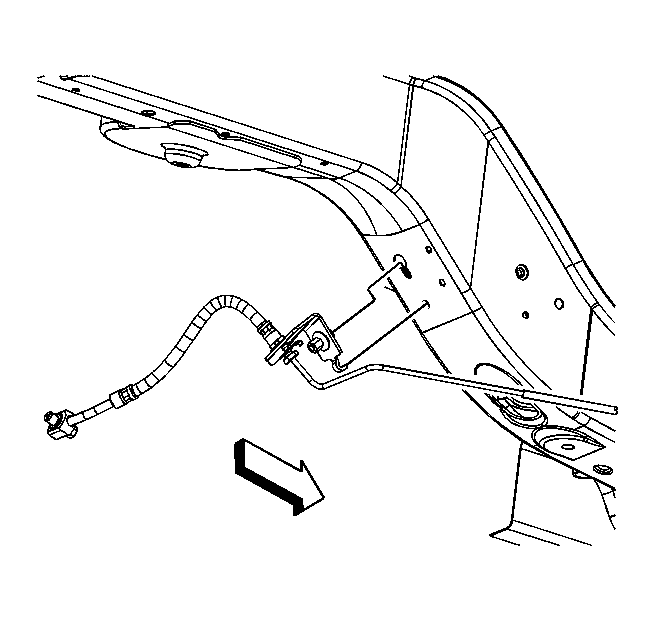 Courtesy of GENERAL MOTORS COMPANY
- Loosen the left and right rear brake hose bracket nut and slide the stud out of the keyhole slot in the side rail.
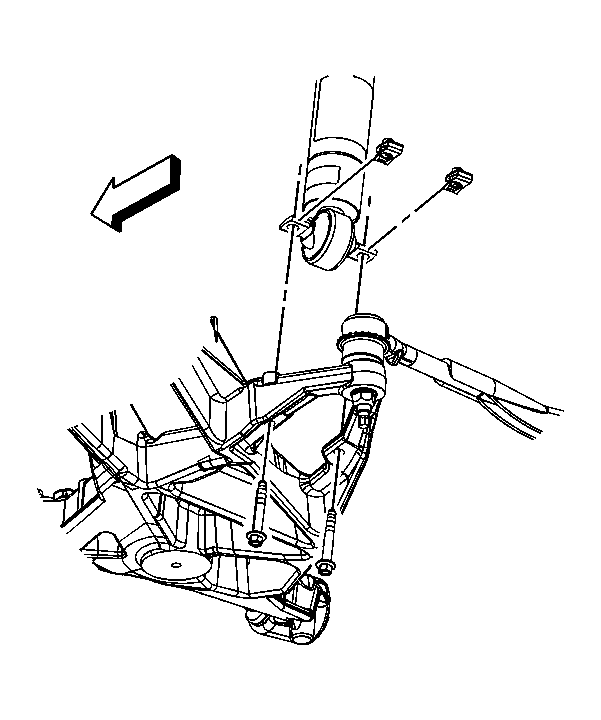 Courtesy of GENERAL MOTORS COMPANY
- Remove the rear shock bolts.
- Support the front of the vehicle with a jack stand at the engine cradle.
- Support the rear suspension crossmember with a suitable adjustable jack.
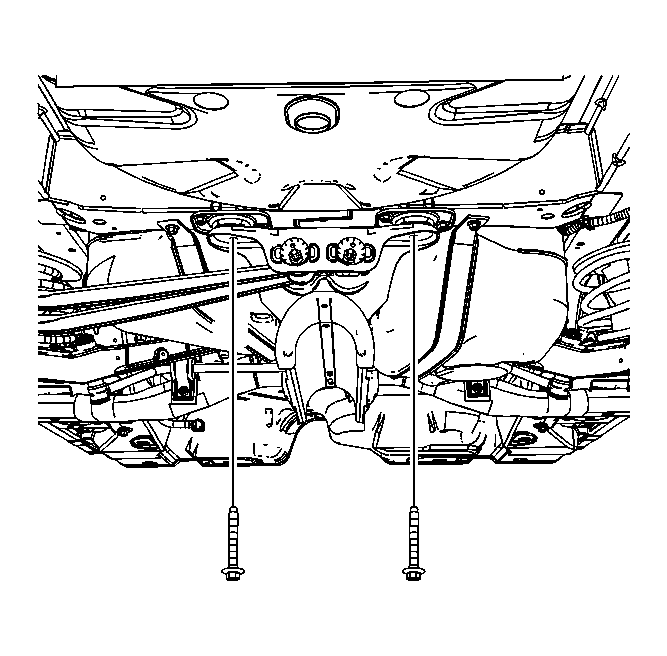 Courtesy of GENERAL MOTORS COMPANY
- Remove the rear suspension crossmember bolts.
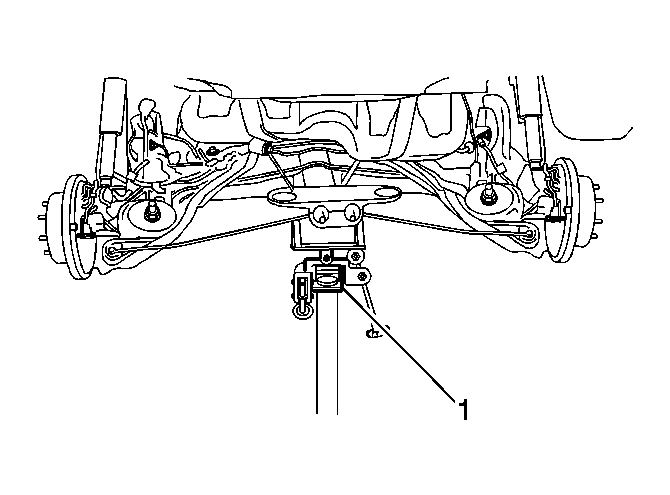 Courtesy of GENERAL MOTORS COMPANY
- Using the adjustable jack (1), slowly lower the rear suspension crossmember allowing the crossmember to pivot at the front bolts, until the rear springs can be removed.
- Remove the rear coil springs.
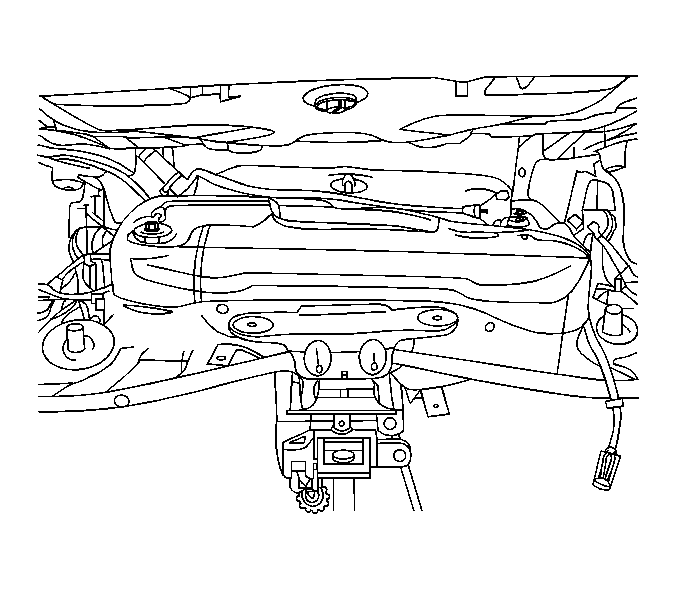 Courtesy of GENERAL MOTORS COMPANY
- Remove the fuel tank strap bolts.
- Remove the fuel tank straps.
- Remove the fuel tank.
- Place the fuel tank on a suitable work surface.