SRS Unit Replacement: Removal
- Do the battery terminal disconnection procedure (see
BATTERY TERMINAL DISCONNECTION AND RECONNECTION
), then wait at least 3 minutes before starting work.
- Remove the center console (see
CENTER CONSOLE REMOVAL/INSTALLATION
).
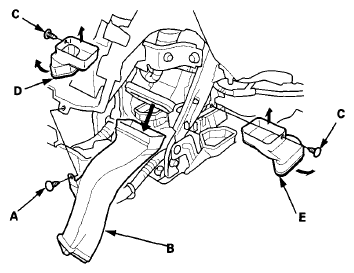
- Detach the clip (A), then pull down on the center heater joint duct (B) to remove it.
 Courtesy of AMERICAN HONDA MOTOR CO., INC.
- Remove the clips (C), then remove the left and right heater ducts (D, E).
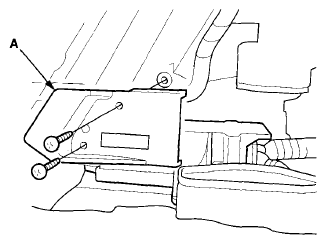
- Remove the two screws from the driver's side center console clip bracket (A), then remove the bracket.
 Courtesy of AMERICAN HONDA MOTOR CO., INC.
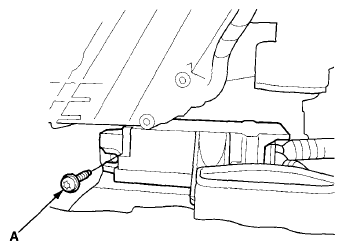
- Remove the TORX bolt (A) using a TORX T30 bit.
 Courtesy of AMERICAN HONDA MOTOR CO., INC.
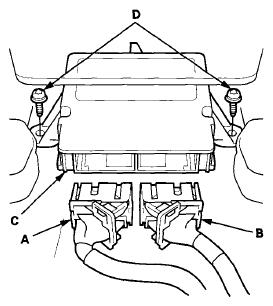
- Disconnect SRS unit connectors A (39P) and B (39P) from the SRS unit (C).
 Courtesy of AMERICAN HONDA MOTOR CO., INC.
- Remove the TORX bolts (D) using a TORX T30 bit, then remove the SRS unit from the driver's side.