Rear Safing Sensor Replacement: Installation
- Install the rear safing sensor (A) with the new TORX bolt (B) using a TORX T30 bit, and tighten the TORX bolt to the specified torque.
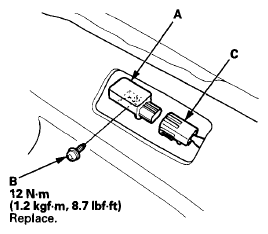 Courtesy of AMERICAN HONDA MOTOR CO., INC.
- Connect the SRS floor wire harness 2P connector (C) to the rear safing sensor.
- Do the battery terminal reconnection procedure (see
BATTERY TERMINAL DISCONNECTION AND RECONNECTION
).
- Clear any DTCs with the HDS (see HOW TO CLEAR DTCS
).
- Confirm proper SRS operation: Turn the ignition switch to ON (II), or press the engine start/stop button to select the ON mode, and check that the SRS indicator comes on for about 6 seconds and then goes off.
- Install the rear seat cushion (see
REAR SEAT CUSHION COVER REPLACEMENT
).