Oil Pump Overhaul: Installation
- Remove the old oil seal from the oil pump.
- Clean and dry the crankshaft oil seal housing.
- Using the oil seal driver, 64 mm, drive in the new crankshaft oil seal (A) until the oil seal driver bottoms on the pump.
 Courtesy of AMERICAN HONDA MOTOR CO., INC.
- Remove all of the old liquid gasket from the oil pump mating surfaces, the bolts, and the bolt holes.
- Clean and dry the oil pump mating surfaces.
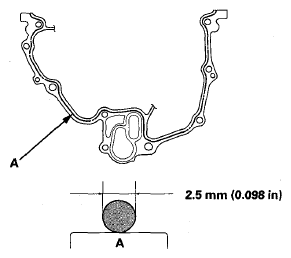
- Apply liquid gasket (P/N 08717-0004, 08718-0003, 08718-0004, or 08718-0009) to the engine block mating surface of the oil pump and to the inside edge of the threaded bolt holes. Install the component within 5 minutes of applying the liquid gasket.
NOTE:
- Apply a 2.5 mm (0.098 in) diameter bead of liquid gasket along the broken line (A).
- If you apply liquid gasket P/N 08718-0012, the component must be installed within 4 minutes.
- If too much time has passed after applying the liquid gasket, remove all of the old liquid gasket and residue, then reapply the new liquid gasket.
 Courtesy of AMERICAN HONDA MOTOR CO., INC.
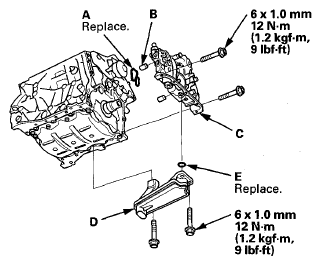
- Apply a light coat of new engine oil to the lip of the crankshaft oil seal, and to the new O-ring (A).
 Courtesy of AMERICAN HONDA MOTOR CO., INC.
- Install the dowel pins (B), then align the inner rotor with the crankshaft, and install the oil pump (C).
NOTE:
- Wait at least 30 minutes before filling the engine with oil.
- Do not run the engine for at least 3 hours after installing the oil pump.
- Clean the excess oil off the crankshaft, and check that the oil seal lip is not distorted.
- Install the oil strainer (D) with a new O-ring (E).
- Install the oil pan (see
CKP PULSE PLATE REPLACEMENT
).
- Install the rocker arm oil control solenoid/oil filter assembly with a new rocker arm oil control solenoid filter (see step 38 under
CRANKSHAFT AND PISTON INSTALLATION
).
- Install the timing belt drive pulley to the crankshaft (see
TIMING BELT DRIVE PULLEY REPLACEMENT
).
- Support the engine with a jack and a wood block under the oil pan.
- Remove the engine support hanger and the engine hanger adapter set, then install the service caps to the cowl cover.
- Install the timing belt (see
TIMING BELT INSTALLATION
).
- Refill the engine with engine oil (see ENGINE OIL REPLACEMENT
).
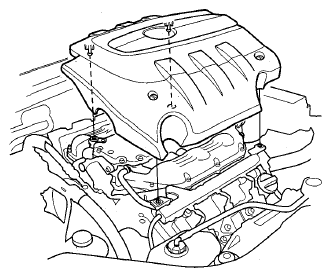
- Install the engine cover.
 Courtesy of AMERICAN HONDA MOTOR CO., INC.
- Install the bulkhead cover (see
FRONT BULKHEAD COVER REPLACEMENT
).
- Remove the hood prop bar, then reattach the hood support strut on the pivot bolt (see
HOOD SUPPORT STRUT REPLACEMENT
),
- Install the passenger's side front fender trim (see
FRONT FENDER TRIM REPLACEMENT
).