Side Engine Mount Removal and Installation: Installation
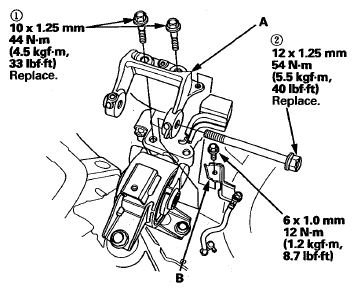
- Install the side engine mount (A).
 Courtesy of AMERICAN HONDA MOTOR CO., INC.
- Loosely install the upper half of the side engine mount bracket (A).
 Courtesy of AMERICAN HONDA MOTOR CO., INC.
- Install the ground cable bracket (B).
- Remove the jack and the wood block.
- Tighten the mounting bolts in the numbered sequence shown.
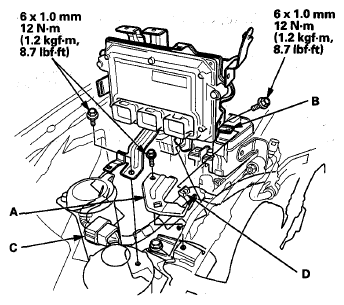
- Install the coolant reservoir to the bracket.
- Install the harness bracket (A), then install the PCM with the bracket (B).
 Courtesy of AMERICAN HONDA MOTOR CO., INC.
- Install the engine wire harness connector (C) and the harness clamp (D) to the PCM bracket.
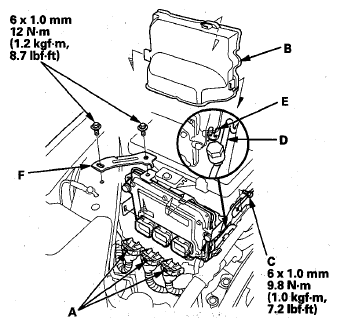
- Connect the PCM connectors (A), then install the PCM cover (B).
 Courtesy of AMERICAN HONDA MOTOR CO., INC.
- Install the A/C suction line mounting bracket bolt (C), front receiver line (D) to the clip (E), and install the bracket (F).
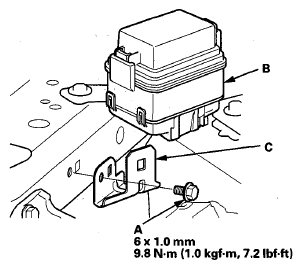
- Install the bolt (A), then install the auxiliary under-hood fuse/relay box (B) to the mounting bracket (C).
 Courtesy of AMERICAN HONDA MOTOR CO., INC.