Transmission Mount Replacement
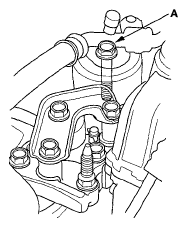
- Loosen the upper torque rod mounting bolt (A).
 Courtesy of AMERICAN HONDA MOTOR CO., INC.
- Remove the air cleaner housing assembly (see
AIR CLEANER REMOVAL/INSTALLATION
).
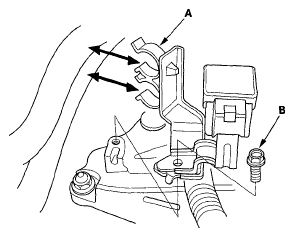
- Remove the heater hoses from the clamps (A), then remove the bolt (B) securing the heater hose clamp bracket.
 Courtesy of AMERICAN HONDA MOTOR CO., INC.
- Support the transmission with a jack and wood block under the transmission.
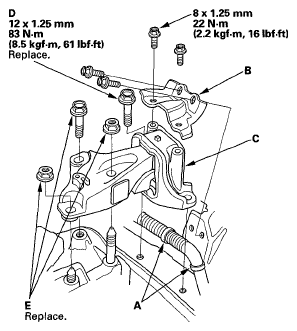
- Remove the harness clamps (A), then remove the transmission mount stiffener (B) and transmission mount (C).
 Courtesy of AMERICAN HONDA MOTOR CO., INC.
- Install the transmission mount with the new mounting bolts (D), then install the transmission mount stiffener and harness clamps.
- Loosely tighten the new bolt and nuts (E).
- Raise the lift to full height.
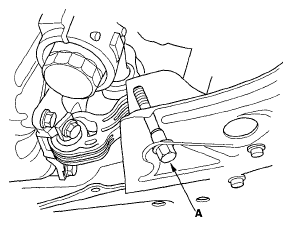
- Loosen the lower torque rod mounting bolt (A).
 Courtesy of AMERICAN HONDA MOTOR CO., INC.
- Lower the vehicle on the lift.
- Tighten the transmission mounting bolt and nuts.
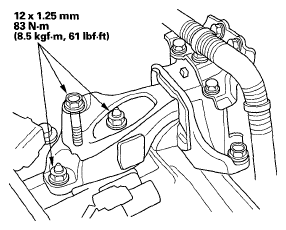 Courtesy of AMERICAN HONDA MOTOR CO., INC.
- Raise the lift to full height.
- Tighten the lower torque rod mounting bolt.
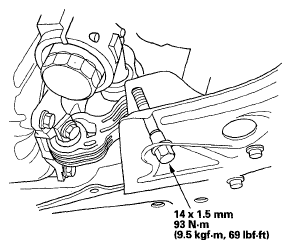 Courtesy of AMERICAN HONDA MOTOR CO., INC.
- Lower the vehicle on the lift.
- Install heater hose clamp bracket (A), then install the heater hoses to the clamps (B).
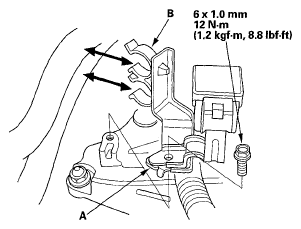 Courtesy of AMERICAN HONDA MOTOR CO., INC.
- Install the air cleaner housing assembly (see
AIR CLEANER REMOVAL/INSTALLATION
).
- Tighten the upper torque rod mounting bolt.
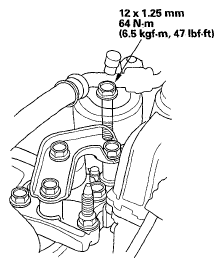 Courtesy of AMERICAN HONDA MOTOR CO., INC.