Steering Column Removal and Installation: Removal
- Make sure you have the anti-theft codes for the audio or the navigation system (if equipped).
- Make sure the ignition switch is OFF, then disconnect the negative cable from the battery.
- Remove the driver's airbag and the steering wheel (see STEERING WHEEL REMOVAL
).
- Remove the column covers.
- Remove the steering joint cover A.
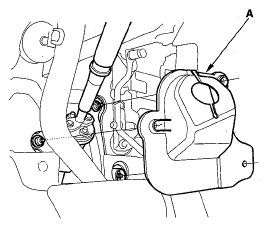 Courtesy of AMERICAN HONDA MOTOR CO., INC.
- Release the lock lever, and adjust the steering column to the full tilt up position, and to the full telescopic in position.
- Tighten the lock lever.
- Hold the lower slide shaft (A) on the column with a piece of wire (B) between the joint yoke (C) of the lower slide shaft and joint yoke (D) of the upper shaft to prevent the slider shaft from pulling out.
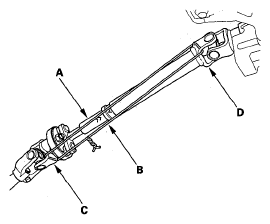 Courtesy of AMERICAN HONDA MOTOR CO., INC.
- Release the lock lever, and adjust the steering column to the full telescopic out position, then tighten the lock lever.
- Disconnect the wire harness connectors from the combination switch assembly and cable reel (A).
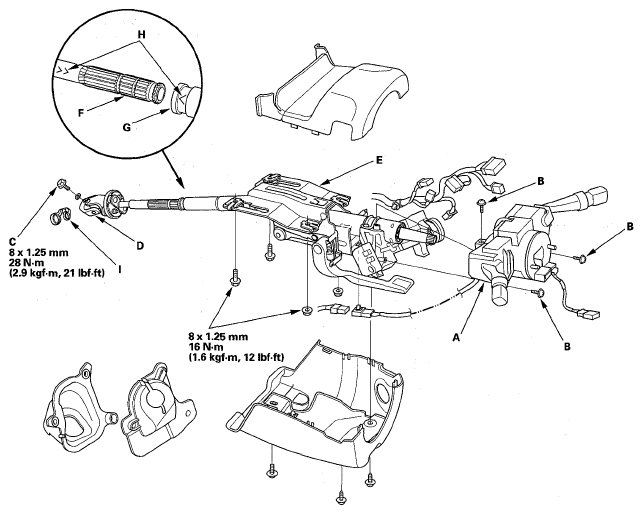 Courtesy of AMERICAN HONDA MOTOR CO., INC.
- Remove the combination switch assembly from the steering column shaft by removing the screws (B).
- Disconnect the connectors from the ignition switch, and release the wire harness clips from the steering column.
- Remove the steering joint bolt (C), then disconnect the steering joint (D) from the pinion shaft.
- Remove the steering column (E) by removing the attaching nuts and bolts. If the lower slide shaft (F) is removed, slip it into the upper shaft (G) by aligning the marks (H).
- Remove the center guide (I) (if equipped) from the top of the pinion shaft, and discard it. The center guide is for factory assembly use only.