Hood Latch Replacement
- Remove the upper grille (see
UPPER GRILLE REPLACEMENT
).
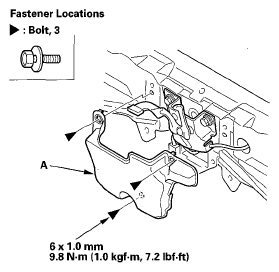
- Remove the bolts, then remove the hood latch cover (A).
 Courtesy of AMERICAN HONDA MOTOR CO., INC.
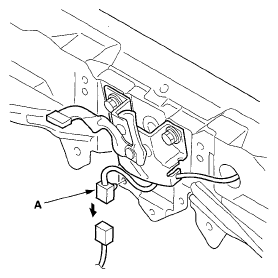
- Disconnect the hood latch switch connector (A), then remove the connector clip from the body.
 Courtesy of AMERICAN HONDA MOTOR CO., INC.
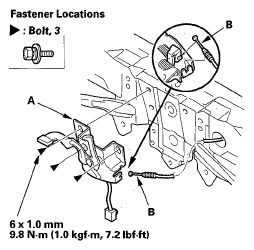
- Remove the bolts, then remove the hood latch (A) from the body.
 Courtesy of AMERICAN HONDA MOTOR CO., INC.
- Disconnect the hood opener cable (B) from the hood latch. Take care not to kink the cable.
- Install the latch in the reverse order of removal, and note these items:
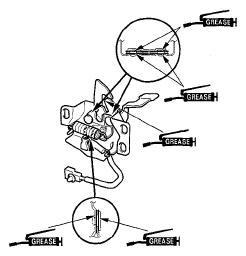
- Apply multipurpose grease to the hood latch as indicated by the arrows.
- Make sure the hood opener cable is connected properly and the hood latch switch connector is plugged in properly.
- Make sure the cable actuates the latch before you close the hood.
- Adjust the hood latch alignment (see step 4 under HOOD ADJUSTMENT
).
- Make sure the hood opens properly and locks securely.
 Courtesy of AMERICAN HONDA MOTOR CO., INC.