Alternator Removal and Installation: Installation
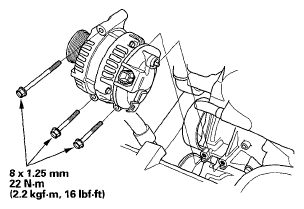
- Install the alternator.
 Courtesy of AMERICAN HONDA MOTOR CO., INC.
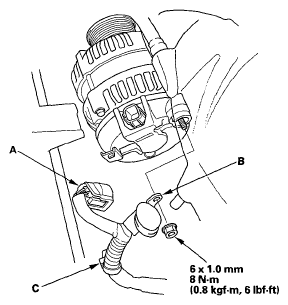
- Connect the alternator connector (A) and BLK wire (B), then install the harness clamp (C) to the alternator.
 Courtesy of AMERICAN HONDA MOTOR CO., INC.
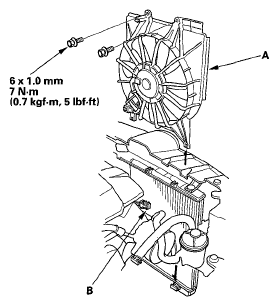
- Install the A/C condenser fan shroud assembly (A), then connect the A/C condenser fan motor connector (B).
 Courtesy of AMERICAN HONDA MOTOR CO., INC.
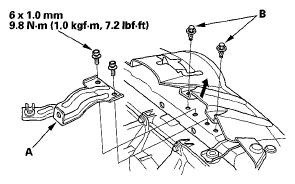
- Install the support rod clamp bracket (A), then install the clips (B).
 Courtesy of AMERICAN HONDA MOTOR CO., INC.
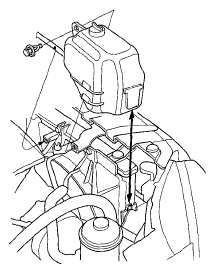
- Install the coolant reservoir.
 Courtesy of AMERICAN HONDA MOTOR CO., INC.
- Install the drive belt (see
DRIVE BELT INSPECTION ).
- Connect the negative cable to the battery.
- Enter the anti-theft code for the audio system and the navigation system (if equipped).
- Set the clock (on vehicles without navigation).