Shift Lever Boot and A/T Gear Position Indicator Panel Replacement
- Remove the shift lever (see SHIFT LEVER REMOVAL
).
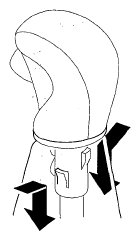
- Grasp the shift lever boot ring, and slip it out of the shift lever knob cover.
 Courtesy of AMERICAN HONDA MOTOR CO., INC.
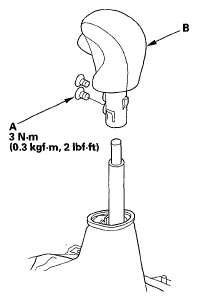
- Remove the screws (A), and remove the shift lever knob(B).
 Courtesy of AMERICAN HONDA MOTOR CO., INC.
- Remove the A/T gear position indicator panel light socket from the indicator panel, and remove the indicator panel from the shift lever bracket base.
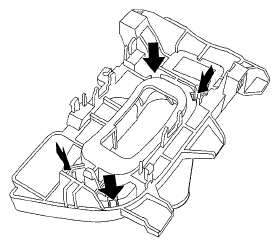
- Release the lock tabs retaining the shift lever boot using a screwdriver.
 Courtesy of AMERICAN HONDA MOTOR CO., INC.
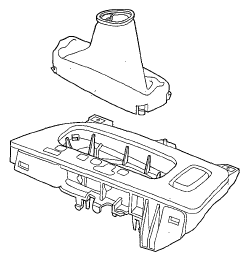
- Replace the shift lever boot or A/T gear position indicator panel, and install the boot in the indicator panel.
 Courtesy of AMERICAN HONDA MOTOR CO., INC.
- Install the A/T gear position indicator panel on the shift lever bracket base, and install the indicator panel light socket in the indicator panel.
- Apply non-hardening thread lock sealant to the screw threads, install the shift lever knob, and secure it with the screws.
- Slide the shift lever boot ring over the shift lever knob until it snaps on.
- Install the shift lever (see SHIFT LEVER INSTALLATION
).