Pulsed Secondary Air Injection (PAIR) System
- PAIR valve is located at top rear of engine. Check all vacuum hose routing. Start and warm engine until cooling fan comes on. Disconnect vacuum hose No. 7 from PAIR valve. See Fig 1
. Connect vacuum gauge to hose.
- If no vacuum is present, go to step 3. If vacuum is present, disconnect 6-wire connector at PAIR control solenoid, located at right front of engine compartment. See Fig 2
. If vacuum is still present, replace PAIR control solenoid. If vacuum goes away, check for short in Gray wire between 6-pin connector and ECM terminal A17. If wire is okay, substitute a known-good ECM and retest. If problem goes away, replace ECM.
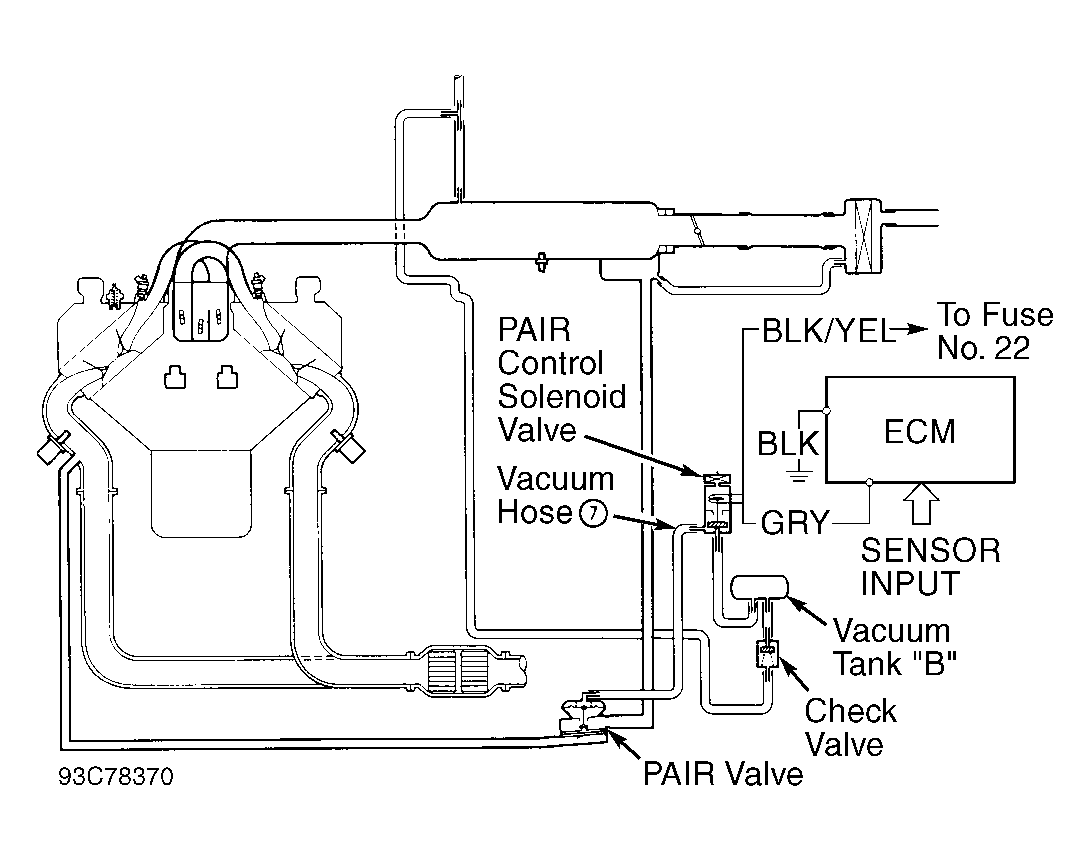 Courtesy of AMERICAN HONDA MOTOR CO., INC.
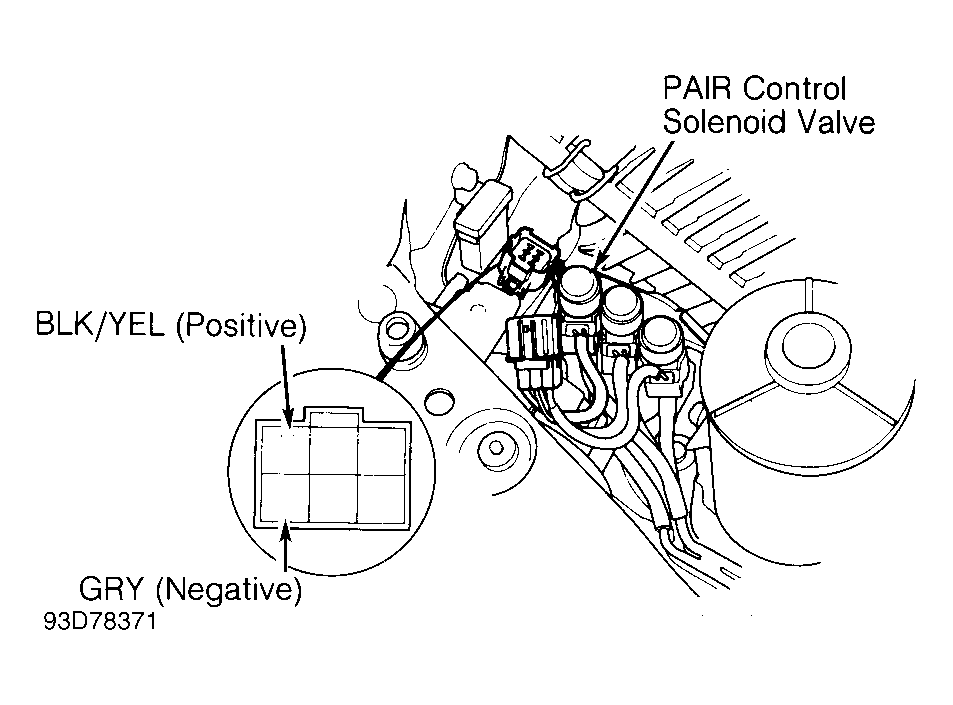 Courtesy of AMERICAN HONDA MOTOR CO., INC.
- Block rear wheels. Raise and support front of vehicle. Start engine. Place transmission in 2nd gear (M/T) or in "2" (A/T). Check for vacuum during deceleration from greater than 9 MPH and 1500 RPM. If vacuum is present, go to step 6.
- If no vacuum is present, turn ignition off. Unplug 6-wire connector at PAIR control solenoid. Start engine. Connect voltmeter to Black/Yellow (positive) and Gray (negative) wire terminals of PAIR control solenoid valve. Observe voltmeter reading during deceleration from greater than 9 MPH and 1500 RPM. If voltage is present, replace PAIR control solenoid valve. If voltage is not present, go to next step.
- Check Black/Yellow wire (between connector and fuse No. 22) and Gray wire (between connector and ECM terminal A17) for opens or shorts. If no problems are found, substitute a known-good ECM and retest. If problem goes away, replace ECM.
- Connect vacuum hose No. 7. Check for suction noise from PAIR valve during operation at speeds greater than 9 MPH and 1500 RPM. If suction noise is not present, replace PAIR valve. If suction noise is present, system is okay.