Control Valve Body & Oil Pump Assembly: Notes
- Remove all control valve cover bolts except 2. Leave these 2 bolts finger tight. Tap cover edge with rubber mallet to loosen control valve cover and gasket. DO NOT
pry on cover during removal.
NOTE:
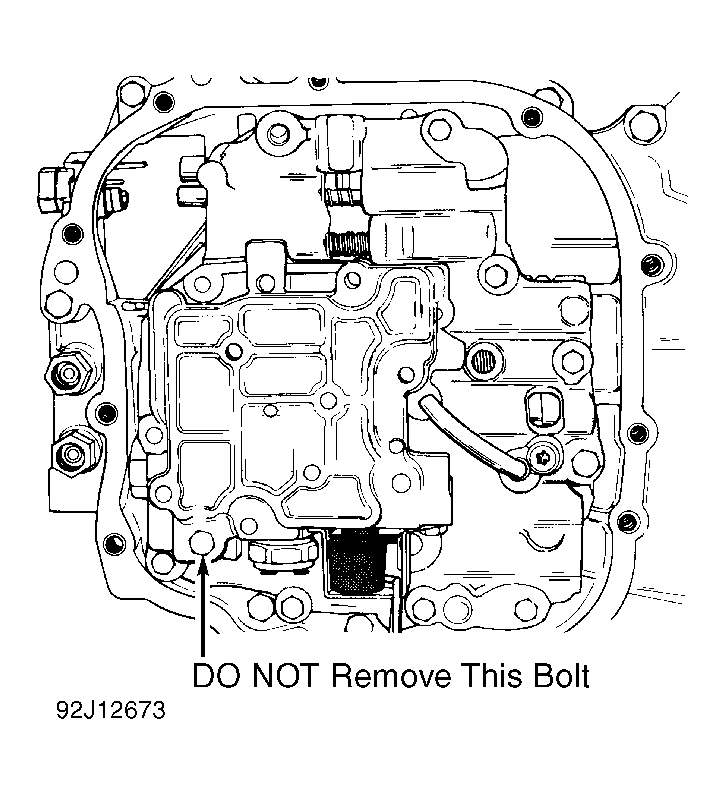
DO NOT
remove lower left bolt marked "A" from control valve and pump assembly unless auxiliary valve body removal is necessary. See Fig 1.
- Remove 2 bolts securing throttle lever and bracket assembly to control valve. Lift off throttle lever and bracket assembly with throttle valve cable link. Use care not to bend link.
- Remove all auxiliary valve body bolts except lower left bolt. See Fig 1. Remove remaining control valve assembly bolts. Carefully lift off control valve and pump assembly. Place assembly on bench with machined surface up.
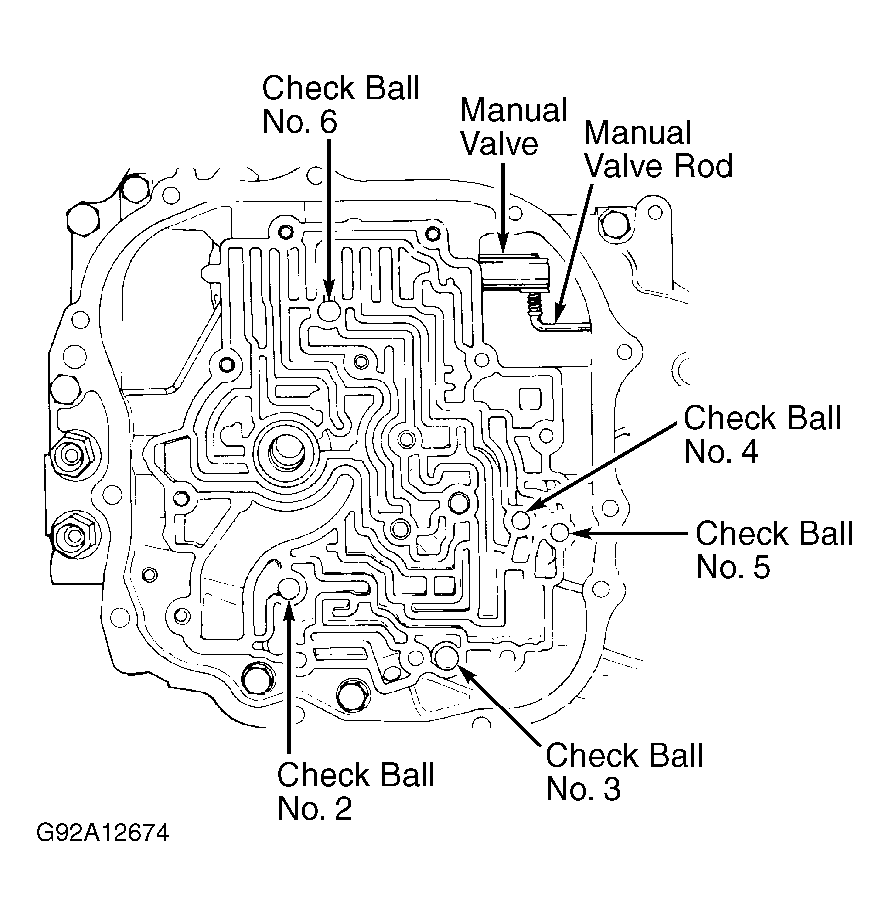
- Remove No. 1 check ball from direct clutch passage on spacer plate. Lift out oil pump drive shaft. Remove spacer plate and spacer plate gaskets. Remove 5 check balls from case cover. See Fig 2.
 Courtesy of GENERAL MOTORS CORP.
 Courtesy of GENERAL MOTORS CORP.